Monday, July 7, 2014

Mushroom & Parmesan Risotto

I've always wanted to make risotto, but have never actually had the courage to try it.  I've seen my mom and grandmother make it before, and I've even helped them, but it always seemed like a daunting task to me.  But today I finally decided to try it and it turned out quite nicely!

My granddmother and mom always make a mushroom risotto; it is one of their staples. This is the recipe from a cookbook called RIsotto by Clive Tring. It is very similar to my family's recipe but has more vegetables in it.  And for some reason I think they may use white wine, but I really don't know for sure about that - I should probably check that out...

Ingredients:
4 cups vegetable or chicken stock (I used my chicken stock from my slowcooker recipe)
2 tbsp olive oil or vegetable oil
1 tbsp butter
generous 1 cup risotto rice 
2 garlic cloves, crushed
1 onion, chopped
2 celery stalks, chopped
1 red (or green) bell pepper, seeded and chopped
1 pkg (225g) mushrooms, thinly sliced
1 tsp dried oregano
1/2 cup finely grated Parmesan cheese
salt and pepper

Directions:

1. Bring the stock to a boil in a pan, then reduce the heat and keep simmering gently over low heat while you are cooking the risotto.

2. Heat the oil and butter in a deep pan.  (A deep pan is better than a wide pan because the rice might be spread out too thin and burn easily.) Add the rice and cook over low heat, stirring constantly for 2-3 minutes, until the grains are thoroughly coated in oil and translucent.

3. Add the garlic, onion, celery and bell pepper and cook, stirring frequently, for 5 minutes.  Add the mushrooms and cook for 3-4 minutes.  Stir in the oregano.

4. Gradually add the hot stock, a ladleful at a time.  Stir constantly and add more liquid as the rice absorbs each addition.  Increase the heat to medium so that the liquid bubbles.  Cook for 20 minutes, or until all the liquid is absorbed and the rice is creamy (you may not need all the stock, and sometimes you may need more liquid).  Season with salt and pepper.

5. Remove the risotto from the heat and stir in another tablespoon of butter and half of the Parmesan until it melts.  Transfer the risotto to plates and top with the remaining cheese.


Notes: The risotto turned out really nice - all that time sitting beside it, stirring and making sure it wasn't over or under cooked was totally worth it in the end.  For my first time, it turned out really well and I will definitely be making risotto again (I really do love it so much!).  The key is the amount of liquid - the rice has to be fully cooked.  If you don't put enough, the rice won't be fully cooked and can be quite hard.  If you put too much, the rice will turn mushy and soggy. This time I did not use all 4 cups of stock; I probably had at least a ladleful left over.

And of course I forgot to take a picture of my dinner until I was halfway through my bowl of risotto! So the picture below is okay.


Sunday, June 22, 2014

Vegetarian Pizza Dinner

Today was the day that our groceries were running on empty and I found myself tweaking recipes left, right and centre!

I had a very busy cooking weekend - puff pancakes on Saturday morning, roasted chicken and potatoes Saturday dinner.  Then I used the leftover chicken bones to make chicken broth in the slow-cooker overnight.  Sunday morning I was in the process of making banana pancakes when I realized that I no longer had any eggs so I had to do some substitutions, and made a pretty good vegan pancake instead.  And for dinner tonight I was making the pizza dough when I realized that I didn't have any pizza sauce - so another substitution was made.  Overall, it still turned out to be a great weekend with great food!

Pizza Dough & Pizza Recipe

This dough comes together really quickly - great for those nights when you don't know what to make for dinner!

Dough Ingredients:
2-1/4 tsp active dry yeast (one package)
1 tsp white sugar
1 cup warm water
2-1/2 cups all-purpose flour
2 tbsp olive oil
1/2 tsp oregano  **the next three seasonings are totally optional; they just add flavour to the dough**
1/2 tsp basil
1/4 tsp garlic powder
1tsp salt

Directions:

1. In a large bowl, dissolve yeast and sugar in warm water.  Let stand until creamy, about 10 minutes.

2. Mix oregano, basil and garlic powder with olive oil in a small bowl.  Stir flour, salt and oil mixture into the yeast-water.  Use your hands to knead the dough until smooth, about 5-10 minutes. Let rest for 5 minutes. (At this point I would start getting your ingredients together for the pizza.  If it rests longer than 5 minutes, not a problem - you will just have more dough like I did and have more pizza!)

3. Turn dough onto a lightly floured surface and pat or roll into your pan shape.  Typically this would fit a 12" round pizza pan.  Because my dough rested for at least 15 minutes, I was able to stretch my dough out to an extra-large rectangular pizza tray.  It didn't quite reach both ends, it was maybe shy about 1", but it didn't change anything.

4. To prepare the pan: Butter it generously - this will give you a golden crust.  I also lightly dust it with cornmeal as it gives it a nice crunch and texture, and also helps prevent the dough from sticking. (Which won't be a problem if you've buttered the heck out of your pan!)  Stretch out your dough to the shape of your pan.  Preheat your oven to 425F around this point in your cooking.

5. Always pour some olive oil over the dough and spread it around before putting on your toppings.  Because this dough has seasoning already in the dough, you don't have to add any to the pizza, but it doesn't hurt it if you do.  I would take a smashed clove of garlic and spread it over the dough just before you pour the olive oil and then sprinkle the dough with oregano, basil, etc.

6. Next you add your sauce.  If you're out of sauce, take a can of tomato paste, pour in a couple of tbsp of water and a few sprinkles of seasoning (ie: basil, oregano, garlic powder, etc.) and mix it.  This will then out the paste and make a quick sauce whenever you need it.  Spread the sauce however thick or thin you like it.  Then add your toppings.  Tonight it was red peppers, thinly sliced onions and thinly sliced garlic.  Then add your cheese - as much or as little as you like.  I always pour a little bit more olive oil over top and then pop it into your preheated oven.

7.  It will take about 20-25 minutes to cook.  You'll know it's ready when the crust is golden brown (underneath too!) and it doesn't stick, and the cheese is all melted and delicious.  Take it out of the oven, let it cool for about 5 minutes before you cut into it.  And there ya have it - a quick and easy, but very yummy pizza dinner!


How much was leftover after the three of us got our hands on it.


Homemade Slow Cooker Chicken Broth

Ever wondered what to do with those lovely bones from your chicken carcass when you roast a chicken?  How about using them to make broth?  This recipe is so fast and easy, it really takes no effort at all.

Ingredients:
leftover chicken carcass/bones
1 carrot
1 onion
Bay leaves
Oregano
Salt

1. Once you've removed all good meat from your chicken, add the bones to your slow cooker.  I also added all the leftover juices at the bottom of my pan, as well as any vegetables. (I removed the lemon wedges and garlic cloves.)  Toss in your carrot, onion and whatever other vegetables you'd like (celery, garlic cloves, etc.)

2. Fill your slow cooker almost to the top with cold water.  Leave about 1/2" of space from the top.  Add in your seasoning - bay leaves, oregano, and salt.

3.  Set your slow cooker to low and let it cook for 8-10 hours.  I always put it to the max (10 hours) and let it go overnight.  When I wake up in the morning I have some delicious broth.  Strain the broth through a strainer/sieve and put it into containers for the fridge or freezer (just make sure you let it cool down first).  You can use this broth for anything - soup, risotto, flavour to any cooking, etc.  Throw out all the bones and vegetables from the broth.

Saturday, June 21, 2014

Roasted Chicken & Potatoes

Roasted Chicken & Potatoes

I don't really measure when I make my chicken, so I apologize in advance as I'm only listing the ingredients.  Some of these ingredients will cross over into your potatoes as well.

Ingredients:
1 whole chicken
Butter
Salt & Pepper
Rosemary
Thyme
1 Lemon, quartered
6 cloves Garlic
1 onion, chopped
2 carrots, peeled and chopped
6-7 potatoes, peeled and chopped
Olive Oil
Wine

Directions:

1. Spray your dish with cooking spray or grease it. Preheat your oven to 450F.

2. Generously butter the outside of your entire chicken.  Pour some salt and pepper, as well as your other seasonings into the cavity of your chicken.  Then generously sprinkle those same seasonings over the entire bird.  Pour some olive oil and give your bird a rub down.  If necessary, sprinkle some more seasonings on the top of the bird. Take half of your lemon (2 pieces) and put them in the cavity, followed by 2-3 cloves of garlic.  You can also gently put some cloves of garlic just under the skin of the chicken breast as well.

3. Toss in about 1/3 of your onion and almost 1 of your carrots into the pan. Add another lemon quarter to the pan. Pour some wine (I used white) over the bird and vegetables, as well as some more olive oil.  Cover with foil and put in your oven.

4. Meanwhile spray another dish with cooking spray.  Toss in your potatoes and remaining carrots and onion.  Mince 2-3 cloves of garlic and toss in as well.  Pour some olive oil and then sprinkle with thyme and rosemary, salt and pepper.  I always had in a few other spices, like oregano or basil as well.  Take your last quarter lemon and squeeze the juice over the potatoes. Pour wine over top of the vegetables and give it a quick stir to make sure everything is coated.  Put 4-5 dots of butter over top.  Cover with foil and place in the oven beside your pan of chicken.

5.  Cook in a 450F oven for about 60-75 minutes, it really depends on when the chicken reaches its appropriate internal temperature.  The potatoes will take about an hour, but give them a pierce to check for doneness.  Remove the foil within the last 15-20 minutes of cooking.  Once the food is cooked, place your oven on broil for another 5 minutes to crisp up the potatoes and chicken skin.

Save your chicken carcass for homemade chicken broth.


Sunday, June 8, 2014

Puff Pancakes

I think the more I cook / bake - I realize I really truly love breakfast food. There's just something about the weekend and having time - I'm not in a rush to get to work and I feel more relaxed.  Clean up is rarely as big as dinner and my daughter can really help me get breakfast together.

This morning we made Puff Pancakes.  I saw this recipe while getting out a tried and true recipe and vowed to make it the next morning (meaning THIS morning).  It was so simple and a great recipe to include a toddler on.

What's great about this recipe is that it uses one bowl and two pans - and it bakes in the oven.  So while it is baking, you can clean up or get ready for the sit-down.

Ingredients:

3 eggs
1/2 cup all-purpose flour
1/2 cup whole milk
2 tbsp melted butter
1/4 tsp salt
freshly grated lemon zest (from most of a lemon if you have it) as well as a few tbsp of the juice
Icing sugar (for dusting)

Directions:

  1.  Preheat oven to 400F.  Generously butter two 8-9" pie pans.
  2.  Beat the eggs in a mixing bowl on low speed for a few minutes.  Add the flour, 2 tbsp at a time, beating well after each addition.  Beat only until smooth.  Beat in the milk, butter, salt and lemon zest/juice. (The more lemon you add, the more lemony it tastes, so I always add a bit more!)
  3. Evenly divided the batter between the two pie pans, evenly pouring it throughout.
  4. Bake for 10 minutes.  Reduce the oven temperature to 350 and bake for another 5 minutes.
  5. Remove from the oven and sprinkle with icing sugar.  Serve immediately.
  6. Top with whatever you like (syrup, jam, Nutella, cinnamon-sugar, etc).
My daughter loves syrup and always says "more syrup."  She would drink the syrup rather than eat the food.  We finished our syrup yesterday so today's puff pancake had to have a different topping: we used homemade Canadian wild blueberry jam and it was just perfect!  My husband put Nutella - another great choice.  The lemon flavour with the pancake was so good, it reminded me of the lemon-sugar crepes I had in Paris!  Speaking of crepes, this pancake was almost like a crepe but a little bit thicker.  It's the perfect in-between of a pancake and crepe - for those days where you can't decide which one you'd like!

I cut each pancake into 4 large slices and it served my family of 3 just fine.  It could easily have fed 4; we just liked it too much!

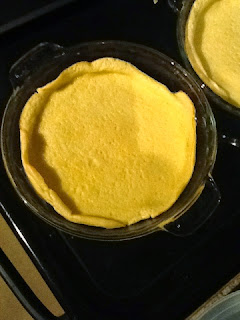
By the way - it was so much fun for my daughter to see how it puffed up in the oven! And of course we were just so excited to eat them that I completely forgot to take a picture of at least one all dressed up with its toppings!


Both pancakes right out of the oven.
Close-up of one.

Sprinkled with icing sugar (my daughter did the lower one!)

Close up

Sunday, March 23, 2014

Banana Blueberry Pancakes

I have to admit: I don't normally make pancakes from scratch.  My grandmother uses a mix where you still have to add eggs and milk; I don't even do that.  I normally buy a mix and just add water.  If I want to get fancy, I'll add chocolate chips or slices of strawberry or blueberries.  This morning when I asked my daughter if she wanted pancakes, I didn't even think to look if I had the mix in the cupboard.  Of course she said yes, and of course I didn't have any more mix.

So I went to my collection of cookbooks and pulled out this book called Breakfast Heaven.  I don't really remember when or where I got it, but I figured it would have some pretty good pancake recipes. This lead me to their blueberry and banana pancakes.  Looking at the clock and realizing I was pressed for time, I decided I might as well give it a go.

My daughter went into her high chair and helped me prepare them. They turned out great, very delicious.  It reminded me slightly of banana muffins.  It was fast to prepare and fast to cook (I used my Griddler so I could cook more at a time).  On top of that - they are dairy free!

Ingredients:
3 ripe bananas
2 tbsp sugar
2 tsp lemon juice
2 eggs, separated
1 cup all-purpose flour, sifted
1.5 tsp baking powder
1/4 tsp salt
pinch ground cinnamon
small pinch salt
1/2-1 cup blueberries (I used frozen)

Directions:

1. Mash the bananas with a fork in a large bowl.  Using the same fork, mix in sugar, lemon juice, and egg yolks.  Next mix in flour, baking powder, 1/4 tsp salt and cinnamon.

2. In a separate bowl, whisk the egg whites and pinch of salt until stiff. Fold into the banana mixture.

3. Heat about 1 tbsp oil in a large, heavy-based skillet over medium heat.  If you are using a griddle, heat it to 350-375F and lightly grease it or spray with non-stick spray.  (I found that I started at 375F, but lowered it to 350F as the pancakes were browning a little too quickly.)

4. Drop by tablespoonfuls into the skillet to make smaller pancakes or by 1/4 cup-fulls for larger ones. When they have been cooking for about a minute, sprinkle four or five blueberries onto each one, pushing them lightly into the batter. (If you are using frozen blueberries, you can place them in right away.)  Cook for about 2 minutes longer, until browned underneath and edges are cooked and it bubbles.  Flip them over and cook for an other minute or so, until they are lightly browned.

This made about 12-15 pancakes.  (I made some small ones for my daughter and small larger ones for me.)


Saturday, March 15, 2014

Anna Olson's Banana Chocolate Chip Bread

It's March Break and I had time for some baking. I wanted to do an easy recipe that I could have my daughter help me with. I went to my trusty Anna Olson cookbook (Back to Basics) and decided to use her recipe.
The bread turned out great - nice and moist, but it did brown quickly in my oven so you might want to wrap it with foil if you see that happening to you.  I used all all-purpose flour instead of half and half with whole wheat.

Ingredients:
1/3 cup unsalted butter, at room temperature
1 cup packed light brown sugar
3 cups mashed ripe bananas (3-4 bananas)
1 egg, at room temperature
1 tsp vanilla extract
3/4 cup all purpose flour
3/4 cup whole wheat flour
1 tsp baking soda
1/4 tsp ground cinnamon
1/4 tsp salt
3/4 cup chocolate chips

Directions:
1. Preheat oven to 350F and grease 9x5" (2L) loaf pan.
2. Beat butter and brown sugar together until smooth. Stir in the bananas, then stir in the egg and vanilla. In a separate bowl, stir the all-purpose flour, whole wheat flour, baking soda, cinnamon and salt to combine. Add this to the butter mixture and stir until evenly blended.  Add the chocolate chips, then scrape the batter into the prepared pan and spread evenly.
3. Bake the loaf for  about an hour, until a tester inserted in the centre of the cake comes out clean. Cool the loaf for 30 minutes in the pan, then turn out to cool completely. The loaf will keep, well wrapped and refrigerated, for up to 3 days.

Thursday, March 13, 2014

Very Yummy Vegetarian Lasagna

I've made a variety of lasagne in my lifetime, but this version seems to be the favourite.  My husband gobbled up two large servings, which isn't saying much because he loves lasagna, but still he really liked it.  My toddler ate a large serving and wanted more afterwards, but she also loves pasta.  I thought it was really good as well.  But I think the true test is that my mother loved it (as leftovers for dinner the next day) and asked for some to take for lunch.  I was raised on my mother's cooking - homemade Italian - and I was spoiled.  And she learned from my nonna, who also makes amazing food.  She would make me frozen trays of lasagna and other yummies to take with me while I was in university.  So when my mother said she thought my lasagna was amazing and asked for more to take for lunch - I was so proud of my lasagna.  My mom's lasagna is excellent so for her to give me that compliment was out of this world.  And saying it was amazing wasn't the compliment because she's mom and would say that for almost anything I did.  The compliment was asking to take some for lunch! Hopefully you will enjoy this recipe as well.  I tried to be as accurate as I could with the measurements, but a lot of my cooking is by eye.

Ingredients:
1 pkg oven ready lasagna (or if it's not oven ready, follow directions to cook it)
2 jars of tomato sauce (see note below)
3 - 3-1/2 cups besciamellla sauce (see recipe below)
2 pkg (300g each) ricotta cheese
1 pkg frozen chopped spinach, thawed and squeezed out
2 eggs
1/2 cup grated Parmesan cheese, plus more for layering 
1 cup mozzarella, grated

Directions:

1. Mix together ricotta, spinach and eggs in a medium bowl. Add Parmesan and mix again. 
2. Set up your layers in front of you so it is easy to assemble the lasagna in a large, deep casserole dish (approx. 9x12")
3. Start by placing enough tomato sauce to cover the bottom of the tray. Add about 1/3 of besciamella and mix the sauces together.  Place a layer of lasagna sheets to cover the bottom, overlapping slightly. Place more tomato sauce to cover the layer, and add another 1/3 besciamella, mixing again if you wish.  Spoon almost half of the ricotta-spinach mixture and spread across.  Sprinkle the top with about half of the grated mozzarella and and sprinkling of more Parmesan.
3. You can put a little more tomato sauce on top if you like, but it is not necessary.  Place another layer of the lasagna sheets, as you did before.  (If you are using fresh pasta or ones you just boiled, you might want to layer this time in the opposite way you did - like a cross pattern - to help the lasagna hold together.  This is not necessary, and is something I did not do.)
4. Continue as before, with a layer of the tomato sauce and remainder of the besciamella, followed by the ricotta-spinach, then Parmesan and mozzarella. Place a little more sauce over top and continue onto your last layer of the lasagna sheets. Spread the remaining tomato sauce over the top of the dish and sprinkle with Parmesan cheese.  Make sure the sauce is completely covering all the pasta or else it will dry out while it bakes.
5. Cover with foil and bake in a 375F oven for 45-60 minutes, until it is cooked through and bubbling. You can remove the foil for the last 10 minutes.  You may also want to put a large baking sheet under the dish as you bake it to prevent any spillover from the lasagna.
6. You could also put the dish in the fridge until you are ready to bake it.  If you do this, take it out of the fridge while you preheat the oven so the dish isn't too cold when it goes in the oven.

Tomato Sauce:
I'm very fortunate that my family jars its own tomato sauce, so this is my go to.  This still takes some preparation.  I saute an onion with 2 cloves of garlic and 1 carrot until softened.  I add two jars (the large mason jars - I think they are approx. 1 L each) of the sauce.  I also add basil, oregano, bay leaves, salt and pepper.  I let it simmer at least 30 minutes, but even as long as 2 hours to really deepen the flavours.  In the past I've added mushrooms and red peppers to the sauce with the other vegetables.  If you don't like a chunky sauce, you could use an immersion blender to puree it, otherwise you could use it as it is.  This is what I use in my lasagna.

Besciamella Sauce (Bechamel Sauce)
3 tbsp (unsalted) butter
1/4 cup all-purpose flour
2 cups milk (whole milk is better), warmed (I warm it in the microwave for a couple of minutes)
1/2 tsp salt, to taste
pinch of black pepper
pinch of nutmeg

In a saucepan, melt the butter over medium heat.  Add the flour and whisk until smooth, about 2 minutes.  Let the flour cook for another couple of minutes, whisking. Addd the warm milk, whisking constantly to prevent lumps.  Simmer over medium heat, whisking constantly until the sauce thickens.  This should take about 10 minutes, and the sauce should be smooth and creamy.  Do not let the sauce boil. Remove from heat and stir in the salt, pepper and nutmeg.
What I tend to do when I use this for lasagna, is add a few tbsp of the tomato sauce to the besciamella and give it a stir.  It will give it a rosy colour.  This is also not necessary as you can mix the two sauces together in the lasagna tray.
Above: the tomato and besciamella sauce     Below: the spinach-ricotta mixture

Above: The assembled lasagna before it is cooked.
Below: The final product - yum!


Friday, March 7, 2014

Warm Quinoa "Salad"

Today is Friday and it is the season of Lent, so in my household that means no meat.
Today I wanted to cook those frozen tilapias from my last blog post.  And since today is a Friday of a very long week and March Break is about to start, I didn't want to spend time making a new recipe.  So I just used the same recipe as last time.  You can find it here: http://cucinadiheartz.blogspot.ca/2014/02/baked-tilapia-baby-spinach-salad.html

I put the fish on top of a bed of quinoa that I'd like to call a "salad" but in my traditional understanding of the word, it isn't.

Here is the recipe:

Ingredients
1 cup quinoa
2 cups water
salt
3-4 tbsp lemon juice
1 tbsp olive oil
1 tsp dill
salt and pepper to taste
1 tomato, chopped
1 cup mixed greens or baby spinach
feta cheese (optional)

Directions
1. Cook the quinoa according to package, typically 2 cups of boiling water for 1 cup of quinoa, until the water has disappeared, about 15 minutes.  Let cool 5 minutes.
2. Add lemon juice, olive oil, dill and salt and pepper, mix together.  Add tomato and mixed greens; stir.  Add feta if you are using it.


Monday, February 24, 2014

Pan-fried pork chops with stuffed red peppers

I was feeling adventurous today and decided to try something new: stuffed red peppers. Since they take the most amount of time, start with them. You can quickly prepare the chops while the peppers are cooking and fry the pork chops just before you broil the peppers.  Add a nice salad as a side, or maybe even rice or quinoa and you have a very filling meal!

Pan-fried Pork Chops

4 fast-fry pork chops
1/2 cup flour
2 tsp cayenne pepper
2 tsp paprika
2 tsp salt
2 tsp black pepper
olive oil and butter, for frying

Heat oil in large skillet or frying pan over medium-high heat. When oil is hot enough and just before you put the pork chops in, put 1 tbsp butter in the pan and give the pan a stir to mix the oil and butter. (This will add some flavour and nice colour to the chops while they fry.)

Mix together flour and seasoning. Place pork chops, one at a time, in the flour and cover completely. (I like to place the flour on a sheet of wax paper, put the chop in and lift the sides of the paper to cover the chop in the flour mixture.)  Put the chops in the oil and fry two chops at a time until brown on one side, then flip over.  Cook until golden on the other side and chop is cooked through.  Remove from the pan and place on a plate with paper towels.  Repeat steps with the other two chops.

Serves 4

Stuffed Red Peppers

2 large red peppers, cored and seeded, cut in half lengthwise
1 medium-sized eggplant, cut into 1" pieces
1 small onion, chopped in small pieces
4 cloves of garlic, thinly sliced
salt
1 tsp basil
1 tsp oregano
1/4 cup tomato sauce (or marinara)
1/4 cup bread crumbs
3/4 cup havarti cheese, thinly grated

Preheat oven to 400F.  Spray a small pan or baking sheet with oil.  Place red pepper halves in the pan, cut side up; drizzle with olive oil.  Cook in oven for approximately 20 minutes, until peppers are tender. Remove from oven.

Meanwhile heat some vegetable oil (enough to cover the bottom of the pan) in a 12" skillet over medium-high heat.  Place onions, garlic and eggplant pieces in the skillet and cook, approximately 15-20 minutes, stirring frequently. After about 10 minutes, season with salt and basil; stir. When the eggplant has softened and broken down, add the sauce and oregano.  Bring to a simmer, stirring occasionally, for about 5-7 minutes.

Meanwhile combine the bread crumbs and 1/2 cup cheese; set aside. Set your oven to broil.

Spoon equal amounts of eggplant mixture into each red pepper half.  Cover with bread crumb-cheese mixture; drizzle with olive oil. Place pan back in oven, close to the broiler and broil for 2-3 minutes  until the top has browned - keep a close eye or they will burn!  Sprinkle remaining cheese over each half and put back in the oven to quickly melt cheese.

Serves 4.

Sunday, February 23, 2014

Baked Tilapia & Baby Spinach Salad


Today was a quiet day at home. I had purchased some tilapia fillets at Costco and decided today would be a good day to make them.  The original recipe I wanted to try had to be tossed aside when I realized I used all our eggs for our Canada vs. Sweden Olympic Gold hockey game French Toast breakfast (which turned out so delicious by the way!).  I will save that recipe for another time as I have 3 more fillets sitting in the freezer, but this recipe was so good I will definitely be making it again.  The fish cook so quickly and this topping is the right mix of texture and tang and moistness!  The fish doesn't taste very fishy - which is a good thing because we aren't really a seafood household! My daughter who has tended to be a pickier eater when it comes to meats, ate up this fish so quickly.  My husband made some fries in the Acti-fry and I made a spinach salad to go alongside (recipe below). It was a very filling and satisfying lunch.  Next time I might make more of the topping as the fillets were quite large and weren't completely covered.

Baked Tilapia

1/2 cup grated Parmesan cheese
1/4 cup butter, softened
3 tbsp Greek yogurt
1/4 cup Italian bread crumbs
2 tbsp fresh lemon (or lime) juice
1/4 tsp dried basil
1/4 tsp ground black pepper
1/4 tsp paprika
1/4 tsp garlic powder
1/4 tsp salt
4 tilapia fillets


1. Preheat the broiler in your oven. Line a baking sheet with aluminum foil and spray with cooking spray.

2. In a small bowl, mix together cheese, butter, yogurt and bread crumbs.  Add remaining ingredients (except the fillets) and mix well. Set aside.

3. Arrange fillets in a single layer on the prepared baking sheet.  On the second top rack of your oven, broil the fillets for 4 minutes.  Remove the fillets from the oven and cover them with the cheese mixture.  Broil for another 3-4 minutes, or until the topping is browned and fish flakes easily with a fork.  Do not overcook the fish.

Serves 4

Baby Spinach Salad

My friend made a version of this salad when we were over her house and my husband loved it.  You can really do any variations with it, but the dressing is what really makes it.  I have made this with strawberries, blueberries, blackberries or any combo of those three.  I have also included walnuts or pecans (toasted or candied).  And you can throw in Feta cheese or not.  Today's recipe was not fortunate to have all the lovely toppings - simply strawberries and blackberries with the baby spinach.

I don't really use measurements for the ingredients, except for the dressing as the ratio is really important.

Dressing:
1 tsp olive oil
2 tbsp balsamic vinegar
1 tbsp maple syrup
black pepper

Whisk ingredients together and dress your salad.


    The cheese-yogurt mixture before it goes on the fish.
    The baked fish.

    Baked tilapia on top of a warm quinoa "salad."

    Saturday, January 25, 2014

    Cornbread

    My husband recently told me that he tasted the best chili ever and my daughter had cornbread for the first time at daycare - apparently the two go hand in hand, so I decided to try making some cornbread.  She liked polenta when I made it and also loves corn, so I thought it'd be a nice treat for her.
    I've never had cornbread before and I don't know what it should taste like, but this is the recipe I found.  After reading a few suggestions, my modifications are below.  
    As for the taste - it was good - very crumbly, but also moist. I think it would go nice with chili or a sauce or some type of topping on it.

    Ingredients:

    Saturday, January 11, 2014

    Dinner & Dessert

    Happy New Year!!
    Today was not a very productive day for the pile of marking sitting at my front door, but I did get to do some amazing cooking and baking!  I haven't put anything on the blog lately, not because I'm not cooking, but because I don't have time to type up the blog post.
    So today you are going to get two recipes: a one pot barley and chicken cacciatore and a lemon-blueberry loaf.
    And I apologize in advance for the terrible photos I have included - I always forget to take the photo until the leftovers are packed up.  Maybe that should be one of my new year's resolutions! ;-)

    One Pot Barley & Chicken Cacciatore
    This recipe takes its inspiration from Giada DeLaurentiis' Everyday Italian Cookbook. It's a modification of her chicken cacciatore recipe.  I decided to add barley because of how much my husband loves it. It is a very filling dinner, and definitely enough for lunch the next day as well.

    Ingredients:
    4-5 full chicken leg/thighs
    salt and pepper
    1/2 cup all-purpose flour
    3 tbsp olive oil
    1 large red bell pepper, chopped
    1 onion, chopped
    6 garlic cloves, finely chopped
    1-1/2 tsp dried oregano
    3/4 cup wine (I used red)
    1 can (28 fl oz) diced tomatoes with juice
    3/4 - 1 cup chicken broth (I put closer to 1 cup since I was adding barley to the recipe)
    3/4 - 1 cup pearl barley, rinsed

    Directions:
    1. Sprinkle each piece of chicken with salt and pepper and dredge the pieces in flour to coat lightly.

    2. In a large, heavy saute pan, heat oil over medium-high heat. Working in 2 batches, add the chicken pieces to the pan and saute just until brown, about 5 minutes per side. Transfer the chicken to a plate and set aside. Add the bell pepper, onion, garlic and oregano the same pan and saute over medium heat until the onion is tender, about 5 minutes.

    3. Add the wine and simmer until reduced by half, about 3 minutes.  Stir in the barley. Add the tomatoes with their juice and broth. Return the chicken pieces to the pan and turn them to coat in the sauce. Bring the sauce to a simmer.  Continue simmering over medium-low heat until the barley is tender and the chicken is cooked through, about 40 minutes.  Stir occasionally to prevent the barley from sticking, but be careful not to break apart the chicken, and keep the meat covered in the sauce.

    4. Remove the chicken and transfer to a platter.  You can boil the sauce a little longer to thicken the sauce and cook the barley.  Spoon the barley onto plates and place the chicken on top or along side it.  This would also go great with pieces of chicken, making it more like a stew.

    5. My husband grated some Monterey Jack cheese and sprinkled it over top of the barley.  It made it nice and gooey and tasted great as well.  This also made my 18-month old daughter devour her dinner, but each mouthful had to have some cheese in it!

    Serves 4-5.


    Lemon-Blueberry Loaf
    This lovely loaf comes from my cookbook: Wanda's Pie in the Sky. It will make a 9" loaf. It is my first time trying this recipe, but as I'm sitting here smelling it as it cools, I can tell it's going to be so moist and delicious.

    Ingredients:
    1/2 cup butter, softened
    1 cup granulated sugar
    1 tsp vanilla extract
    2 eggs
    1-3/4 cups all-purpose flour
    1-1/2 tsp baking powder
    1/2 tsp baking soda
    1/2 tsp salt
    2/3 cup milk
    1/3 cup lemon juice
    1 tbsp lemon zest
    1 cup fresh blueberries

    For the glaze:
    1/3 cup granulated sugar
    1/4 cup lemon juice

    Directions:

    1.Preheat the oven to 325F. Butter and flour ra 9x5zx3" loaf pan.

    2. Using an electric mixer, cream the butter and sugar until light. Add the vanilla and eggs and beat until fluffy. Stir together the flour, baking powder, baking soda and salt. Add the dry ingredients to the butter mixture in 3 parts, alternating with the milk and lemon juice. Mix until smooth. Stir in the lemon zest. Fold blueberries into the batter just before turning it into the pan.

    3. Spread into the prepared pan. Bake for 55-65 minutes, or until a cake tester inserted in the center comes out clean.

    4. Once the loaf is baked and cooling, start on the glaze. In a small saucepan over medium heat, combine the sugar and lemon juice. Heat until the mixture bubbles and the sugar dissolves, stirring occasionally. Pour over the warm loaf in the pan. Allow to cool for 15 minutes.  Turn the loaf out and cool on a rack.

    (For this part I would let the loaf cool a bit before actually making the glaze and pouring it over and/or wait more than 15 minutes before removing it from the pan - my loaf was still way too warm and started to break as I took it out of the pan - and it had been cooling for quite a long time!)

    The loaf just soaked up the glaze and when I took it out it was so moist all the way through! It looks amazing! FYI It also tastes amazing! It is definitely very moist; the glaze definitely helped with that and gives it a nice sheen. It's a very light loaf - my husband said it'd pair well with ice cream, but even a nice cup of tea would do.