When the image for these "ricotta kisses" came up in my Instagram feed, I saved it and knew I'd be returning to it. Easter weekend provided me with the perfect opportunity to make this lovely dessert.
I did a trial run the night before for my family and the kids ate them all up! So I doubled the recipe to make for our family Easter get together. I received many compliments and this recipe will become one of my go-to's. It was fast and easy to put together; the only downside is the time spent frying the batter, but really it is so worth it. They taste great the next day as well; if they get soggy put them in the oven for a few minutes to crisp them up again (but really they taste great either way)!
This recipe makes about 30 balls and the recipe can easily be doubled.
Ingredients:
1 cup ricotta cheese
2 large eggs
1/2 cup flour
1-1/2 tsp baking powder
pinch of salt
1/2 tsp ground cinnamon
1 tbsp sugar
1/2 tsp vanilla extract
vegetable oil or corn oil for frying
2 tsp icing sugar
Directions:
1. Beat the ricotta and eggs until smooth. Add the flour, baking powder, salt, cinnamon, sugar and vanilla extract. Beat until smooth.
2. Fill a wide, shallow pan with about 1" of oil. Heat the pan until a small bit of batter sizzles when dropped into the oil.
3. Drop rounded teaspoons of the ricotta batter into the pan, about six at a time. In her recipe, Nigella says not to make them too big or fry too many at a time, and this is a good piece of advice. The batter will puff up when cooking and they fry up pretty quickly. As they turn golden brown, flip them over and leave for a minute or so on the other side.
4. Place the cooked baci di ricotta on paper towels to remove someof the oil. Pile the balls onto a plate in a pyramid shape and sprinkle with a thick layer of icing sugar They taste best eaten right away!
Original recipe can be found here: Nigella's Baci di Ricotta
Showing posts with label cheese. Show all posts
Monday, April 2, 2018
Monday, December 26, 2016
Crackers & Dip - a great appetizer for a holiday get-together!
Around the holidays, it is inevitable that I will make my spinach dip at least once. Several years ago I made these cheesy crackers and they were hit. They do take some time and as it happened, I hadn't made them since. Feeling ambitious this year I decided to make them again and once again they were a huge hit.
Cheesy Spinach Dip
Ingredients:
2 250g cream cheese bricks, cubed
1/2 cup milk
1/4 cup Parmesan cheese
1/4 cup Asiago cheese
1/3 onion, finely chopped
1/2 tsp garlic powder
1 tsp paprika
1 tsp thyme
2 300g package chopped frozen spinach, thawed and drained
salt to taste
Directions:
1. Spray a medium-sized saucepan with cooking spray. Combine cream cheese and milk over medium heat, stirring frequently to melt the cream cheese (adjust heat as necessary).
2. When the cream cheese is almost melted, add the onion, garlic powder, paprika and thyme; stir to combine. When the cream cheese is completely melted, add spinach, Parmesan and Asiago cheeses. Stir to combine. As the mixture starts to bubble, lower the heat. Continue to heat through, about 20-30 minutes, stirring occasionally so it doesn't stick to the bottom.
3. At this point you can transfer it to a serving dish and serve it warm with various crackers. If you are making it ahead, transfer it to an oven-proof dish (like corning ware) with a lid. Let it cool before refrigerating until you need it. To reheat, place in oven with lid at 350F for 20-30 minutes, or until heated through. Stir and serve.
Tex-Mex Cheese Crisps
Ingredients:
1-3/4 cups flour
1 tsp chilli powder
1 tsp garlic powder
1/2 tsp ground paprika
1/2 tsp salt
1 cup (chilled) butter, chopped
1 egg, lightly beaten
200 g cheddar cheese, grated (about 1.5 cups - but weight to be precise!)
Directions:
1. Preheat oven to 415F. Line two baking trays with parchment paper and spray with cooking spray.
2. Sift the flour, chilli powder, garlic powder, paprika and salt into a large bowl. Rub the butter into the flour with your fingertips until the mixture resembles fine bread crumbs.
3. Add the egg and cheese and stir until the mixture comes together. Turn onto a lightly floured surface and gather together into a ball. Cover the dough with plastic wrap and refrigerate for 20 minutes.
3. Roll the dough on a lightly floured surface to 3 mm (1/8") thickness. Cut into shapes with a 6 cm cookie cutter (for Christmas I used candy canes and Christmas trees!).
4. Place on the trays, allowing room for spreading. Bake for 12 minutes, or until crisp and golden brown. Leave on the trays for 2 minutes before transferring to a wire rack to cool.
Source: Ultimate Kitchen Companion
I call these crackers because they are crunchy, but they are also biscuit-like in that they are so flaky. These were a huge hit again this year - people couldn't get enough (with and without the spinach dip!)
Cheesy Spinach Dip
Ingredients:
2 250g cream cheese bricks, cubed
1/2 cup milk
1/4 cup Parmesan cheese
1/4 cup Asiago cheese
1/3 onion, finely chopped
1/2 tsp garlic powder
1 tsp paprika
1 tsp thyme
2 300g package chopped frozen spinach, thawed and drained
salt to taste
Directions:
1. Spray a medium-sized saucepan with cooking spray. Combine cream cheese and milk over medium heat, stirring frequently to melt the cream cheese (adjust heat as necessary).
2. When the cream cheese is almost melted, add the onion, garlic powder, paprika and thyme; stir to combine. When the cream cheese is completely melted, add spinach, Parmesan and Asiago cheeses. Stir to combine. As the mixture starts to bubble, lower the heat. Continue to heat through, about 20-30 minutes, stirring occasionally so it doesn't stick to the bottom.
3. At this point you can transfer it to a serving dish and serve it warm with various crackers. If you are making it ahead, transfer it to an oven-proof dish (like corning ware) with a lid. Let it cool before refrigerating until you need it. To reheat, place in oven with lid at 350F for 20-30 minutes, or until heated through. Stir and serve.
![]() |
| This yummy and cheesy spinach dip can easily be halved for smaller crowds! |
Tex-Mex Cheese Crisps
Ingredients:
1-3/4 cups flour
1 tsp chilli powder
1 tsp garlic powder
1/2 tsp ground paprika
1/2 tsp salt
1 cup (chilled) butter, chopped
1 egg, lightly beaten
200 g cheddar cheese, grated (about 1.5 cups - but weight to be precise!)
Directions:
1. Preheat oven to 415F. Line two baking trays with parchment paper and spray with cooking spray.
2. Sift the flour, chilli powder, garlic powder, paprika and salt into a large bowl. Rub the butter into the flour with your fingertips until the mixture resembles fine bread crumbs.
3. Add the egg and cheese and stir until the mixture comes together. Turn onto a lightly floured surface and gather together into a ball. Cover the dough with plastic wrap and refrigerate for 20 minutes.
3. Roll the dough on a lightly floured surface to 3 mm (1/8") thickness. Cut into shapes with a 6 cm cookie cutter (for Christmas I used candy canes and Christmas trees!).
4. Place on the trays, allowing room for spreading. Bake for 12 minutes, or until crisp and golden brown. Leave on the trays for 2 minutes before transferring to a wire rack to cool.
Source: Ultimate Kitchen Companion
I call these crackers because they are crunchy, but they are also biscuit-like in that they are so flaky. These were a huge hit again this year - people couldn't get enough (with and without the spinach dip!)
Tuesday, August 30, 2016
Veggie Risotto
My husband grew up on rice, but I get bored of it quite easily. We didn't eat rice very often at home unless it was risotto. So every once in awhile I will make a risotto (usually mushrooms) because that pleases everyone. I was visiting my nonna and she was talking about a zucchini-saffron risotto she made and I thought to myself Why not try something like that??
So while this is in no way her recipe, it was definitely inspired by her! While my LO tried to pick out some of the vegetables, overall it was a huge success with everyone in the house!
Ingredients:
1/2 onion, chopped
1 zucchini, halved and chopped (or quartered if it's a big one)
2 small green peppers, seeded and sliced
2 tomatoes, thinly sliced
2 cloves garlic, thinly sliced
6 cups chicken (or vegetable) stock
1.5 cups arborio rice
1/2 cup white wine
3-4 tbsp butter, separated
1/4 cup grated Parmesan cheese (or mixed with Asiago cheese)
Directions:
1. Bring chicken stock to a boil in a small saucepan. (If you don't have chicken stock handy, use a bouillon cube in boiling water. Make sure you follow the package instructions and make enough for the risotto).
2. Saute onions until translucent over medium heat in oil and butter.
3. Add garlic and pepper and saute for a few more minutes until tender.
4. Add zucchini and tomato and cook until softened; add more butter if necessary. Season with salt and pepper.
5. Add 1 tbsp butter and rice and stir until rice becomes translucent, about 5 minutes.
6. Add 1/2 cup white wine and stir until absorbed. Add chicken stock by the ladleful/s and stir until absorbed. Continue to add stock until the rice is cooked, about 45-50 minutes.
7. Remove from heat, add 1 tbsp butter, then the freshly grated Parmesan (and Asiago) cheese. Stir. Season with salt if necessary.
This serves great with a nice salad or even bruschetta as a side.
So while this is in no way her recipe, it was definitely inspired by her! While my LO tried to pick out some of the vegetables, overall it was a huge success with everyone in the house!
Ingredients:
1/2 onion, chopped
1 zucchini, halved and chopped (or quartered if it's a big one)
2 small green peppers, seeded and sliced
2 tomatoes, thinly sliced
2 cloves garlic, thinly sliced
6 cups chicken (or vegetable) stock
1.5 cups arborio rice
1/2 cup white wine
3-4 tbsp butter, separated
1/4 cup grated Parmesan cheese (or mixed with Asiago cheese)
Directions:
1. Bring chicken stock to a boil in a small saucepan. (If you don't have chicken stock handy, use a bouillon cube in boiling water. Make sure you follow the package instructions and make enough for the risotto).
2. Saute onions until translucent over medium heat in oil and butter.
3. Add garlic and pepper and saute for a few more minutes until tender.
4. Add zucchini and tomato and cook until softened; add more butter if necessary. Season with salt and pepper.
5. Add 1 tbsp butter and rice and stir until rice becomes translucent, about 5 minutes.
6. Add 1/2 cup white wine and stir until absorbed. Add chicken stock by the ladleful/s and stir until absorbed. Continue to add stock until the rice is cooked, about 45-50 minutes.
7. Remove from heat, add 1 tbsp butter, then the freshly grated Parmesan (and Asiago) cheese. Stir. Season with salt if necessary.
This serves great with a nice salad or even bruschetta as a side.
![]() |
| Veggie Risotto |
![]() |
| The yummy bruschetta side dish |
Labels:
arborio,
asiago,
cheese,
dinner,
parmesan,
rice,
risotto,
tomatoes,
vegetables,
vegetarian,
wine,
zucchini
Wednesday, May 4, 2016
Chicken & Nacho Casserole
Mat leave has me watching a lot of daytime tv talk shows. Today I saw someone make a chicken casserole and thought to myself 'Have I ever had a casserole?' I remembered having a conversation with some coworkers about how casseroles are just one pot dishes. If that was the case then I guess I have had and made a casserole before. Regardless, I wanted to make a chicken casserole tonight so I started searching the internet for a good one to try.
The result was tonight's dinner which was really quite yummy and a hit with the family.
Ingredients:
2 tbsp oil
6 (approx.) boneless, skinless chicken thighs or breasts
1 onion, chopped
3 cloves garlic, minced
2 tbsp all-purpose flour
1 cup milk
1/2 cup chicken stock
1 tsp ground cumin
1/2 tsp ground coriander
1/4 tsp kosher salt
1/4 tsp black pepper
1/2 cup cream cheese
1 can black beans, drained and rinsed
1/2 cup (approx.) crushed nacho chips
1 cup (fresh) salsa
1/2 cup shredded cheese (cheddar-mozzarella mix or whatever you like!)
Directions:
1. Heat oil in a saucepan over medium heat. Cook the chicken in batches until cooked through and golden brown. Remove from pan. While preparing the next step, chop or shred the chicken and save for later; set aside.
2. If necessary add another tablespoon of oil. Add onion; cook for 6 minutes. Add garlic and flour; cook for 2 minutes. Gradually add milk and chicken stock, stirring constantly and scraping up the brown bits from the chicken. Bring to a boil and cook for approx. 1 minute. Remove from heat. Stir in cumin, coriander, salt, pepper and cream cheese.
3. Preheat oven to 350F.
4. Spread about 1/2 cup milk mixture over the bottom of a rectangular casserole dish. Layer beans, 1-1/2 cups chicken and half the nachos. Top with 1/2 cup milk mixture. Layer 1-1/2 cups chicken and remaining chips. Top with remaining milk mixture. Add salsa, covering the entire surface. Sprinkle with shredded cheese.
5. Bake at 350F for 30 minutes.
Tips: To save time, this recipe works really well with leftover cooked chicken. Just shred or chop it and start at step 2. Add the chicken as you layer your dish. My husband said this recipe would go really well with rice in it. You can add cooked rice to the bottom of your dish, or cook it separately and serve the casserole over the rice. My family enjoyed eating the casserole with more nachos on the side.
The result was tonight's dinner which was really quite yummy and a hit with the family.
Ingredients:
2 tbsp oil
6 (approx.) boneless, skinless chicken thighs or breasts
1 onion, chopped
3 cloves garlic, minced
2 tbsp all-purpose flour
1 cup milk
1/2 cup chicken stock
1 tsp ground cumin
1/2 tsp ground coriander
1/4 tsp kosher salt
1/4 tsp black pepper
1/2 cup cream cheese
1 can black beans, drained and rinsed
1/2 cup (approx.) crushed nacho chips
1 cup (fresh) salsa
1/2 cup shredded cheese (cheddar-mozzarella mix or whatever you like!)
Directions:
1. Heat oil in a saucepan over medium heat. Cook the chicken in batches until cooked through and golden brown. Remove from pan. While preparing the next step, chop or shred the chicken and save for later; set aside.
2. If necessary add another tablespoon of oil. Add onion; cook for 6 minutes. Add garlic and flour; cook for 2 minutes. Gradually add milk and chicken stock, stirring constantly and scraping up the brown bits from the chicken. Bring to a boil and cook for approx. 1 minute. Remove from heat. Stir in cumin, coriander, salt, pepper and cream cheese.
3. Preheat oven to 350F.
4. Spread about 1/2 cup milk mixture over the bottom of a rectangular casserole dish. Layer beans, 1-1/2 cups chicken and half the nachos. Top with 1/2 cup milk mixture. Layer 1-1/2 cups chicken and remaining chips. Top with remaining milk mixture. Add salsa, covering the entire surface. Sprinkle with shredded cheese.
5. Bake at 350F for 30 minutes.
Tips: To save time, this recipe works really well with leftover cooked chicken. Just shred or chop it and start at step 2. Add the chicken as you layer your dish. My husband said this recipe would go really well with rice in it. You can add cooked rice to the bottom of your dish, or cook it separately and serve the casserole over the rice. My family enjoyed eating the casserole with more nachos on the side.
![]() |
| It got flipped upside-down on the plate! |
Tuesday, April 19, 2016
Sautéed Veggies & Pork Cutlets
Today I stopped by the grocery store and just browsed around waiting for some type of inspiration for dinner. I saw some fast frying pork cutlets and knew right away I could use that, so I made my way to the veggies and picked up some zucchini and spinach. I was going to pick up some broccoli as well, but remembered that I had some frozen at home so left them behind. I had a good idea of what I wanted to make for dinner! The problem for the blog is that I didn't really measure my ingredients and just eye-balled it.
Sautéed Veggies

Ingredients:
1 onion, thinly diced
2 cloves garlic, minced
2 cups broccoli florets (or broccoli cut into small florets)
2 small zucchini, halved and then sliced
1/2 cup spinach
2 tbsp olive oil
salt and pepper to taste
Parmesan cheese
Directions:
1. If using fresh broccoli, cook in boiling water for about 3 minutes until tender. If using frozen broccoli, follow instructions (ie: microwave with water for 3-5 minutes or boil until tender).
2. Heat oil over medium-high heat in a large pan. Add onion and sauté for 1-2 minutes until softened; add garlic and cook another minute until fragrant.
3. Add zucchini, tossing to coat, and cook for 2-3 minutes until tender. Season with salt. Add broccoli and cook for another 1-2 minutes.
4. Tear the spinach in half or thirds and add to the pan. Cook, tossing to combine, until the spinach is wilted. Season with salt and pepper.
5. Remove from heat and grate Parmesan cheese over top.
Breaded Pork Cutlets
This is a pretty easy thing to bring together. All you need is some thin pork cutlets, bread crumbs, an egg and oil for frying.

1. Beat an egg and place the cutlets in the egg to coat. Drip off any excess.
2. Coat the cutlet in your favourite bread crumb mix (I like Italian breadcrumbs), patting down to make sure the crumbs stick and the cutlet is fully coated.
3. When you are ready to fry, cover the bottom of a pan with enough oil for frying. Heat over medium-high heat. When the oil is hot, place the cutlets (in batches) in the oil. Don't overcrowd the pan as it will lower the temperature.
4. Fry the cutlet about 4 minutes on each side, until it is golden brown, turning once. Remove from oil and place on paper towel-lined plate to absorb excess oil. Fry the remaining cutlets.
Sautéed Veggies

Ingredients:
1 onion, thinly diced
2 cloves garlic, minced
2 cups broccoli florets (or broccoli cut into small florets)
2 small zucchini, halved and then sliced
1/2 cup spinach
2 tbsp olive oil
salt and pepper to taste
Parmesan cheese
Directions:
1. If using fresh broccoli, cook in boiling water for about 3 minutes until tender. If using frozen broccoli, follow instructions (ie: microwave with water for 3-5 minutes or boil until tender).
2. Heat oil over medium-high heat in a large pan. Add onion and sauté for 1-2 minutes until softened; add garlic and cook another minute until fragrant.
3. Add zucchini, tossing to coat, and cook for 2-3 minutes until tender. Season with salt. Add broccoli and cook for another 1-2 minutes.
4. Tear the spinach in half or thirds and add to the pan. Cook, tossing to combine, until the spinach is wilted. Season with salt and pepper.
5. Remove from heat and grate Parmesan cheese over top.
Breaded Pork Cutlets
This is a pretty easy thing to bring together. All you need is some thin pork cutlets, bread crumbs, an egg and oil for frying.

1. Beat an egg and place the cutlets in the egg to coat. Drip off any excess.
2. Coat the cutlet in your favourite bread crumb mix (I like Italian breadcrumbs), patting down to make sure the crumbs stick and the cutlet is fully coated.
3. When you are ready to fry, cover the bottom of a pan with enough oil for frying. Heat over medium-high heat. When the oil is hot, place the cutlets (in batches) in the oil. Don't overcrowd the pan as it will lower the temperature.
4. Fry the cutlet about 4 minutes on each side, until it is golden brown, turning once. Remove from oil and place on paper towel-lined plate to absorb excess oil. Fry the remaining cutlets.
Friday, March 11, 2016
Garlic Bread Sticks
If my little one could have pizza and garlic sticks every day, she would. Whenever we ask her what she wants, that's her answer, followed by the cutest smile and a "please please please please please." Fridays during Lent we are abstaining from meat, so veggie pizza is always an easy fix for a Friday night dinner.
The dough recipe that I use can be found here (from a previous post): Quick Pizza Dough. I let the dough rise a little longer, probably 20-30 minutes. This gives me enough dough to make two round pizzas. One dough I use for my pizza and the other one I use for the bread sticks.
On a side note, this is such an easy recipe to get little hands involved. My daughter helped me mix the dough, roll the dough, put on the toppings of the pizza and brush the bread sticks. Her hands were really the ones that made our dinner tonight!
Ingredients:
half of my dough recipe (see above)
2 tbsp melted butter
1 tbsp olive oil
2 cloves garlic, finely minced
1 tsp garlic powder
1 tsp Italian seasoning
salt and pepper to taste
1/4 cup freshly grated Parmesan cheese
1/4 cup grated mozzarella
Directions:
1. Roll out the dough into a circle. Grease the pizza pan with butter and spread the dough into the pan.
2. Combine the butter, olive oil and garlic into a small bowl.
3. Sprinkle the dough with salt and pepper to season. Using a pastry brush, spread the garlic mixture over the dough, covering it entirely. Sprinkle with Italian seasoning.
4. Top with your cheeses.
5. Bake in a preheated 500F oven for approximately 10 minutes.
6. Remove from oven, let sit for a minute or so then cut into strips and serve (with your favourite marinara or dipping sauce if you like!).
Notes: We normally just sprinkle Parmesan on our bread sticks because we don't like them as cheesy. If you are baking the bread sticks with your pizza, then you will have to adjust some of your settings. Normally I bake my pizza at 425F, so I place the garlic sticks in the top rack to cook at the same time. I normally bake the pizza first and then start on the bread sticks. If you do the same thing, the breadsticks will probably be in the oven for about 10 minutes. After you take out the pizza, place the breadsticks in the bottom rack and raise the temperature to 450F. Bake it for another 5-10 minutes, until it is golden brown.
The dough recipe that I use can be found here (from a previous post): Quick Pizza Dough. I let the dough rise a little longer, probably 20-30 minutes. This gives me enough dough to make two round pizzas. One dough I use for my pizza and the other one I use for the bread sticks.
On a side note, this is such an easy recipe to get little hands involved. My daughter helped me mix the dough, roll the dough, put on the toppings of the pizza and brush the bread sticks. Her hands were really the ones that made our dinner tonight!
Ingredients:
half of my dough recipe (see above)
2 tbsp melted butter
1 tbsp olive oil
2 cloves garlic, finely minced
1 tsp garlic powder
1 tsp Italian seasoning
salt and pepper to taste
1/4 cup freshly grated Parmesan cheese
1/4 cup grated mozzarella
Directions:
1. Roll out the dough into a circle. Grease the pizza pan with butter and spread the dough into the pan.
2. Combine the butter, olive oil and garlic into a small bowl.
3. Sprinkle the dough with salt and pepper to season. Using a pastry brush, spread the garlic mixture over the dough, covering it entirely. Sprinkle with Italian seasoning.
4. Top with your cheeses.
5. Bake in a preheated 500F oven for approximately 10 minutes.
6. Remove from oven, let sit for a minute or so then cut into strips and serve (with your favourite marinara or dipping sauce if you like!).
Notes: We normally just sprinkle Parmesan on our bread sticks because we don't like them as cheesy. If you are baking the bread sticks with your pizza, then you will have to adjust some of your settings. Normally I bake my pizza at 425F, so I place the garlic sticks in the top rack to cook at the same time. I normally bake the pizza first and then start on the bread sticks. If you do the same thing, the breadsticks will probably be in the oven for about 10 minutes. After you take out the pizza, place the breadsticks in the bottom rack and raise the temperature to 450F. Bake it for another 5-10 minutes, until it is golden brown.
![]() |
| We left this one in a little too long, so it was a bit dark and on the crunchy side, but still tasted delicious! |
Monday, September 28, 2015
Chicken Enchiladas & Apple Crisp
Many, many years ago I was at my friend's apartment and she made this recipe. I absolutely loved and saved it. I've made it several times over the years. Every once in awhile I have a craving for it and tonight was one of those nights. It's also a bonus that everyone in my house loves it! There's always leftover for lunch the next day too.
Chicken Enchiladas
Ingredients:
1 medium onion, chopped
2-4 tbsp butter
4-6 chicken breasts, chopped
1 - 1-1/2 cups salsa
1 pkg (125g) cream cheese
2 cups grated cheese (I like a mixture of cheddar, mozzarella and asiago)
6 large flour tortillas
Directions:
1. Chop chicken into cubes and fry on stove in butter until it is no longer pink. Remove from pan and set aside in a bowl.
2. Cook and stir onion in butter over medium heat for 2-3 minus until softened. Stir in cooked onion, about 2/3 cup salsa, and cream cheese. Cook until thoroughly heated.
3. Stir in 1 cup grated cheese.
4. Spoon about 1/3 cup of the chicken mixture in the centre of each tortilla. Roll and place seam side down in large (13x9") baking dish. Top with remaining salsa and cheddar cheese.
5. Bake in preheated 350F oven for 15 minutes.
And now onto dessert - my favourite part of any meal!
Apple Crisp
The great thing about this recipe, is that you can make a large batch and portion it out to freeze. If you are expecting a large crowd, put this in a large dish and make one portion. But if you want to have some on hand to give to family or friends or save for another day, then you can do that as well.
Today I made this into 3-8x8" serving dishes. One went to our neighbour, the other is being frozen for a work function and the last one is the dessert tonight. My apple crisp recipes have evolved over the years, but this time the crumble part is true to a Barefoot Contessa recipe.
1 tsp nutmeg
For the topping:
1-1/2 cups all-purpose flour
3/4 cup sugar
3/4 light brown sugar, packed
1/2 tsp salt
1 cup rolled oats
1 cup cold unsalted butter, diced
Directions:
1. If you are making a large dish, grease a 9x14" dish. If you are making smaller portions, grease 3 8x8" dishes.
2. Peel, core and cut the apples into slices. Combine the apples, lemon juice, sugar and spices. Pour into the dish. (I actually like to divide the apples into the three dishes and then squeeze the lemon juice over top. I then mix the rest of the ingredients and evenly sprinkle it over each dish and toss.)
3. For the topping: Combine the flour, sugars, salt, oatmeal, butter in the bowl of stand mixer with the paddle attachment. Mix on low speed until the mixture is crumbly and the butter is small. Scatter evenly over the apples.
4. If you are baking immediately, bake in a preheated 350F oven for 45 minutes, until the top is brown and the apples are bubbly. Serve warm. (Consider putting a sheet pan underneath for overflow if your dish is really full.) If you are freezing, cover in foil and write the instructions on top. Place in the freezer. If you are baking one large dish, you will probably have to increase the baking time to 60 minutes.
5. Baking from frozen? Thaw and bake uncovered at 350F for 45 minutes.
![]() |
| Cooking the chicken cubes. |
![]() |
| Adding in the salsa and cream cheese. |
![]() |
| Snapping a picture just before I chow down! |
![]() |
| Saving some leftovers for lunch tomorrow. |
And now onto dessert - my favourite part of any meal!
Apple Crisp
The great thing about this recipe, is that you can make a large batch and portion it out to freeze. If you are expecting a large crowd, put this in a large dish and make one portion. But if you want to have some on hand to give to family or friends or save for another day, then you can do that as well.
Today I made this into 3-8x8" serving dishes. One went to our neighbour, the other is being frozen for a work function and the last one is the dessert tonight. My apple crisp recipes have evolved over the years, but this time the crumble part is true to a Barefoot Contessa recipe.
Ingredients:
10 apples, peeled, cored and sliced (fairly thinly)
1/2 cup sugar
the juice of one lemon
2 tsp cinnamon10 apples, peeled, cored and sliced (fairly thinly)
1/2 cup sugar
the juice of one lemon
1 tsp nutmeg
For the topping:
1-1/2 cups all-purpose flour
3/4 cup sugar
3/4 light brown sugar, packed
1/2 tsp salt
1 cup rolled oats
1 cup cold unsalted butter, diced
Directions:
1. If you are making a large dish, grease a 9x14" dish. If you are making smaller portions, grease 3 8x8" dishes.
2. Peel, core and cut the apples into slices. Combine the apples, lemon juice, sugar and spices. Pour into the dish. (I actually like to divide the apples into the three dishes and then squeeze the lemon juice over top. I then mix the rest of the ingredients and evenly sprinkle it over each dish and toss.)
3. For the topping: Combine the flour, sugars, salt, oatmeal, butter in the bowl of stand mixer with the paddle attachment. Mix on low speed until the mixture is crumbly and the butter is small. Scatter evenly over the apples.
4. If you are baking immediately, bake in a preheated 350F oven for 45 minutes, until the top is brown and the apples are bubbly. Serve warm. (Consider putting a sheet pan underneath for overflow if your dish is really full.) If you are freezing, cover in foil and write the instructions on top. Place in the freezer. If you are baking one large dish, you will probably have to increase the baking time to 60 minutes.
5. Baking from frozen? Thaw and bake uncovered at 350F for 45 minutes.
![]() |
| Prepping the apples in their foil dishes. |
![]() |
| Check out the delicious crumble topping. |
![]() |
| The apple crisp all bubbly and brown! |
![]() |
| "It's so yummy mommy!" |
![]() |
| And of course, we have to add Birthday Cake Oreo Ice Cream on top! |
Labels:
apple crisp,
apples,
cheddar,
cheese,
chicken,
cream cheese,
crumble,
dinner,
enchilada,
mozzarella,
oats,
onion,
salsa,
tortilla
Monday, August 31, 2015
Visiting a Friend with Baby #2
We are off to visit my oldest friend who just had a new baby. We are so excited to meet her newest member. Although I can't relate to having two, I can only imagine how exhausting it is to entertain guests when you have two under two running around. That is why I am bringing lunch and dessert for our visit.
Both recipes that I chose come together pretty easily, but they need time to sit so they have to be made well in advance. For lunch I made macaroni and cheese (the overnight edition) and for desert this lovely tart that I've been dying to make forever.
Overnight Mac & Cheese
Ingredients:
4 cups whole milk
2 cups uncooked elbow macaroni
1/8 cup butter, diced into small cubes
1 cup cheddar cheese, grated (I like to mix the cheese that I use: this time I used medium orange cheddar and an aged white cheddar)
1/4 tsp salt
Directions:
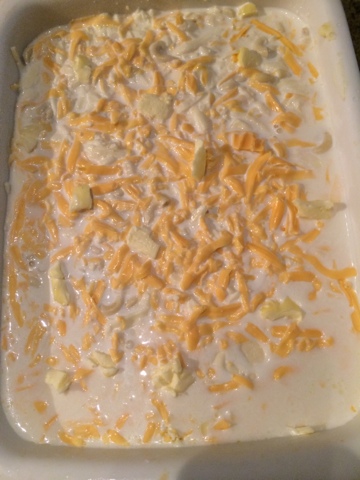
1. Grease a 13x9" baking dish. Spread half the pasta in the bottom of the dish. Sprinkle with half of the cheese, dot with half of butter and sprinkle with half the salt. Repeat the layers with the remaining pasta, remaining cheese, butter and salt.
2. Pour milk evenly over pasta, cover with aluminum foil and refrigerate for about 24 hours.

3. Bake, covered with foil at 350F for 45-60 minutes. Remove the foil during the final 15 minutes to allow the top to brown and get crispy. (Sometimes I sprinkle some Parmesan cheese over the top when I remove the foil.)
Caramel-Swirl Double Chocolate Tart
Ingredients:
Crust:
2-1/4 cups almonds
1/2 cup sugar
1/4 cup flour
1/3 cup butter, melted and cooled
Filling:
6 oz white chocolate, finely chopped
8 oz semisweet chocolate, finely chopped
1 cup 35% whipping cream, divided
Caramel Sauce:
1/3 cup brown sugar
1/2 cup 35% whipping cream
1/4 tsp vanilla
1/2 tbsp butter
Directions:
1. Preheat oven to 350F.
Crust:
2. In a food processor, process the almonds, sugar and flour until the nuts are finely ground. Pour in butter; process (or mix) until thoroughly moistened. Pat nut mixture into the bottom of a 10" pie plate. Bake for 15-20 minutes or until the crust is lightly coloured. Cool on rack.
Filling:
3. Meanwhile place white chocolate in a bowl and dark chocolate in another bowl. Bring cream to a boil in saucepan over medium heat. Pour 1/3 cup of hot cream over white chocolate; pour remaining 2/3 cup hot cream over dark chocolate. Whisk white chocolate mixture until smooth and the chocolate is melted. Repeat with dark chocolate. Let each cool for 10 minutes. (At this point you can start making the caramel sauce in the same saucepan.)
4. Pour dark chocolate over cooled crust, spreading evenly. Pour white chocolate over dark chocolate, tilting pan to evenly distribute.
Caramel Sauce:
5. In a saucepan combine all ingredients and bring to a boil over medium heat, stirring occasionally. Reduce heat and simmer for 5 minutes, stirring occasionally.
6. Drizzle caramel sauce over white chocolate in decorative pattern.
7. Refrigerate for at least 8 hours. Store in the refrigerator.
Both recipes that I chose come together pretty easily, but they need time to sit so they have to be made well in advance. For lunch I made macaroni and cheese (the overnight edition) and for desert this lovely tart that I've been dying to make forever.
Overnight Mac & Cheese
Ingredients:
4 cups whole milk
2 cups uncooked elbow macaroni
1/8 cup butter, diced into small cubes
1 cup cheddar cheese, grated (I like to mix the cheese that I use: this time I used medium orange cheddar and an aged white cheddar)
1/4 tsp salt
Directions:
1. Grease a 13x9" baking dish. Spread half the pasta in the bottom of the dish. Sprinkle with half of the cheese, dot with half of butter and sprinkle with half the salt. Repeat the layers with the remaining pasta, remaining cheese, butter and salt.
2. Pour milk evenly over pasta, cover with aluminum foil and refrigerate for about 24 hours.

3. Bake, covered with foil at 350F for 45-60 minutes. Remove the foil during the final 15 minutes to allow the top to brown and get crispy. (Sometimes I sprinkle some Parmesan cheese over the top when I remove the foil.)
Caramel-Swirl Double Chocolate Tart
![]() |
| Almond crust, cooling |
Ingredients:
Crust:
2-1/4 cups almonds
1/2 cup sugar
1/4 cup flour
1/3 cup butter, melted and cooled
Filling:
6 oz white chocolate, finely chopped
8 oz semisweet chocolate, finely chopped
1 cup 35% whipping cream, divided
![]() |
| Dark chocolate filling |
1/3 cup brown sugar
1/2 cup 35% whipping cream
1/4 tsp vanilla
1/2 tbsp butter
Directions:
1. Preheat oven to 350F.
Crust:
2. In a food processor, process the almonds, sugar and flour until the nuts are finely ground. Pour in butter; process (or mix) until thoroughly moistened. Pat nut mixture into the bottom of a 10" pie plate. Bake for 15-20 minutes or until the crust is lightly coloured. Cool on rack.
![]() |
| White chocolate filling |
Filling:
![]() |
| Caramel sauce simmering |
4. Pour dark chocolate over cooled crust, spreading evenly. Pour white chocolate over dark chocolate, tilting pan to evenly distribute.
Caramel Sauce:
5. In a saucepan combine all ingredients and bring to a boil over medium heat, stirring occasionally. Reduce heat and simmer for 5 minutes, stirring occasionally.
6. Drizzle caramel sauce over white chocolate in decorative pattern.
7. Refrigerate for at least 8 hours. Store in the refrigerator.
![]() |
| Assembled product without the caramel sauce. |
![]() |
| Ready to be refrigerated for 8 hours. |
Wednesday, August 12, 2015
A Vegetarian Dinner
Tonight was a meat free dinner with some delicious vegetarian options: eggplant pizza and baked broccoli. Both recipes required the use of the oven, so I started with the eggplant and while it was cooking I prepped the broccoli. When the eggplant was ready to be taken out of the oven, I put the broccoli in and topped the eggplant slices. I then turned the oven to broil on high and put the eggplant back in beside the broccoli for about 5 minutes. When it was ready, I left the broccoli to cook again at 425 for whatever time was left.
Baked Broccoli
This makes a great side dish to any meal and it's really easy to put together.
Ingredients:
1 head of broccoli, washed and cut into pieces
2-4 tbsp olive oil
4 garlic cloves, minced
salt and pepper to season
1/4 cup bread crumbs
2 tbsp cheese (Parmesan or Asiago are my favourites), shredded or grated
1/3 cup grated Parmesan cheese
1 lemon, zest and juice
Directions:
1. Preheat the oven to 425F. Spray a 8x8" baking dish with cooking spray.
2. In a large bowl, combine the broccoli, olive oil, garlic, salt and pepper until the broccoli is coated. Add the bread crumbs and 2 tbsp cheese; stir again. Transfer to the baking dish. Make sure you add all the crumbs in the bowl to the top of the broccoli. (Easy clean-up option: Combine all the ingredients in a large ziploc bag and give it a shake to coat!)
3. Roast in the oven for 20-25 minutes until everything is browned. Stir the broccoli about half way through cooking if you like.
4. Zest the lemon over the broccoli. Cut the lemon in half and squeeze the lemon juice over the broccoli as well. Sprinkle with the remaining Parmesan cheese.
Eggplant Pizza
I've been wanting to make this for a long time. With the ingredients required to make it, you really can't go wrong! And this portion of our vegetarian dinner is gluten free as well!
Ingredients:
1 large eggplant, sliced into 1" thick slices
1 jar/can (213mL) tomato sauce or pizza sauce
1/2 cup mozzarella, grated (this amount varies depending on how cheesy you like our pizza)
15-20 fresh cherry tomatoes, halved (enough so that there's 2-3 halves per slice)
4-5 fresh basil leaves, thinly sliced
1 tsp sea salt
Asiago or Parmesan cheese (optional)
Directions:
1. Preheat oven to 425F. Arrange the sliced eggplant in rows on a baking sheet (or two if you need it). Sprinkle with salt and bake for 20 minutes.
2. Remove the eggplant from the oven and turn the broiler on. Spread 1 tbsp sauce over each eggplant, followed by the mozzarella. Arrange the basil and cherry tomatoes over the cheese. Grate some Asiago cheese over each slice.
3. Broil for 3-5 minutes. Keep a close eye to make sure it does not burn. Serve hot.
Instead of mozzarella, you can use Provolone cheese. If you buy it already sliced, it makes for an even quicker prep and less clean up.
Baked Broccoli
This makes a great side dish to any meal and it's really easy to put together.
Ingredients:
1 head of broccoli, washed and cut into pieces
2-4 tbsp olive oil
4 garlic cloves, mincedsalt and pepper to season
1/4 cup bread crumbs
2 tbsp cheese (Parmesan or Asiago are my favourites), shredded or grated
1/3 cup grated Parmesan cheese
1 lemon, zest and juice
Directions:
1. Preheat the oven to 425F. Spray a 8x8" baking dish with cooking spray.
2. In a large bowl, combine the broccoli, olive oil, garlic, salt and pepper until the broccoli is coated. Add the bread crumbs and 2 tbsp cheese; stir again. Transfer to the baking dish. Make sure you add all the crumbs in the bowl to the top of the broccoli. (Easy clean-up option: Combine all the ingredients in a large ziploc bag and give it a shake to coat!)
3. Roast in the oven for 20-25 minutes until everything is browned. Stir the broccoli about half way through cooking if you like.
4. Zest the lemon over the broccoli. Cut the lemon in half and squeeze the lemon juice over the broccoli as well. Sprinkle with the remaining Parmesan cheese.
Eggplant Pizza
I've been wanting to make this for a long time. With the ingredients required to make it, you really can't go wrong! And this portion of our vegetarian dinner is gluten free as well!
Ingredients:
1 large eggplant, sliced into 1" thick slices
1 jar/can (213mL) tomato sauce or pizza sauce
1/2 cup mozzarella, grated (this amount varies depending on how cheesy you like our pizza)
15-20 fresh cherry tomatoes, halved (enough so that there's 2-3 halves per slice)
4-5 fresh basil leaves, thinly sliced
1 tsp sea salt
Asiago or Parmesan cheese (optional)
Directions:
![]() |
| Sprinkle the eggplant slices with salt. This will help dry them out as they cook. |
1. Preheat oven to 425F. Arrange the sliced eggplant in rows on a baking sheet (or two if you need it). Sprinkle with salt and bake for 20 minutes.
2. Remove the eggplant from the oven and turn the broiler on. Spread 1 tbsp sauce over each eggplant, followed by the mozzarella. Arrange the basil and cherry tomatoes over the cheese. Grate some Asiago cheese over each slice.
3. Broil for 3-5 minutes. Keep a close eye to make sure it does not burn. Serve hot.
Instead of mozzarella, you can use Provolone cheese. If you buy it already sliced, it makes for an even quicker prep and less clean up.
![]() |
| The cooked eggplant topped and ready to be broiled! |
![]() |
| The final product - so delicious! |
Labels:
aubergine,
basil,
bread crumbs,
broccoli,
cheese,
eggplant,
garlic,
gluten free,
mozzarella,
pizza,
side dish,
tomatoes,
vegetarian
Wednesday, July 29, 2015
Stuffed Zucchini Flowers (Fiori di Zucca)
I love zucchini flowers. My Nonna used to make them when my Nonno picked them from the garden. She would make a batter, dip them, fry them and sprinkle them with sugar. When I recently asked her why she doesn't make them anymore her response was, "They don't turn out so good...." So I asked her if they had any in the garden because I wanted to try making them. Nonno went out and came back with three large zucchini. "She wants the flowers!!" Nonna shouts in Italian. He's not sure if there is any, but he went out to look anyways. And he came back with about a dozen. I have seen a lot of recipes for stuffed zucchini flowers so that's what I wanted to try!
When preparing the flowers, make sure you take out the yellow stamen inside and cut off the stem (if necessary). You don't need to wash them, but it doesn't hurt to wipe them with a damp paper towel if they look a little dirty. Be gentle when you open them as you need them to stay in tact in order to be stuffed. Some of the smaller ones or ones I couldn't stuff, I simply dipped in the same batter, fried them and sprinkled them with sugar like my Nonna does!
Ingredients:
12 zucchini blossoms, ready to be stuffed
1 cup ricotta cheese
1 large egg
1/3 cup Parmesan cheese, grated
1.5 tsp garlic powder (or 1-2 cloves minced garlic)
2 tsp basil, or about 4 fresh basil leaves finely chopped
1 tsp salt
2/3 cup & 1/8 cup all-purpose flour
1 cup cold water
1 tbsp lemon juice
oil for frying (vegetable, canola or coconut - I used a combo of vegetable and coconut)
1. Mix together the ricotta, Parmesan, egg, basil, garlic and salt. Continue mixing until it has a smooth consistency. Using a freezer bag, place the mixture into it and cut off the corner to make a piping bag. Do this just before you are ready to stuff the flowers.
2. Add the lemon juice to the water and give it a quick stir. In a separate bowl whisk together the flour and lemon water.
3. Meanwhile heat the oil over medium heat. You will need a large pan with a couple of inches of oil so the whole flower can fry.
4. Gently pipe about 1-2 tbsp (depending on the flower size) of the ricotta filling into the flowers. The large flowers will swell up as they are filled. Twist the top of the petals together to close and seal the flowers.
5. Test the oil by dropping in some batter. If it's hot enough it will sizzle and rise to the top. Dip each flower into the batter one at a time. Hold the flower by the top where you twisted the petals. Make sure it is totally covered in batter and let the excess batter drip off.
6. Gently lower the flower into the hot oil. Cook until the flowers are crispy, about 2-3 minutes. If the whole flower isn't covered in the oil, turn it over part way through. Fry the flowers in small batches depending on the size of your pan.
7. Remove the flowers with a slotted spoon and place on a baking sheet with a paper towels. Keep the stuffed flowers warm in a low oven while the others are being fried. They taste best when they're fresh, but can easily be warmed up again in the oven at a later time.
When preparing the flowers, make sure you take out the yellow stamen inside and cut off the stem (if necessary). You don't need to wash them, but it doesn't hurt to wipe them with a damp paper towel if they look a little dirty. Be gentle when you open them as you need them to stay in tact in order to be stuffed. Some of the smaller ones or ones I couldn't stuff, I simply dipped in the same batter, fried them and sprinkled them with sugar like my Nonna does!
Ingredients:
12 zucchini blossoms, ready to be stuffed
1 cup ricotta cheese
1 large egg
1/3 cup Parmesan cheese, grated
1.5 tsp garlic powder (or 1-2 cloves minced garlic)
2 tsp basil, or about 4 fresh basil leaves finely chopped
1 tsp salt
2/3 cup & 1/8 cup all-purpose flour
1 cup cold water
1 tbsp lemon juice
oil for frying (vegetable, canola or coconut - I used a combo of vegetable and coconut)
1. Mix together the ricotta, Parmesan, egg, basil, garlic and salt. Continue mixing until it has a smooth consistency. Using a freezer bag, place the mixture into it and cut off the corner to make a piping bag. Do this just before you are ready to stuff the flowers.
2. Add the lemon juice to the water and give it a quick stir. In a separate bowl whisk together the flour and lemon water.
3. Meanwhile heat the oil over medium heat. You will need a large pan with a couple of inches of oil so the whole flower can fry.
4. Gently pipe about 1-2 tbsp (depending on the flower size) of the ricotta filling into the flowers. The large flowers will swell up as they are filled. Twist the top of the petals together to close and seal the flowers.
5. Test the oil by dropping in some batter. If it's hot enough it will sizzle and rise to the top. Dip each flower into the batter one at a time. Hold the flower by the top where you twisted the petals. Make sure it is totally covered in batter and let the excess batter drip off.
6. Gently lower the flower into the hot oil. Cook until the flowers are crispy, about 2-3 minutes. If the whole flower isn't covered in the oil, turn it over part way through. Fry the flowers in small batches depending on the size of your pan.
7. Remove the flowers with a slotted spoon and place on a baking sheet with a paper towels. Keep the stuffed flowers warm in a low oven while the others are being fried. They taste best when they're fresh, but can easily be warmed up again in the oven at a later time.
Friday, March 6, 2015
Spinach & Artichoke Spaghetti Squash
We take turns at work bringing in munchies on Fridays. This week was my turn and I wanted something that was meatless (as it would be a Friday in Lent) and gluten free, as well as easy to make as my Thursday night was turning out to be quite busy.
I found the perfect recipe that had all things I love in it, and it tasted so good that everyone was interested in the recipe - there were no leftovers!
Ingredients:
1 spaghetti squash, seeded (about 2 lbs)
3 tsp olive oil
1 onion, chopped
salt and pepper
3 cloves garlic, minced
1/2 cup (light) sour cream
1/2 pkg (250g) cream cheese
1 cup grated Parmesan cheese, divided
3 cups packed baby spinach (about 3 large handfuls)
1 can artichoke hearts, drained and chopped
3/4 - 1 cup marble cheese, grated
Directions:
1. Place the spaghetti squash in a microwave safe dish, cut side up. Fill up the dish halfway with water, cover with plastic wrap and microwave about 10 minutes, until soft. Remove and cool slightly. (Alternately, you can roast the squash in a 350F oven cut side down for about 40 minutes. Brush the cut sides with olive oil or butter before roasting).
2. Meanwhile, heat olive oil over medium heat in a pan. Add the onion and cook until tender, about 5-8 minutes. Season with salt and pepper, then add the garlic and cook until fragrant, about another minute. Add in sour cream, cream cheese and 1/2 cup Parmesan. Stir until the cream cheese has melted and the mixture is smooth. Stir in the spinach and artichoke hearts and cook until the spinach has wilted.
3. Scrape up the strings of the squash with a fork and add it to the pan. Stir together to combine.
4. Pour into a rectangular dish. Top with the grated cheese and remaining Parmesan cheese.
5. Place under the broiler for 2-3 minutes, or until the cheese is melted and bubbly.
I let it cool slightly and covered my dish, brought it to work the next day and people microwaved it as they needed. It turned out so yummy! And it was really quite filling.
![]() |
| The final product just before broiling the cheese. |
Labels:
artichoke,
cheese,
creamy,
easy,
gluten free,
quick,
spaghetti squash,
spinach,
vegetarian
Sunday, June 22, 2014
Vegetarian Pizza Dinner
Today was the day that our groceries were running on empty and I found myself tweaking recipes left, right and centre!
I had a very busy cooking weekend - puff pancakes on Saturday morning, roasted chicken and potatoes Saturday dinner. Then I used the leftover chicken bones to make chicken broth in the slow-cooker overnight. Sunday morning I was in the process of making banana pancakes when I realized that I no longer had any eggs so I had to do some substitutions, and made a pretty good vegan pancake instead. And for dinner tonight I was making the pizza dough when I realized that I didn't have any pizza sauce - so another substitution was made. Overall, it still turned out to be a great weekend with great food!
Pizza Dough & Pizza Recipe
This dough comes together really quickly - great for those nights when you don't know what to make for dinner!
Dough Ingredients:
2-1/4 tsp active dry yeast (one package)
1 tsp white sugar
1 cup warm water
2-1/2 cups all-purpose flour
2 tbsp olive oil
1/2 tsp oregano **the next three seasonings are totally optional; they just add flavour to the dough**
1/2 tsp basil
1/4 tsp garlic powder
1tsp salt
Directions:
1. In a large bowl, dissolve yeast and sugar in warm water. Let stand until creamy, about 10 minutes.
2. Mix oregano, basil and garlic powder with olive oil in a small bowl. Stir flour, salt and oil mixture into the yeast-water. Use your hands to knead the dough until smooth, about 5-10 minutes. Let rest for 5 minutes. (At this point I would start getting your ingredients together for the pizza. If it rests longer than 5 minutes, not a problem - you will just have more dough like I did and have more pizza!)
3. Turn dough onto a lightly floured surface and pat or roll into your pan shape. Typically this would fit a 12" round pizza pan. Because my dough rested for at least 15 minutes, I was able to stretch my dough out to an extra-large rectangular pizza tray. It didn't quite reach both ends, it was maybe shy about 1", but it didn't change anything.
4. To prepare the pan: Butter it generously - this will give you a golden crust. I also lightly dust it with cornmeal as it gives it a nice crunch and texture, and also helps prevent the dough from sticking. (Which won't be a problem if you've buttered the heck out of your pan!) Stretch out your dough to the shape of your pan. Preheat your oven to 425F around this point in your cooking.
5. Always pour some olive oil over the dough and spread it around before putting on your toppings. Because this dough has seasoning already in the dough, you don't have to add any to the pizza, but it doesn't hurt it if you do. I would take a smashed clove of garlic and spread it over the dough just before you pour the olive oil and then sprinkle the dough with oregano, basil, etc.
6. Next you add your sauce. If you're out of sauce, take a can of tomato paste, pour in a couple of tbsp of water and a few sprinkles of seasoning (ie: basil, oregano, garlic powder, etc.) and mix it. This will then out the paste and make a quick sauce whenever you need it. Spread the sauce however thick or thin you like it. Then add your toppings. Tonight it was red peppers, thinly sliced onions and thinly sliced garlic. Then add your cheese - as much or as little as you like. I always pour a little bit more olive oil over top and then pop it into your preheated oven.
7. It will take about 20-25 minutes to cook. You'll know it's ready when the crust is golden brown (underneath too!) and it doesn't stick, and the cheese is all melted and delicious. Take it out of the oven, let it cool for about 5 minutes before you cut into it. And there ya have it - a quick and easy, but very yummy pizza dinner!
I had a very busy cooking weekend - puff pancakes on Saturday morning, roasted chicken and potatoes Saturday dinner. Then I used the leftover chicken bones to make chicken broth in the slow-cooker overnight. Sunday morning I was in the process of making banana pancakes when I realized that I no longer had any eggs so I had to do some substitutions, and made a pretty good vegan pancake instead. And for dinner tonight I was making the pizza dough when I realized that I didn't have any pizza sauce - so another substitution was made. Overall, it still turned out to be a great weekend with great food!
Pizza Dough & Pizza Recipe
This dough comes together really quickly - great for those nights when you don't know what to make for dinner!
Dough Ingredients:
2-1/4 tsp active dry yeast (one package)
1 tsp white sugar
1 cup warm water
2-1/2 cups all-purpose flour
2 tbsp olive oil
1/2 tsp oregano **the next three seasonings are totally optional; they just add flavour to the dough**
1/2 tsp basil
1/4 tsp garlic powder
1tsp salt
Directions:
1. In a large bowl, dissolve yeast and sugar in warm water. Let stand until creamy, about 10 minutes.
2. Mix oregano, basil and garlic powder with olive oil in a small bowl. Stir flour, salt and oil mixture into the yeast-water. Use your hands to knead the dough until smooth, about 5-10 minutes. Let rest for 5 minutes. (At this point I would start getting your ingredients together for the pizza. If it rests longer than 5 minutes, not a problem - you will just have more dough like I did and have more pizza!)
3. Turn dough onto a lightly floured surface and pat or roll into your pan shape. Typically this would fit a 12" round pizza pan. Because my dough rested for at least 15 minutes, I was able to stretch my dough out to an extra-large rectangular pizza tray. It didn't quite reach both ends, it was maybe shy about 1", but it didn't change anything.
4. To prepare the pan: Butter it generously - this will give you a golden crust. I also lightly dust it with cornmeal as it gives it a nice crunch and texture, and also helps prevent the dough from sticking. (Which won't be a problem if you've buttered the heck out of your pan!) Stretch out your dough to the shape of your pan. Preheat your oven to 425F around this point in your cooking.
5. Always pour some olive oil over the dough and spread it around before putting on your toppings. Because this dough has seasoning already in the dough, you don't have to add any to the pizza, but it doesn't hurt it if you do. I would take a smashed clove of garlic and spread it over the dough just before you pour the olive oil and then sprinkle the dough with oregano, basil, etc.
6. Next you add your sauce. If you're out of sauce, take a can of tomato paste, pour in a couple of tbsp of water and a few sprinkles of seasoning (ie: basil, oregano, garlic powder, etc.) and mix it. This will then out the paste and make a quick sauce whenever you need it. Spread the sauce however thick or thin you like it. Then add your toppings. Tonight it was red peppers, thinly sliced onions and thinly sliced garlic. Then add your cheese - as much or as little as you like. I always pour a little bit more olive oil over top and then pop it into your preheated oven.
7. It will take about 20-25 minutes to cook. You'll know it's ready when the crust is golden brown (underneath too!) and it doesn't stick, and the cheese is all melted and delicious. Take it out of the oven, let it cool for about 5 minutes before you cut into it. And there ya have it - a quick and easy, but very yummy pizza dinner!
![]() |
| How much was leftover after the three of us got our hands on it. |
Thursday, April 25, 2013
Rice Cooker Mac n Cheese
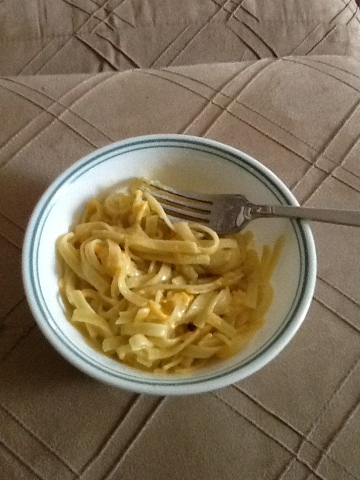
We use our rice cooker quite a bit - so much so that my husband went out and bought a super-duper fancy one. We use it to make rice (obviously!) and quinoa mostly. When I heard that you could mac n cheese in a rice cooker, I had to try it! And I have to say it turned out quite nice. The cheese didn't melt as well as it should have, but I think that's because I only had fettuccine in my cupboard and it didn't allow enough room for the cheese to blend and melt.
Ingredients:
2 cups pasta
1.5 cups chicken stock
Salt
1 cup milk
1.5 cups grated cheese (I used cheddar, mozzarella and Swiss)
Directions:
1. Put the pasta and chicken stock in the rice cooker and season with salt. Set it to cook for about 15 minutes; most of the liquid will evaporate.
2. Add the milk and cheese and give it a stir. Let it cook for another 20 minutes or so. You may have to stir it once or twice in this time period.
(Each rice cooker is different so keep an eye on it. After about 10 minutes mine switched to the warm setting and the bottom was already getting crusty while there was still quite a bit of liquid. After another 5 minutes the liquid was gone and it was quite creamy.)
3. Serve. You can add some more grated cheese on top.
This served me and my husband with no leftovers.
Ingredients:
2 cups pasta
1.5 cups chicken stock
Salt
1 cup milk
1.5 cups grated cheese (I used cheddar, mozzarella and Swiss)
Directions:
1. Put the pasta and chicken stock in the rice cooker and season with salt. Set it to cook for about 15 minutes; most of the liquid will evaporate.
2. Add the milk and cheese and give it a stir. Let it cook for another 20 minutes or so. You may have to stir it once or twice in this time period.
(Each rice cooker is different so keep an eye on it. After about 10 minutes mine switched to the warm setting and the bottom was already getting crusty while there was still quite a bit of liquid. After another 5 minutes the liquid was gone and it was quite creamy.)
3. Serve. You can add some more grated cheese on top.
This served me and my husband with no leftovers.
Update: I've made this recipe several times since with macaroni and it definitely turns out much better! I've actually increased the grated cheese to 2 cups (and always use a mix of different cheeses) and also increased the milk to about 1-1/3. It will take a little longer to cook, but it definitely comes out creamier and cheesier.
Wednesday, April 17, 2013
Crustless Quiche
This quiche comes together quickly and easily and is so very filling! It warms up nicely in the microwave - if you have any leftovers!
1 pkg (227g) sliced mushrooms
1 clove garlic, minced
1/2 bag baby spinach
6 eggs
3/4 cup milk
1/2 cup feta cheese (or to your taste)
1/2 cup grated Parmesan
1 cup mozzarella, shredded
salt and pepper to taste
1. Preheat oven to 425F. Place the sliced mushrooms in a pan coated with non-stick spray with the garlic and salt and pepper. Turn the heat to medium-high and saute the mushrooms until they release all of their moisture and no water remains in the pan, approx. 5-10 minutes.
2. Spray a pie dish with nonstick spray. Spread the baby spinach on the bottom of the pie dish. Add the cooked mushrooms and crumble the feta over top.
3. In a medium bowl, whisk together the eggs until smooth. Add the milk, Parmesan and some salt and pepper. Whisk to combine. Pour the egg mixture into the pie dish, over the vegetables and feta.
4. Sprinkle the mozzarella over top. Place the pie dish in the oven and bake until it is golden brown on top and the center is solid, approximately 30-35 minutes.
1 pkg (227g) sliced mushrooms
1 clove garlic, minced
1/2 bag baby spinach
6 eggs
3/4 cup milk
1/2 cup feta cheese (or to your taste)
1/2 cup grated Parmesan
1 cup mozzarella, shredded
salt and pepper to taste
1. Preheat oven to 425F. Place the sliced mushrooms in a pan coated with non-stick spray with the garlic and salt and pepper. Turn the heat to medium-high and saute the mushrooms until they release all of their moisture and no water remains in the pan, approx. 5-10 minutes.
2. Spray a pie dish with nonstick spray. Spread the baby spinach on the bottom of the pie dish. Add the cooked mushrooms and crumble the feta over top.
3. In a medium bowl, whisk together the eggs until smooth. Add the milk, Parmesan and some salt and pepper. Whisk to combine. Pour the egg mixture into the pie dish, over the vegetables and feta.
4. Sprinkle the mozzarella over top. Place the pie dish in the oven and bake until it is golden brown on top and the center is solid, approximately 30-35 minutes.
Subscribe to:
Posts (Atom)