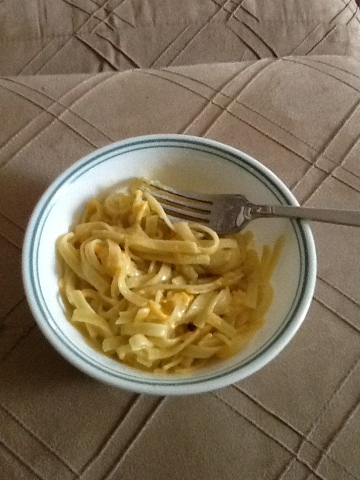
Has anyone else been struggling to find inspiration for 3 meals a day every day during this COVID-19 pandemic? I've come to realize how often we ate out or even just picked up snacks out. Now we are basically enjoying all meals inside.
I'm a PC Insiders member and I didn't even realize we had exclusive access to something called the Insiders Project until I received an email saying they were giving free access to everyone during the pandemic!
Well of course I had to go on and browse what they have on there - and wow! Lots of variety and lots of great looking recipes. So of course I had to try one of them out.
I've always loved a cream sauce on my pasta, even though my kids are not big fans. And no matter what I do, I can never really replicate my mom's cream sauce, and any that I've found online are not what I would consider keepers. Well tonight the pasta was enjoyed by all and my husband actually said "Wow! This is a keeper!" Now that's saying a lot because I'm pretty sure my kids inherited their dislike for cream sauces from him. He started talking about all the different ways we could use this sauce in other dishes.
This amount was perfect for our family of 4, and it came together very quickly. Once I popped the frozen ravioli in the boiling water, I got started on the sauce. It has very little prep involved as well - grate the cheese, mince the garlic and zest the lemon. The recipe calls for 1 cup of Parmesan cheese, but I never measure and always use till I think it looks good. Of course, you could use any pasta you want, but for some reason I love ravioli in a cream sauce.
Ingredients:
400g bag frozen cheese ravioli
2 tbsp butter
2 garlic cloves, minced
1 cup cream
zest of one lemon
sea salt to taste
1 tsp dried parsley
(1 cup) Parmesan cheese, grated
2 tbsp lemon juice
freshly ground black pepper to taste
Directions:
1. Place frozen ravioli in a salted (large) pot of boiling water. Cook until the ravioli is al dente (approx. 8-10 minutes). Reserve 1/2 cup of pasta water, and drain the ravioli.
2. While ravioli is cooking, melt butter in a large frying pan over medium heat. Add garlic and cook until fragrant, about 30 seconds. Be careful not to brown or burn the garlic. Stir in cream, lemon zest, dried parsley and salt. Simmer until the sauce is reduced by half, about 5 minutes, stirring occasionally.
3. Add drained ravioli and 1/2 cup pasta water. Increase heat to medium-high, then cook, stirring often until the sauce thickens and coats the pasta, approx. 2-3 minutes. Remove from heat and gradually grate the Parmesan cheese over top, stirring occasionally. Stir in lemon juice and season with black pepper. Serve.
Makes 4 servings.
Showing posts with label easy. Show all posts
Thursday, April 16, 2020
Tuesday, April 24, 2018
Chicken Curry with Homemade Naan
I watched an episode of Bake with Anna Olson the other day, where she made naan bread. She is one of my most favourite pastry chefs and every recipe I've ever tried of hers always turns out amazing. The recipe looked easy enough and I really wanted to make it, so I went on a search for an easy curry recipe. I've never made a curry before, so that part was a little daunting. Everything turned out great.
I made the dough earlier in the afternoon so it had time to rise. As it got closer to dinnertime, I set the rice to cook in our rice cooker and started on the prep for the curry. As the curry was left to cook for the last 15-20 minutes, I cooked the naan and everything came together perfectly.
3/4 cup warm water
1/2 cup yogurt
2-1/4 tsp yeast
2-1/2 cups flour
1/2 tsp salt
2 tbsp vegetable oil
Directions:
1. Add the first three ingredients to a large bowl in order. Next add the flour, reserving 1/4 to 1/2 cup to use when you knead the dough. Add the salt on top of the flour so it does not come in contact with the yeast. Lastly add the vegetable oil.
2. Mix the ingredients with a wooden spoon until blended.
3. Turn the dough onto a floured work surface to knead, using the reserved flour, until the dough no longer sticks to your hands. This should take 3-5 minutes in total.
4. Place dough in bowl and cover with plastic wrap. Let it rise for 1 hour.
5. Roll out the naan on a floured work surface. It will deflate as you start handling it.
6. Cut it into 6-8 pieces; no pre-shaping necessary. Flatten each piece with a rolling pin to about 8-9" across and 1/4" thick.
7. Put in pan, one at a time, on high heat with no butter or oil. It will take about 90 seconds on each side; the dough will start to bubble and blister.
8. Baste with melted butter and sprinkle with sea salt to serve.
9. Roll out the next piece while it cooks, and repeat until all the pieces are done.
6 scallions
3-4 garlic cloves
2 tbsp vegetable oil
200g tomatoes, chopped
2 tbsp curry powder
1 tsp ground ginger
400g boneless, skinless chicken thighs, cut into 1" pieces
100ml Greek yogurt
salt and pepper
cooked rice to serve over
Directions:
1. Thinly slice the scallions, leaving a handful of the green parts for garnish. Peel and chop the garlic.
2. Heat the oil in a large pan over medium heat and cook the onions and garlic for a few minutes. Add the tomatoes, curry powder, ginger, and cook for 3-4 minutes. If the pan gets dry, add some water to ensure the spices don't burn.
3. Add the chicken and cook for 5 minutes. Make sure all the chicken is coated and is starting to brown.
4. Add 1 cup (250 ml) of water and bring to a boil. Reduce heat to medium-low and cook for 15-20 minutes, or until the chicken is cooked through with no sign of pink juices in the middle of the pieces. 5. At this point you can prepare the rice (my rice cooker takes a while so I actually start it before I star the curry) and/or cook the naan.
5. When the everything is ready and the chicken is cooked, take the curry off the heat. Stir in the yogurt and season with salt and pepper. Serve the curry over rice with a drizzle of yogurt and the naan bread.
I made the dough earlier in the afternoon so it had time to rise. As it got closer to dinnertime, I set the rice to cook in our rice cooker and started on the prep for the curry. As the curry was left to cook for the last 15-20 minutes, I cooked the naan and everything came together perfectly.
Naan
Ingredients:3/4 cup warm water
1/2 cup yogurt
2-1/4 tsp yeast
2-1/2 cups flour
1/2 tsp salt
2 tbsp vegetable oil
Directions:
1. Add the first three ingredients to a large bowl in order. Next add the flour, reserving 1/4 to 1/2 cup to use when you knead the dough. Add the salt on top of the flour so it does not come in contact with the yeast. Lastly add the vegetable oil.
2. Mix the ingredients with a wooden spoon until blended.
3. Turn the dough onto a floured work surface to knead, using the reserved flour, until the dough no longer sticks to your hands. This should take 3-5 minutes in total.
4. Place dough in bowl and cover with plastic wrap. Let it rise for 1 hour.
5. Roll out the naan on a floured work surface. It will deflate as you start handling it.
6. Cut it into 6-8 pieces; no pre-shaping necessary. Flatten each piece with a rolling pin to about 8-9" across and 1/4" thick.
7. Put in pan, one at a time, on high heat with no butter or oil. It will take about 90 seconds on each side; the dough will start to bubble and blister.
8. Baste with melted butter and sprinkle with sea salt to serve.
9. Roll out the next piece while it cooks, and repeat until all the pieces are done.
Chicken Curry
Ingredients:6 scallions
3-4 garlic cloves
2 tbsp vegetable oil
200g tomatoes, chopped
2 tbsp curry powder
1 tsp ground ginger
400g boneless, skinless chicken thighs, cut into 1" pieces
100ml Greek yogurt
salt and pepper
cooked rice to serve over
Directions:
1. Thinly slice the scallions, leaving a handful of the green parts for garnish. Peel and chop the garlic.
2. Heat the oil in a large pan over medium heat and cook the onions and garlic for a few minutes. Add the tomatoes, curry powder, ginger, and cook for 3-4 minutes. If the pan gets dry, add some water to ensure the spices don't burn.
3. Add the chicken and cook for 5 minutes. Make sure all the chicken is coated and is starting to brown.
4. Add 1 cup (250 ml) of water and bring to a boil. Reduce heat to medium-low and cook for 15-20 minutes, or until the chicken is cooked through with no sign of pink juices in the middle of the pieces. 5. At this point you can prepare the rice (my rice cooker takes a while so I actually start it before I star the curry) and/or cook the naan.
5. When the everything is ready and the chicken is cooked, take the curry off the heat. Stir in the yogurt and season with salt and pepper. Serve the curry over rice with a drizzle of yogurt and the naan bread.
Saturday, June 17, 2017
Smarties Cookies
This cookie recipe comes together pretty easily and makes about 2-2.5 dozen cookies (depending on your size). You can substitute the Smarties for chocolate chips if you like.
Ingredients:
1-1/2 cups Smarties
1 cup butter, softened
1-1/2 cups packed brown sugar
2 tsp vanilla extract
2 eggs
2-1/4 cups all-purpose flour
1/4 tsp salt
1/2 tsp baking powder
Directions:
1. Preheat oven to 375F. Grease a large baking sheet, or line it with parchment paper.
2. In a large bowl beat butter and brown sugar with electric mixer until creamy. Beat in vanilla and eggs. Beat in flour, baking powder, and salt.
3. Drop by rounded tablespoons on to baking sheet, about 2-inches apart. Flatten cookies slightly and press 4-5 Smarties into the top of each.
4. Bake for 10-12 minutes, or until edges are lightly golden brown but center is still soft. Cool in pan for 5 minutes before removing them to a rack to cool completely.
5. Cookies can be stored in an airtight bag or container for up to one week.
Ingredients:
1-1/2 cups Smarties
1 cup butter, softened
1-1/2 cups packed brown sugar
2 tsp vanilla extract
2 eggs
2-1/4 cups all-purpose flour
1/4 tsp salt
1/2 tsp baking powder
Directions:
1. Preheat oven to 375F. Grease a large baking sheet, or line it with parchment paper.
2. In a large bowl beat butter and brown sugar with electric mixer until creamy. Beat in vanilla and eggs. Beat in flour, baking powder, and salt.
3. Drop by rounded tablespoons on to baking sheet, about 2-inches apart. Flatten cookies slightly and press 4-5 Smarties into the top of each.
4. Bake for 10-12 minutes, or until edges are lightly golden brown but center is still soft. Cool in pan for 5 minutes before removing them to a rack to cool completely.
5. Cookies can be stored in an airtight bag or container for up to one week.
Tuesday, February 7, 2017
Tahini Cookies
I remember seeing a recipe for Tahini Cookies once. The writer said that it was a great alternative to peanut butter cookies. It looked easy enough and the reviews were good, so I went out to buy tahini. Of course life got in the way and the tahini sat in my cupboard for awhile.
Today was a snow day so I decided to bake cookies with my eldest while the baby napped. I thought about those tahini cookies, but couldn't remember if I had saved that recipe so I looked for a new one. This one had a lot a great comments and very few ingredients - all great things when I didn't know how much time I'd have before the baby woke up. (Original recipe: http://sweetpotatosoul.com/2014/12/life-changing-tahini-cookies.html)
These cookies came together really easily - perfect for little hands! And the batter itself is delicious to eat - and safe since there's no raw egg. This recipe is nut-free, dairy-free and egg-free, and also vegan!
Ingredients:
1 cup tahini
1/4 cup maple syrup
1/4 cup honey
2 tsp cinnamon
1.5 cups rolled oats
1.5 tsp vanilla
1 tsp salt
Directions:
1. Mix the tahini, maple syrup, honey, cinnamon, vanilla and salt until well combined.
2. Add rolled oats and stir to combine.
3. Scoop out some dough into your hands and roll into a ball. Place onto a parchment lined baking sheet and flatten slightly. Repeat with remaining batter.
4. Bake in a preheated 350Ff oven for 10 minutes.
5. Allow to cool for 10 minutes before serving.
Makes approximately 16 cookies.
Try adding chopped walnuts or chocolate chips for added flavour!
Today was a snow day so I decided to bake cookies with my eldest while the baby napped. I thought about those tahini cookies, but couldn't remember if I had saved that recipe so I looked for a new one. This one had a lot a great comments and very few ingredients - all great things when I didn't know how much time I'd have before the baby woke up. (Original recipe: http://sweetpotatosoul.com/2014/12/life-changing-tahini-cookies.html)
These cookies came together really easily - perfect for little hands! And the batter itself is delicious to eat - and safe since there's no raw egg. This recipe is nut-free, dairy-free and egg-free, and also vegan!
Ingredients:
1 cup tahini
1/4 cup maple syrup
1/4 cup honey
2 tsp cinnamon
1.5 cups rolled oats
1.5 tsp vanilla
1 tsp salt
Directions:
1. Mix the tahini, maple syrup, honey, cinnamon, vanilla and salt until well combined.
2. Add rolled oats and stir to combine.
3. Scoop out some dough into your hands and roll into a ball. Place onto a parchment lined baking sheet and flatten slightly. Repeat with remaining batter.
4. Bake in a preheated 350Ff oven for 10 minutes.
5. Allow to cool for 10 minutes before serving.
Makes approximately 16 cookies.
Try adding chopped walnuts or chocolate chips for added flavour!
Tuesday, July 26, 2016
Slow-Cooker Soy-Braised Chicken
As I mentioned in my previous post, I've been trying to find easy slow-cooker recipes. Today I wanted to utilize some chicken breasts that I had and some other ingredients that I don't use too often when cooking dinner.
The results were pretty good. I'd probably use chicken thighs instead next time as the white meat does tend to get drier. I would also reduce the amount of soy sauce I used as I found that flavour quite strong.
Ingredients:
2 medium onions, sliced
4 garlic cloves, smashed
1/3 cup apple cider vinegar
1/3 cup (low-sodium) soy sauce
1 tbsp brown sugar
1 bay leaf
1/4 tsp black pepper
1.5-2lbs skinless, boneless chicken
1 tsp paprika
1 large head bok choy and/or 2-3 handfuls of kale or spinach, cut into 1" strips
Directions:
1. Combine onions, garlic, vinegar, soy sauce, brown sugar, bay leaf and black pepper. Place the chicken on top and sprinkle with paprika.
2. Cook on high for 4-5 hours (or on low for 7-8 hours) until the chicken and onions are tender.
3. Ten minutes before serving, make sure the slow cooker setting is high. Gently fold in the bok choy/spinach/kale and cook, covered, until tender (at least 5 minutes).
4. Serve over rice.
The results were pretty good. I'd probably use chicken thighs instead next time as the white meat does tend to get drier. I would also reduce the amount of soy sauce I used as I found that flavour quite strong.
Ingredients:
2 medium onions, sliced
4 garlic cloves, smashed
1/3 cup apple cider vinegar
1/3 cup (low-sodium) soy sauce
1 tbsp brown sugar
1 bay leaf
1/4 tsp black pepper
1.5-2lbs skinless, boneless chicken
1 tsp paprika
1 large head bok choy and/or 2-3 handfuls of kale or spinach, cut into 1" strips
Directions:
1. Combine onions, garlic, vinegar, soy sauce, brown sugar, bay leaf and black pepper. Place the chicken on top and sprinkle with paprika.
2. Cook on high for 4-5 hours (or on low for 7-8 hours) until the chicken and onions are tender.
3. Ten minutes before serving, make sure the slow cooker setting is high. Gently fold in the bok choy/spinach/kale and cook, covered, until tender (at least 5 minutes).
4. Serve over rice.
Labels:
apple cider vinegar,
asian,
chicken,
dinner,
easy,
quick,
slow cooker,
soy
Tuesday, July 19, 2016
Slow-cooker Chicken Chilli Tacos
I've been on the search for recipes that are quick and easy and utilize a slow-cooker. With a new baby, it's hard sometimes to spend a lot of time prepping and cooking meals. And since we are on a reduced income for the next year, eating out is not always the best option!
I came across this recipe by chance and decided to give it a try. It turned out really well and makes a great filling for tacos or even quesadillas. We even used it to dip nacho chips in with salsa. The chicken has quite a bit of flavour!
Ingredients:
2 lb. boneless, skinless chicken thighs
4 cloves garlic, minced
1 cup salsa, plus more for serving
1 tbsp chilli powder
To fill your tacos:
taco shells or soft tortillas
1 cup grated cheese (use your favourite or a mix like cheddar, mozzarella, Monterey Jack, etc.)
fresh cilantro
sour cream
Directions:
1. Combine chicken, garlic, salsa and chilli powder in slow cooker. Cover and cook on high for 4 hours (or 8 hours on low).
2. When chicken is ready, remove it from the slow cooker and place in a bowl or on a plate. Shred the chicken and combine with juices from slow cooker.
3. Fill your tacos/tortillas with shredded chicken, cheese, salsa, sour cream and your other favourite toppings.
Another way: These are great to make as quesadillas. Warm up your tortilla in a frying pan, flip it over and add the meat, cheese and other toppings. Fold the tortilla over or cover with another one and flip to heat through.
I came across this recipe by chance and decided to give it a try. It turned out really well and makes a great filling for tacos or even quesadillas. We even used it to dip nacho chips in with salsa. The chicken has quite a bit of flavour!
Ingredients:
2 lb. boneless, skinless chicken thighs
4 cloves garlic, minced
1 cup salsa, plus more for serving
1 tbsp chilli powder
To fill your tacos:
taco shells or soft tortillas
1 cup grated cheese (use your favourite or a mix like cheddar, mozzarella, Monterey Jack, etc.)
fresh cilantro
sour cream
Directions:
1. Combine chicken, garlic, salsa and chilli powder in slow cooker. Cover and cook on high for 4 hours (or 8 hours on low).
2. When chicken is ready, remove it from the slow cooker and place in a bowl or on a plate. Shred the chicken and combine with juices from slow cooker.
3. Fill your tacos/tortillas with shredded chicken, cheese, salsa, sour cream and your other favourite toppings.
Another way: These are great to make as quesadillas. Warm up your tortilla in a frying pan, flip it over and add the meat, cheese and other toppings. Fold the tortilla over or cover with another one and flip to heat through.
Labels:
chicken,
dinner,
easy,
quesadillas,
quick,
salsa,
shredded,
slow cooker,
tacos
Wednesday, June 15, 2016
Slow Cooker Chicken Legs
Tonight's dinner was a team effort! It's hard being at home with an 8-week old and trying to make dinner. I had these chicken legs in the fridge that I have been wanting to cook for a few days now but dinner time almost lines up exactly with baby's witching hour. This means that I don't have much time for prep. I searched for a quick and easy slow cooker recipe and found several for chicken legs - some more complicated than others. The one that I settled one seemed quite simple and adaptable with the ingredients I had in my house. I got this in the slow cooker mid-afternoon so it'd be ready for dinner time. When my husband came home he got some potatoes in the Acti-fry and we were off for a fairly easy dinner that had no leftovers. And on top of it all - hubby said it was the best chicken I've made ever (and I make a lot of chicken)!
Ingredients:
8-9 chicken legs (about 800-900g)
1/2 cup brown sugar
1-1/2 tbsp seasoning blend like Adobo (or another one you prefer)
1/2 tbsp paprika
1/2 tbsp cayenne pepper (completely optional - it adds a nice kick, but wasn't a hit with the kid)
Directions:
1. Spray the inside of your slow cooker with non-stick spray. (I used a large oval one that fit all the chicken in a single layer.)
2. Mix together the brown sugar and seasonings in a small bowl.
3. One by one, place a chicken leg in the seasoning bowl and sprinkle with the mix. Make sure the chicken is completely covered, rubbing the mix in well. Place the chicken (ideally) in a single layer in the bottom of the slow cooker. Repeat with each leg.
4. Cover and set to High. Cook 3-4 hours, or until the juices run clear.
Ingredients:
8-9 chicken legs (about 800-900g)
1/2 cup brown sugar
1-1/2 tbsp seasoning blend like Adobo (or another one you prefer)
1/2 tbsp paprika
1/2 tbsp cayenne pepper (completely optional - it adds a nice kick, but wasn't a hit with the kid)
Directions:
1. Spray the inside of your slow cooker with non-stick spray. (I used a large oval one that fit all the chicken in a single layer.)
2. Mix together the brown sugar and seasonings in a small bowl.
3. One by one, place a chicken leg in the seasoning bowl and sprinkle with the mix. Make sure the chicken is completely covered, rubbing the mix in well. Place the chicken (ideally) in a single layer in the bottom of the slow cooker. Repeat with each leg.
4. Cover and set to High. Cook 3-4 hours, or until the juices run clear.
Labels:
adobo,
brown sugar,
chicken,
chicken legs,
easy,
quick,
seasoning,
slow cooker
Tuesday, April 19, 2016
Sautéed Veggies & Pork Cutlets
Today I stopped by the grocery store and just browsed around waiting for some type of inspiration for dinner. I saw some fast frying pork cutlets and knew right away I could use that, so I made my way to the veggies and picked up some zucchini and spinach. I was going to pick up some broccoli as well, but remembered that I had some frozen at home so left them behind. I had a good idea of what I wanted to make for dinner! The problem for the blog is that I didn't really measure my ingredients and just eye-balled it.
Sautéed Veggies

Ingredients:
1 onion, thinly diced
2 cloves garlic, minced
2 cups broccoli florets (or broccoli cut into small florets)
2 small zucchini, halved and then sliced
1/2 cup spinach
2 tbsp olive oil
salt and pepper to taste
Parmesan cheese
Directions:
1. If using fresh broccoli, cook in boiling water for about 3 minutes until tender. If using frozen broccoli, follow instructions (ie: microwave with water for 3-5 minutes or boil until tender).
2. Heat oil over medium-high heat in a large pan. Add onion and sauté for 1-2 minutes until softened; add garlic and cook another minute until fragrant.
3. Add zucchini, tossing to coat, and cook for 2-3 minutes until tender. Season with salt. Add broccoli and cook for another 1-2 minutes.
4. Tear the spinach in half or thirds and add to the pan. Cook, tossing to combine, until the spinach is wilted. Season with salt and pepper.
5. Remove from heat and grate Parmesan cheese over top.
Breaded Pork Cutlets
This is a pretty easy thing to bring together. All you need is some thin pork cutlets, bread crumbs, an egg and oil for frying.

1. Beat an egg and place the cutlets in the egg to coat. Drip off any excess.
2. Coat the cutlet in your favourite bread crumb mix (I like Italian breadcrumbs), patting down to make sure the crumbs stick and the cutlet is fully coated.
3. When you are ready to fry, cover the bottom of a pan with enough oil for frying. Heat over medium-high heat. When the oil is hot, place the cutlets (in batches) in the oil. Don't overcrowd the pan as it will lower the temperature.
4. Fry the cutlet about 4 minutes on each side, until it is golden brown, turning once. Remove from oil and place on paper towel-lined plate to absorb excess oil. Fry the remaining cutlets.
Sautéed Veggies

Ingredients:
1 onion, thinly diced
2 cloves garlic, minced
2 cups broccoli florets (or broccoli cut into small florets)
2 small zucchini, halved and then sliced
1/2 cup spinach
2 tbsp olive oil
salt and pepper to taste
Parmesan cheese
Directions:
1. If using fresh broccoli, cook in boiling water for about 3 minutes until tender. If using frozen broccoli, follow instructions (ie: microwave with water for 3-5 minutes or boil until tender).
2. Heat oil over medium-high heat in a large pan. Add onion and sauté for 1-2 minutes until softened; add garlic and cook another minute until fragrant.
3. Add zucchini, tossing to coat, and cook for 2-3 minutes until tender. Season with salt. Add broccoli and cook for another 1-2 minutes.
4. Tear the spinach in half or thirds and add to the pan. Cook, tossing to combine, until the spinach is wilted. Season with salt and pepper.
5. Remove from heat and grate Parmesan cheese over top.
Breaded Pork Cutlets
This is a pretty easy thing to bring together. All you need is some thin pork cutlets, bread crumbs, an egg and oil for frying.

1. Beat an egg and place the cutlets in the egg to coat. Drip off any excess.
2. Coat the cutlet in your favourite bread crumb mix (I like Italian breadcrumbs), patting down to make sure the crumbs stick and the cutlet is fully coated.
3. When you are ready to fry, cover the bottom of a pan with enough oil for frying. Heat over medium-high heat. When the oil is hot, place the cutlets (in batches) in the oil. Don't overcrowd the pan as it will lower the temperature.
4. Fry the cutlet about 4 minutes on each side, until it is golden brown, turning once. Remove from oil and place on paper towel-lined plate to absorb excess oil. Fry the remaining cutlets.
Thursday, February 25, 2016
Chocolate Berry Muffins
My little one has been asking if we could bake some chocolate berry muffins, so this evening that is exactly what we did. This recipe is so easy to make and comes together very quickly! You get very full muffins that bake up perfectly and taste amazing!
Ingredients:
2 cups all-purpose flour
1/2 cup sugar
1 tbsp baking powder
1/4 tsp salt
1 large egg
1 cup buttermilk ***
1/4 cup oil
1 cup berries (I used a mix of frozen blueberries, raspberries and blackberries)
1 cup white/chocolate chips (I used half milk chocolate, half white chocolate)
Directions:
1. Measure first 4 ingredients (dry ingredients) into a large bowl. Stir. Make a well in the centre.
2. Combine the next 3 ingredients (wet ingredients) in a small bowl. Add to well.
3. Add the berries and chocolate chips. Stir gently until just moistened.
4. Fill 12 paper-lined muffin cups at least 3/4 full. (I was able to fill the liners almost right to the top.) Bake in 375F oven for about 24 minutes until toothpick inserted comes out clean.
5. Let stand in pan for 5 minutes before removing to wire rack to cool.
***If you don't have buttermilk, you can use soured milk. To do this, put 1tbsp of white vinegar or lemon juice in a 1 cup measuring cup. Add enough milk to make 1 cup. Stir and let stand at least 1 minute.***
Ingredients:
2 cups all-purpose flour
1/2 cup sugar
1 tbsp baking powder
1/4 tsp salt
1 large egg
1 cup buttermilk ***
1/4 cup oil
1 cup berries (I used a mix of frozen blueberries, raspberries and blackberries)
1 cup white/chocolate chips (I used half milk chocolate, half white chocolate)
![]() |
| The yummy looking batter. |
Directions:
1. Measure first 4 ingredients (dry ingredients) into a large bowl. Stir. Make a well in the centre.
2. Combine the next 3 ingredients (wet ingredients) in a small bowl. Add to well.
![]() |
| Muffin liners filled right to the top for a full looking muffin with a rounded top. |
3. Add the berries and chocolate chips. Stir gently until just moistened.
4. Fill 12 paper-lined muffin cups at least 3/4 full. (I was able to fill the liners almost right to the top.) Bake in 375F oven for about 24 minutes until toothpick inserted comes out clean.
5. Let stand in pan for 5 minutes before removing to wire rack to cool.
***If you don't have buttermilk, you can use soured milk. To do this, put 1tbsp of white vinegar or lemon juice in a 1 cup measuring cup. Add enough milk to make 1 cup. Stir and let stand at least 1 minute.***
![]() |
| The baked muffins cooling in the muffin pan for 5 minutes. They cooked up perfectly in 24 minutes! |
![]() |
| The final product cooling before we can taste test. They are quite soft when warm, so patience is oh so important - even though they smell so delicious! |
Saturday, January 23, 2016
Pretzels!
My little one has been asking to make pretzels all week. I'm not sure where the idea came from, but it's been a persistent request. So today we spent the afternoon making pretzels. While the recipe is easy enough, it does take time. I spent some time trying to find a good recipe, and a lot of them seemed to follow Alton Brown's recipe on www.foodnetwork.com. So that is the recipe we used!
Ingredients:
![]() |
| Nice and golden on the outside, so soft on the inside. |
1-1/2 cups warm water
1 tbsp sugar
2 tsp kosher salt
2-1/4 tsp active dry yeast
3 to 3-1/2 cups all-purpose flour
1/4 cup unsalted butter, melted
vegetable oil
10 cups water
2/3 cups baking soda
1 large egg beaten with 1 tbsp water
salt
1/4 cup unsalted butter, melted (to brush the baked pretzels)
Directions:
1. Combine water, sugar, and kosher salt in the bowl of a stand mixer and sprinkle the yeast on top. Allow it to sit for 5 minutes or until the mixture begins to foam.
2. Add the flour (start with about 3 cups and add more if necessary - ie: the dough is still sticky) and butter and mix on low speed using the dough hook attachment until well combined. Change to medium speed and knead until the dough is smooth and pulls away from the side of the bowl, about 5 minutes. Remove dough from the bowl, oil it well with vegetable oil and return the dough to the bowl. Cover with plastic wrap and sit in a warm place to allow it to double in size, about 50-55 minutes.
3. Line a large baking sheet with parchment paper that is lightly oiled, set aside. Preheat oven to 450F.
4. Bring 10 cups of water and the baking soda to a rolling boil in a medium saucepan.
![]() |
| The shaped dough ready to be boiled. |
6. Place the pretzels into the boiling water, one at a time, for 30 seconds. Make sure the entire do ugh is immersed in water. Remove from the water using a flat spatula. Return to the baking sheet and brush the top with the egg wash. Sprinkle with salt.
![]() |
| The final product, all golden and delicious! |
8. Serve warm. Makes 16 pretzels.
**You can divide the entire dough into 8 equal pieces for larger pretzels.**
While we may need some more practice on our shaping of pretzels, the overall taste was really quite good, especially warm out of the oven. My husband loved it with nutella on top, cut open with seasoned cherry tomatoes on the inside. I preferred it all on its own, but I've been thinking about what kind of dipping sauce I can make next time.
In fact, next time I think I might add some parmesan, oregano, garlic powder and basil in the dough to give it more of an Italian/pizza flavour and pair it with a marinara sauce. What do you think?
Wednesday, August 26, 2015
AABCD (Applesauce-Almond-Brown Sugar Cookie Drops)
The cooler temperature and drizzling rain made today a great day to bake with my little one.
We decided on cookies so I looked for an easy recipe that didn't require any chilling time. The result is my "AABCD" (Applesauce, Almond Brown Sugar Cookie Drops). Cheesy I know, but maybe it'll stick in your mind.....
This recipe makes about 2 dozen cookies and can easily be doubled. The result is a really light cookie that really tastes delicious.
Ingredients:
1 cup packed brown sugar
1/2 cup butter, softened
1/2 cup applesauce
1 egg
1-3/4 cup all-purpose flour
1/2 tsp baking soda
1/4 tsp salt
1-1/2 tsp cinnamon
1 cup almonds, finely chopped (optional)
Directions:
1. Preheat oven to 400F.
2. Beat brown sugar, butter, applesauce and egg in the stand mixer on medium speed.
3. Meanwhile in a small bowl combine flour, baking soda, salt and cinnamon. Add it to the wet ingredients and stir with a spatula.
4. Add in the almonds (I ground them up in my food chopper) and stir again.
5. Drop dough by the tablespoonful about 2" apart on a parchment paper lined cookie sheet. Bake 9-11 minutes or until almost no indentation is left when touched in the centre. Cool for a couple of minutes then remove to a cookie sheet to continue cooling.
We decided on cookies so I looked for an easy recipe that didn't require any chilling time. The result is my "AABCD" (Applesauce, Almond Brown Sugar Cookie Drops). Cheesy I know, but maybe it'll stick in your mind.....
This recipe makes about 2 dozen cookies and can easily be doubled. The result is a really light cookie that really tastes delicious.
Ingredients:
1 cup packed brown sugar
1/2 cup butter, softened
1/2 cup applesauce
1 egg
1-3/4 cup all-purpose flour
1/2 tsp baking soda
1/4 tsp salt
1-1/2 tsp cinnamon
1 cup almonds, finely chopped (optional)
Directions:
1. Preheat oven to 400F.
2. Beat brown sugar, butter, applesauce and egg in the stand mixer on medium speed.
3. Meanwhile in a small bowl combine flour, baking soda, salt and cinnamon. Add it to the wet ingredients and stir with a spatula.
4. Add in the almonds (I ground them up in my food chopper) and stir again.
5. Drop dough by the tablespoonful about 2" apart on a parchment paper lined cookie sheet. Bake 9-11 minutes or until almost no indentation is left when touched in the centre. Cool for a couple of minutes then remove to a cookie sheet to continue cooling.
Labels:
almond,
applesauce,
brown sugar,
cinnamon,
cookie,
drops,
easy,
quick
Tuesday, August 11, 2015
Yummy Pancakes!
There's nothing worse than promising your daughter pancakes on a rushed morning to discover you are out of pancake mix. That's what happened this morning, so I had to whip up an easy "from scratch" pancake recipe. This recipe came together quickly and was really quite light and fluffy. It just soaked up the maple syrup and was absolutely delicious!
For a dairy-free alternative, use unsweetened (vanilla) almond milk and oil (vegetable, canola or melted coconut) instead of milk and butter.
Ingredients:
1-1/2 cups all-purpose flour
3-1/2 tsp baking powder
1 tsp salt
1 tbsp white sugar
1-1/4 cups milk
1 egg
3 tbsp butter, melted
1 tsp vanilla
Directions:
1. In a large bowl, sift together the flour, baking powder, salt and sugar. Make a well in the centre and pour in the milk, egg and butter; mix until smooth.
2. Heat a lightly oiled griddle or frying pan over medium-high heat. Scoop the batter onto the griddle (approximately 1/4 cup each pancake). Brown on both sides and serve while it's ot.
Feel free to add in your favourite mix-ins: chocolate chips, cinnamon, berries, etc.
Makes approximately 10-12 pancakes.
For a dairy-free alternative, use unsweetened (vanilla) almond milk and oil (vegetable, canola or melted coconut) instead of milk and butter.
Ingredients:
1-1/2 cups all-purpose flour
3-1/2 tsp baking powder
1 tsp salt
1 tbsp white sugar
1-1/4 cups milk
1 egg
3 tbsp butter, melted
1 tsp vanilla
Directions:
1. In a large bowl, sift together the flour, baking powder, salt and sugar. Make a well in the centre and pour in the milk, egg and butter; mix until smooth.
2. Heat a lightly oiled griddle or frying pan over medium-high heat. Scoop the batter onto the griddle (approximately 1/4 cup each pancake). Brown on both sides and serve while it's ot.
Feel free to add in your favourite mix-ins: chocolate chips, cinnamon, berries, etc.
Makes approximately 10-12 pancakes.
Labels:
almond milk,
breakfast,
Dairy free,
easy,
eggs,
fast,
milk,
pancake,
pancakes,
scratch
Friday, March 6, 2015
Spinach & Artichoke Spaghetti Squash
We take turns at work bringing in munchies on Fridays. This week was my turn and I wanted something that was meatless (as it would be a Friday in Lent) and gluten free, as well as easy to make as my Thursday night was turning out to be quite busy.
I found the perfect recipe that had all things I love in it, and it tasted so good that everyone was interested in the recipe - there were no leftovers!
Ingredients:
1 spaghetti squash, seeded (about 2 lbs)
3 tsp olive oil
1 onion, chopped
salt and pepper
3 cloves garlic, minced
1/2 cup (light) sour cream
1/2 pkg (250g) cream cheese
1 cup grated Parmesan cheese, divided
3 cups packed baby spinach (about 3 large handfuls)
1 can artichoke hearts, drained and chopped
3/4 - 1 cup marble cheese, grated
Directions:
1. Place the spaghetti squash in a microwave safe dish, cut side up. Fill up the dish halfway with water, cover with plastic wrap and microwave about 10 minutes, until soft. Remove and cool slightly. (Alternately, you can roast the squash in a 350F oven cut side down for about 40 minutes. Brush the cut sides with olive oil or butter before roasting).
2. Meanwhile, heat olive oil over medium heat in a pan. Add the onion and cook until tender, about 5-8 minutes. Season with salt and pepper, then add the garlic and cook until fragrant, about another minute. Add in sour cream, cream cheese and 1/2 cup Parmesan. Stir until the cream cheese has melted and the mixture is smooth. Stir in the spinach and artichoke hearts and cook until the spinach has wilted.
3. Scrape up the strings of the squash with a fork and add it to the pan. Stir together to combine.
4. Pour into a rectangular dish. Top with the grated cheese and remaining Parmesan cheese.
5. Place under the broiler for 2-3 minutes, or until the cheese is melted and bubbly.
I let it cool slightly and covered my dish, brought it to work the next day and people microwaved it as they needed. It turned out so yummy! And it was really quite filling.
![]() |
| The final product just before broiling the cheese. |
Labels:
artichoke,
cheese,
creamy,
easy,
gluten free,
quick,
spaghetti squash,
spinach,
vegetarian
Sunday, June 8, 2014
Puff Pancakes
I think the more I cook / bake - I realize I really truly love breakfast food. There's just something about the weekend and having time - I'm not in a rush to get to work and I feel more relaxed. Clean up is rarely as big as dinner and my daughter can really help me get breakfast together.
This morning we made Puff Pancakes. I saw this recipe while getting out a tried and true recipe and vowed to make it the next morning (meaning THIS morning). It was so simple and a great recipe to include a toddler on.
What's great about this recipe is that it uses one bowl and two pans - and it bakes in the oven. So while it is baking, you can clean up or get ready for the sit-down.
Ingredients:
3 eggs
1/2 cup all-purpose flour
1/2 cup whole milk
2 tbsp melted butter
1/4 tsp salt
freshly grated lemon zest (from most of a lemon if you have it) as well as a few tbsp of the juice
Icing sugar (for dusting)
Directions:
This morning we made Puff Pancakes. I saw this recipe while getting out a tried and true recipe and vowed to make it the next morning (meaning THIS morning). It was so simple and a great recipe to include a toddler on.
What's great about this recipe is that it uses one bowl and two pans - and it bakes in the oven. So while it is baking, you can clean up or get ready for the sit-down.
Ingredients:
3 eggs
1/2 cup all-purpose flour
1/2 cup whole milk
2 tbsp melted butter
1/4 tsp salt
freshly grated lemon zest (from most of a lemon if you have it) as well as a few tbsp of the juice
Icing sugar (for dusting)
Directions:
- Preheat oven to 400F. Generously butter two 8-9" pie pans.
- Beat the eggs in a mixing bowl on low speed for a few minutes. Add the flour, 2 tbsp at a time, beating well after each addition. Beat only until smooth. Beat in the milk, butter, salt and lemon zest/juice. (The more lemon you add, the more lemony it tastes, so I always add a bit more!)
- Evenly divided the batter between the two pie pans, evenly pouring it throughout.
- Bake for 10 minutes. Reduce the oven temperature to 350 and bake for another 5 minutes.
- Remove from the oven and sprinkle with icing sugar. Serve immediately.
- Top with whatever you like (syrup, jam, Nutella, cinnamon-sugar, etc).
My daughter loves syrup and always says "more syrup." She would drink the syrup rather than eat the food. We finished our syrup yesterday so today's puff pancake had to have a different topping: we used homemade Canadian wild blueberry jam and it was just perfect! My husband put Nutella - another great choice. The lemon flavour with the pancake was so good, it reminded me of the lemon-sugar crepes I had in Paris! Speaking of crepes, this pancake was almost like a crepe but a little bit thicker. It's the perfect in-between of a pancake and crepe - for those days where you can't decide which one you'd like!
I cut each pancake into 4 large slices and it served my family of 3 just fine. It could easily have fed 4; we just liked it too much!
By the way - it was so much fun for my daughter to see how it puffed up in the oven! And of course we were just so excited to eat them that I completely forgot to take a picture of at least one all dressed up with its toppings!
![]() |
| Both pancakes right out of the oven. |
![]() |
| Close-up of one. |
![]() |
| Sprinkled with icing sugar (my daughter did the lower one!) |
![]() |
| Close up |
Thursday, April 25, 2013
Rice Cooker Mac n Cheese
We use our rice cooker quite a bit - so much so that my husband went out and bought a super-duper fancy one. We use it to make rice (obviously!) and quinoa mostly. When I heard that you could mac n cheese in a rice cooker, I had to try it! And I have to say it turned out quite nice. The cheese didn't melt as well as it should have, but I think that's because I only had fettuccine in my cupboard and it didn't allow enough room for the cheese to blend and melt.
Ingredients:
2 cups pasta
1.5 cups chicken stock
Salt
1 cup milk
1.5 cups grated cheese (I used cheddar, mozzarella and Swiss)
Directions:
1. Put the pasta and chicken stock in the rice cooker and season with salt. Set it to cook for about 15 minutes; most of the liquid will evaporate.
2. Add the milk and cheese and give it a stir. Let it cook for another 20 minutes or so. You may have to stir it once or twice in this time period.
(Each rice cooker is different so keep an eye on it. After about 10 minutes mine switched to the warm setting and the bottom was already getting crusty while there was still quite a bit of liquid. After another 5 minutes the liquid was gone and it was quite creamy.)
3. Serve. You can add some more grated cheese on top.
This served me and my husband with no leftovers.
Ingredients:
2 cups pasta
1.5 cups chicken stock
Salt
1 cup milk
1.5 cups grated cheese (I used cheddar, mozzarella and Swiss)
Directions:
1. Put the pasta and chicken stock in the rice cooker and season with salt. Set it to cook for about 15 minutes; most of the liquid will evaporate.
2. Add the milk and cheese and give it a stir. Let it cook for another 20 minutes or so. You may have to stir it once or twice in this time period.
(Each rice cooker is different so keep an eye on it. After about 10 minutes mine switched to the warm setting and the bottom was already getting crusty while there was still quite a bit of liquid. After another 5 minutes the liquid was gone and it was quite creamy.)
3. Serve. You can add some more grated cheese on top.
This served me and my husband with no leftovers.
Update: I've made this recipe several times since with macaroni and it definitely turns out much better! I've actually increased the grated cheese to 2 cups (and always use a mix of different cheeses) and also increased the milk to about 1-1/3. It will take a little longer to cook, but it definitely comes out creamier and cheesier.
Sunday, March 10, 2013
Sunday night pizza
It's been a long tradition in my family to have a big pasta lunch on a Sunday afternoon with the entire family (I mean my Nonna, Nonno, mom, Zias, Zios, etc.). And it isn't just pasta that we're having either: there's always meatballs or fatine, fagioli or eggplant, salad; basically there is a lot of food. So dinner is usually much more laid back and casual: homemade pizza. And by homemade I mean homemade dough, sauce, sausages or cappicolo, and then vegetables from the garden and sometimes even my grandfather's cheese too. Even when the family get togethers aren't everyone, pasta still is the lunch and pizza still is the dinner. The pizza always tastes a little different - depending on who made it: Nonno, Nonna or my mom - but it's always good. Everyone has their preference, but I would never choose one over the other because they really all are amazing!
In trying to learn how to make pizza like my elders, I soon realized that I too had to develop my own way. Mostly because neither my grandparents nor my mom measure while making dough ("It's more about the feeling of the dough..."). Plus they are often making two big trays of pizza that will feed almost 20 people!
I've played around with some different pizza dough recipes (the one below doesn't have to rest all day to rise) and added some of the tricks of the trade I've learned from my family. And I think my pizza always tastes a little different each time too. Today I'm going to share with you my most recent pizza endeavour: one with toppings similar to my family's and one that is my own creation that has become pretty popular with my husband, mom, and others. My grandfather will always choose a pizza with sauce (but not too much) over one without (unless it has anchovies on it!)
PIZZA DOUGH
2 1/4 tsp active dry yeast
1 tsp white sugar
1 cup warm water
2 1/2 cups flour
2 tbsp olive oil
1 tsp salt
1. In a medium bowl dissolve yeast and sugar in warm water. Let stand until creamy, about 10 minutes.
2. Stir in flour, salt and oil. Mix / knead until smooth. Place in a greased bowl and cover with a damp cloth or Saran wrap. Let rest for about an hour.
3. Turn dough onto a lightly floured surface and divide into 2 equal rounds. Pat or roll into a round. Grease two pizza pans with a piece of cold butter (this will give a nice golden color to your crust), then olive oil, then dust with coarse cornmeal (this will give a nice crunch). Transfer dough to the pan. Drizzle olive oil on the top and rub it around so the dough is nice and greased. As you prepare your toppings the dough will rise a little bit more.
4. Spread your toppings and bake in a preheated 450F oven for about 20 minutes, or until the crust is nice and golden underneath and the toppings are cooked and delicious looking. Let it rest for a few minutes before cutting into it.
This recipe will make two round pizzas pictured below. The crust is between a thin and thick crust. If you only let it rise for a few minutes, you will probably get one pizza.
The great thing about pizza is you can put whatever you want on it and it will probably still taste amazing. This is a bit more of your common toppings.
TRADITIONAL TOPPINGS: sauce, onions, mushrooms, red peppers, tomatoes, minced garlic, mozzarella
Spread as much pizza sauce as you like on the crust. In a pinch you can use tomato paste thinned out with some water and even some seasonings. Or if you like a chunkier sauce, you can used a can of crushed tomatoes (drained of course; and it won't spread like a normal sauce). If you like garlic you can always take a crushed clove and rub it all over the dough first. If the sauce isn't seasoned, it's always nice to have some oregano and basil sprinkled on the dough. Add the toppings listed above. These are the common toppings used in my family. Red peppers always make an appearance as does my grandfather's cold cuts (prosciutto, cappicolo, salami, dried sausage). Drizzle some more olive oil over top of everything.
Bake the pizza in the oven till it is almost done. Add as much cheese as you like and pop it back in the oven till the cheese is melted and pizza is done. Keep in mind that when you do it this way, the sauce will dry up a little bit as the cheese isn't protecting it as much (although the oil will help a little), but the cheese will stay nice and gooey instead of getting hard and crusty.
My husband loves this pizza - the more sauce the better he always says!
2 handfuls baby spinach, roughly chopped
1/4 - 1/2 onion, thinly sliced
1 clove garlic, thinly sliced
Basil
Oregano
Thyme
Salt
Pepper
Olive oil
Feta cheese
Drizzle olive oil on top of the dough and spread it around. Sprinkle dough with salt, pepper, basil, oregano and thyme to your taste. You can also rub a crushed garlic clove after rubbing the oil to enhance the garlic flavor. Spread garlic, onions and spinach on pizza. Drizzle more olive oil over top. This is important so your toppings don't completely dry out. Crumble feta cheese over toppings. Bake in preheated 425F oven for about 15-20 mins until crust is cooked and golden brown and toppings are cooked.
I absolutely love this pizza, and have made it several times for company with good reviews!
In trying to learn how to make pizza like my elders, I soon realized that I too had to develop my own way. Mostly because neither my grandparents nor my mom measure while making dough ("It's more about the feeling of the dough..."). Plus they are often making two big trays of pizza that will feed almost 20 people!
I've played around with some different pizza dough recipes (the one below doesn't have to rest all day to rise) and added some of the tricks of the trade I've learned from my family. And I think my pizza always tastes a little different each time too. Today I'm going to share with you my most recent pizza endeavour: one with toppings similar to my family's and one that is my own creation that has become pretty popular with my husband, mom, and others. My grandfather will always choose a pizza with sauce (but not too much) over one without (unless it has anchovies on it!)
PIZZA DOUGH
2 1/4 tsp active dry yeast
1 tsp white sugar
1 cup warm water
2 1/2 cups flour
2 tbsp olive oil
1 tsp salt
1. In a medium bowl dissolve yeast and sugar in warm water. Let stand until creamy, about 10 minutes.
2. Stir in flour, salt and oil. Mix / knead until smooth. Place in a greased bowl and cover with a damp cloth or Saran wrap. Let rest for about an hour.
3. Turn dough onto a lightly floured surface and divide into 2 equal rounds. Pat or roll into a round. Grease two pizza pans with a piece of cold butter (this will give a nice golden color to your crust), then olive oil, then dust with coarse cornmeal (this will give a nice crunch). Transfer dough to the pan. Drizzle olive oil on the top and rub it around so the dough is nice and greased. As you prepare your toppings the dough will rise a little bit more.
4. Spread your toppings and bake in a preheated 450F oven for about 20 minutes, or until the crust is nice and golden underneath and the toppings are cooked and delicious looking. Let it rest for a few minutes before cutting into it.
This recipe will make two round pizzas pictured below. The crust is between a thin and thick crust. If you only let it rise for a few minutes, you will probably get one pizza.
The great thing about pizza is you can put whatever you want on it and it will probably still taste amazing. This is a bit more of your common toppings.
TRADITIONAL TOPPINGS: sauce, onions, mushrooms, red peppers, tomatoes, minced garlic, mozzarella
Spread as much pizza sauce as you like on the crust. In a pinch you can use tomato paste thinned out with some water and even some seasonings. Or if you like a chunkier sauce, you can used a can of crushed tomatoes (drained of course; and it won't spread like a normal sauce). If you like garlic you can always take a crushed clove and rub it all over the dough first. If the sauce isn't seasoned, it's always nice to have some oregano and basil sprinkled on the dough. Add the toppings listed above. These are the common toppings used in my family. Red peppers always make an appearance as does my grandfather's cold cuts (prosciutto, cappicolo, salami, dried sausage). Drizzle some more olive oil over top of everything.
Bake the pizza in the oven till it is almost done. Add as much cheese as you like and pop it back in the oven till the cheese is melted and pizza is done. Keep in mind that when you do it this way, the sauce will dry up a little bit as the cheese isn't protecting it as much (although the oil will help a little), but the cheese will stay nice and gooey instead of getting hard and crusty.
My husband loves this pizza - the more sauce the better he always says!
"GREEK" TOPPINGS: My spinach and feta pizza
2 handfuls baby spinach, roughly chopped
1/4 - 1/2 onion, thinly sliced
1 clove garlic, thinly sliced
Basil
Oregano
Thyme
Salt
Pepper
Olive oil
Feta cheese
Drizzle olive oil on top of the dough and spread it around. Sprinkle dough with salt, pepper, basil, oregano and thyme to your taste. You can also rub a crushed garlic clove after rubbing the oil to enhance the garlic flavor. Spread garlic, onions and spinach on pizza. Drizzle more olive oil over top. This is important so your toppings don't completely dry out. Crumble feta cheese over toppings. Bake in preheated 425F oven for about 15-20 mins until crust is cooked and golden brown and toppings are cooked.
I absolutely love this pizza, and have made it several times for company with good reviews!
Labels:
delicious,
dinner,
easy,
family,
feta,
Greek,
homemade,
Italian,
mozzarella,
Pizza dough,
spinach,
Sunday,
tomato sauce
Subscribe to:
Posts (Atom)