Thursday, January 11, 2024

Potato Leek Soup

 I love David Rocco and his recipes are so easy to make at home.  When he shared this recipe for Potato Leek Soup on his instagram, I went out and bought leeks and sage and had an amazing dinner that came together so quickly and easily.  This was a hit with everyone in the house, even the kids.  I toast some bread slices, rub some garlic on them and serve that on the side.  Delish!


Ingredients:

  • 4 potatoes, cubed
  • 1 large leek, white and green parts only, roughly chopped
  • 1 tbsp unsalted butter
  • 2 tbsp extra-virgin olive oil
  • 1 sprig sage
  • 6 cups vegetable (or chicken) broth
  • Balsamic vinegar to finish (optional)
  • salt (to taste)

Directions:

  1. Melt the butter over medium-high heat in a large pot.
  2. Add oil, sage, leek, salt.  Stir and cook for 2 minutes. 
  3. Add potatoes and mix all together. 
  4. Add broth and bring mixture to a boil, then reduce the heat and let it simmer for 20 minutes or until soft.
  5. Purée the soup using a hand-held immersion blender until smooth.
  6. Serve the soup in a bowl with a drizzle of balsamic.
  7. Enjoy!

Saturday, December 23, 2023

Grinch Themed Peanut Butter Blossoms

 I saw these cute cookies in a Facebook group I'm part of that turned Peanut Butter Blossoms into a cute green Grinch themed cookie with a little red heart. I had never heard of or tried these cookies before, but I thought "Why not?" and gave it a go.  They were creamy and tasty, but next time I will need to make them smaller.  My cookies were way too big and didn't look cute so much as a female body part! 


Ingredients:

  • 1 cup peanut butter
  • 1/2 cup butter
  • 1/2 cup sugar
  • 1/2 cup brown sugar
  • 1 egg
  • 3 tbsp milk
  • 1 tsp vanilla
  • 1-1/4 cup flour
  • 3/4 tsp baking powder
  • 1/4 tsp salt
  • additional granulated sugar
  • Hershey's kisses, unwrapped (about 35-40 of them)
  • Green food colouring
  • Red cookie icing (for the hearts)
Directions:

  1. In a small bowl combine flour, baking powder and salt.  Set aside.
  2. In a large bowl cream together peanut butter, butter and both sugars.  Once it is light and fluffy beat in the egg, milk and vanilla.  At this point I add in a few drops of green food colouring if I am turning them into Grinch cookies
  3. Add in the dry ingredients and combine.  Add in more green food colouring until the desired green is achieved,
  4. Heat oven to 375F.  Shape dough into 1-inc balls and roll in additional granulated sugar.  Place on ungreased cookie sheet, about 2 inches apart. 
  5. Bake 10-12 minutes or until the edges are slightly brown and the cookie begins to crack.
  6. Press 1 unwrapped Hershey Kiss in the center of each cookie.  Remove from cookie sheets to cooling rack.
  7. When cookies are completely cooled, draw a little red heart on each cookie using the red cookie icing. (I used the Betty Crocker brand.)


Saturday, December 16, 2023

"Un-Spritzed" Cookies

 This cookie is called "un-spritzed" because it takes the dough of a spritzer cookie and instead of pushing it through the cookie press, you simply roll and stamp or flatten with a fork.  It saves a little time and they look really pretty if you have nice cookie stamps!


Ingredients:

  • 1 cup butter, softened
  • 3/4 cup sugar
  • 1 egg
  • 2-1/4 cups flour
  • 1/2 tsp baking powder
  • dash salt
  • 1 tsp almond extract
Directions:

  1. Cream butter until light and fluffy; add sugar. 
  2. Add egg, unbeaten; beat well.
  3. Add dry ingredients and extract.
  4. Roll in balls and and place 1 inch apart on cookie sheet. Press down with stamp or fork.
  5. Put some coloured sugar or sprinkles on them.
  6. Bake in preheated 350F oven for 9-12 minutes until the bottoms just start to brown.
  7. Cool for a few minutes on tray before transferring to cooling rack.
    The cookies before they are sprinkled and baked. 


Tuesday, June 13, 2023

Cast Iron Peach Cobbler

 Last year my sister got me a LODGE cast-iron skillet and cookbook for my birthday.  She raved about her own cast iron skillet and how much they cook in it.  Even though I owned one, I didn't cook very often with it. I'd read that it may help with low iron which is something I struggle with and the cookbook had so many great ideas and even tips on how to cook with cast iron.  So I jumped in with both feet and have really enjoyed using it.  At some point in the last year I attempted a peach cobbler which turned out great, so tonight I wanted to make it again for dessert (I have some very ripe peaches in my kitchen!).  For some reason I couldn't remember the recipe I used and kept flipping through my book with no luck. I tend to leave notes beside a recipe I've used and had no luck with the recipes I thought it was. 

So I picked one, tweaked it and hoped for the best. And the result was so amazing: the edges were caramelized and crunch, the peaches so tasty, the batter light and fluffy .  The kiddos said that this was way better than the last time (the secret is alcohol!) so I made sure to make my notes in my cookbook and as an extra precaution, I'm adding it to my blog!

Ingredients:
-11 oz peeled, pitted and sliced peaches
-1 cup granulated sugar
- 1/2 cup firmly packed brown sugar
-1/2 cup plus 2 tbsp flour
-juice of about 1/3 lemon
-1 tsp cinnamon, divided
-1/4 cup butter
-1/4 tsp baking powder
-1/4 tsp salt
-1/2 cup milk
-1 tbsp liquor, like Jack Daniels whiskey

Directions:

1. Place a 10" cast iron skillet in the oven and preheat it to 350F. 

2. Stir together the peaches, 1/2 cup granulated sugar, brown sugar, 2 tbsp flour, lemon juice, 1/2 tsp cinnamon in a bowl.  Set aside.

3. When the oven is preheated, add the butter and return to the oven to melt and brown.  The butter will brown around the edges and foam.  The butter needs to be very hot!

4. Add the liquor to the peaches and give it another stir. 

5. While the butter is melting, stir together the remaining 1/2 cup flour and granulated sugar, baking powder, salt, 1/2 tsp cinnamon.  Add the milk and stir until the batter is just combined.  The consistency should be like pancake batter.

6. Pour the batter over the butter in the hot skillet.  Do not stir. Immediately spoon the peaches on top of the batter, making sure to include all the liquid that has accumulated.  Bake until the crust looks golden and crisp, about 30-35 minutes. 

7. Serve warm, topped with freshly whipped cream and a sprinkle of icing sugar (if you please!).  Enjoy! 😊

Ready to go in the oven!

The finished product.

Plated and ready for my belly! 


Monday, June 12, 2023

Stuffed Red Peppers

 I have always loved red peppers, especially sautéed with onions, garlic and my nonno's sausages.  When I make pizza, red peppers are a guaranteed topping!  I've tried a few different stuffed peppers recipes, but they never really hit the spot until this one!  I still haven't mastered the correct ratio (I always end up with more meat than peppers), but there's always enough for lunch the next day - and really it tastes even better the day after! The recipe as I share below will have leftover meat, so feel free to start another tray with more peppers....or save the meat to eat on its own (or in tacos!)!

Ingredients:
800g lean ground beef
1-1/2 tsp salt, divided
1/2 tsp baking soda
4 large bell peppers (red, yellow or orange)
3 tbsp olive oil
1 medium onion, finely chopped
3-4 cloves garlic, minced
1-1/2 tsp chili powder
1/2 tsp ground cumin
1/2 tsp dried oregano
2 cups tomato sauce
2 cups cooked rice
1-1/2 cups cheddar cheese, grated

Directions:

1. Preheat the oven to 425F.

2. In a medium bowl, mash the beef with 1 tsp salt and the baking soda, using your hands.  Let it sit for approximately 20 minutes while you move on to the other steps. 

3. Lightly spray the bottom of a 9x13" baking dish.  Cut the bell peppers in half from stem to the bottom, and remove the core and seeds. Place the peppers cut side up in the baking dish and drizzle with 1 tbsp olive oil. Sprinkle with the remaining salt.

4. Roast the peppers for about 20 minutes, until they are slightly browned and tender-crisp.  It is okay if liquid accumulates in the bottom of the peppers. 

5. In the meantime, heat the remaining oil over medium heat in a non-stick skillet.  Add the onion and cool,  stirring frequently, until it is soft and translucent, about 3-4 minutes.  Add the garlic and cook for another minute, trying not to brown things.  Add the ground beef and spices; increase heat to medium-high. Cook, breaking up the meat, until the meat is browned and almost cooked through, 5-7 minutes. 

6. Add the tomato sauce and bring to a boil; reduce heat to medium-low, cook uncovered until the meat is cooked through.  Add the rice and half of the cheese; stir until melted.  Remove from heat. 

7. Remove peppers from the oven and spoon the meat filling equally into each pepper half.  Sprinkle with the remaining cheese and return to the oven.  Roast for 10-15 minutes until the filling is hot and the cheese is melted and bubbly.  Serve. 

The stuffed peppers before
going in the oven.

The meat filling.....

I almost forgot to snap a picture;
I was so eager to enjoy it!

Some of the leftovers!


Wednesday, December 22, 2021

Matcha Swirl Refrigerator Cookies

 Ingredients:

  • 1 cup butter, softened
  • 1.5 cups sugar
  • 1 egg, lightly beaten and then divided
  • 1 tsp vanilla
  • 1 tsp peppermint
  • 2.5 cups flour
  • 1/2 tsp salt
  • 1.5 tsp baking powder
  • 3 tsp matcha, candy cane or peppermint flavoured
  • red and green food colouring
  • Christmas sprinkles
Directions:

  1. Because you are making two doughs to create the swirl, you will be working with half the ingredients and making two batches. The first dough is the vanilla-flavoured red dough.
  2. In a small bowl whisk together 1-1/4 cups flour, 1/4 tsp salt and 3/4 tsp baking powder.
  3. In a large bowl mix 1/2 cup butter on slow speed.  Slowly add 3/4 cup sugar. 
  4. For the red dough, add 1 tsp vanilla and half of the egg, scraping down the sides periodically.  Add a few drops of red food colouring.
  5. Add the dry ingredients and mix until the dough comes together.
  6. Roll out the dough in large square.
  7. Next you will make the peppermint-flavoured green dough.  To do this, repeat the steps above, starting with the dry ingredients.  This time you will add 3 tsp of matcha to the dry ingredients.
  8. In another large bowl, repeat the process with the butter and sugar.  Next you will add the peppermint extract and the other half of the egg, scraping down the sides periodically.  Add a few drops of the green food colouring.  Add the dry ingredients and mix until the dough comes together.
  9. Roll out the green dough to the same shape as the red dough.  Place one on top of the other and roll gently to flatten them together. 
  10. Roll up the two-layer dough lengthwise into a log; roll in Christmas sprinkles so that the outside layer is covered.
  11. Wrap the dough in wax paper and refrigerate for a few hours or overnight.
  12. Preheat oven to 375F.  
  13. Cut the dough into 1/4" thick rounds and place on a large parchment-lined baking sheet leaving space between.
  14. Bake for 7-9 minutes until just starting to brown.  Cool for 1 minute on baking sheet before moving to a cooling rack to completely cool.
Makes 5-6 dozen cookies. 


Christmas Crack

 This is such a great treat to have in the house.  It gets its name from how tasty and addictive it is. It is a lovely addition to a cookie box around the holidays. 

Ingredients: 

  • 40-45 salted saltine crackers (approx. 1 sleeve)
  • 1 cup unsalted butter
  • 1 cup packed brown sugar
  • 1 tsp vanilla
  • salt
  • 1 pkg (300 g) semi-sweet chocolate chips
  • Additional toppings:
    • chopped walnuts
    • candy sprinkles
    • toffee bits
    • white chocolate chips

Directions:

  1. Preheat oven to 375F.  Lined a rimmed cookie sheet with parchment paper and grease with cookie spray.
  2. Place crackers side by side on the lined pan; set aside.
  3. In a large saucepan combine butter and brown sugar.  Bring to a boil over medium-high heat and boil for 3 minutes, stirring constantly.
  4. Remove from heat and stir in the vanilla extract.
  5. Pour the mixture over the crackers, making sure all crackers are covered.
  6. Bake in the preheated oven for 3-5 minutes.  Be careful not to burn the caramel!
  7. Remove from oven and sprinkle chocolate chips over the top.  Let stand for 3-5 minutes and then spread the melted chocolate over the crackers and caramel using an offset spatular.  If the chocolate is not melted enough, you can always put the tray back in the oven for a few minutes to melt it.
  8. Sprinkle the chocolate with salt and whatever toppings you'd like.  I love adding chopped walnuts and candy sprinkles.  You can always melt white chocolate and drizzle over top. 
  9. Cool completely in the fridge for at least 2 hours, then break into pieces.
  10. Store in the fridge in an airtight container for up to a week.

The Christmas Crack is around the outside.


Tuesday, December 22, 2020

Tea Cookies

These cookies come together rather quickly and are fairly easy to make; plus they taste great.  I always get compliments when I make these cookies.  The butter gives it a flaky texture and the nuts give it a nice crunch!  They are a great addition to any holiday baking tray!

Ingredients:

1 cup butter, softened
1/2 cup powdered sugar
1-1/2 tsp vanilla extract
2 cups all-purpose flour
dash salt
dash baking powder
3/4 cup finely chopped walnuts (or other nuts)
powdered sugar for dusting

Directions:

1. In a bowl beat together the butter and powdered sugar until smooth and creamy.

2. Add vanilla.

3. Blend together flour, salt and baking powder. (Don't forget it's just a dash!)

4. Add flour mixture to butter mixture, blending well.

5. Add the chopped nuts; combine well.

6. Roll the dough into two balls.  Wrap each ball in plastic wrap an chill for at least an hour in the refrigerator.

7. Flatten dough out and cut into 15 or 16 equal size pieces.

8. Shape into small marble-sized balls.  Place on ungreased cookie sheets.

9.  Bake at 400F for 10-12 minutes until firm not brown (one cookie sheet on each rack).  About halfway through baking, rotate the baking sheets to the one that was on top is now on the bottom and the one on the bottom now on the top.  Watch closely that the cookies don't brown too quickly and burn!

10.  Cool the cookies on a rack while still on the tray.  While still warm, dust with powdered sugar.

11.  Let cool completely.  Roll again in powdered sugar.

Makes about 30 cookies.

Cookies rolled and ready to bake.


The final product!


Tuesday, April 28, 2020

Garlic & Veggie Risotto

Risotto is a well-loved dish in my household and I'm always looking for ways to change it up.
I recently saw a post by Lidia Bastianich for a garlic risotto which sounded interesting but I was hesitant about the amount of garlic and lack of other veggies.  I made a few modifications, but I now have no doubt the original would have been wonderful the way it was!  You could easily pick any vegetable or combination of veggies for this risotto.

Needless to say, this risotto was a huge success!  The kids ate it up and the husband was very impressed.  This served our family of four with a protein and salad, with leftovers for another day. 

Ingredients:
7-8 cups chicken stock
2 cups arborio rice
1 head of garlic (approx. 14 cloves), peeled and crushed
1 cup white wine
olive oil
salt to taste
1 onion, chopped
1 cup chopped green beans
1/2 red pepper, seeded and diced
2 tbsp unsalted butter
1/2 - 1 cup Parmesan cheese, finely grated

Directions:

1. Bring the chicken stock to simmer over medium heat and season with salt.

2. In a frying pan over medium heat, add a couple of tablespoons of olive oil.   Toss the green beans red peppers and cook until tender.

3. Puree the garlic and white wine in a blender or food processor.

4. In a large, shallow pot, heat a few tablespoons of olive oil over medium heat.  When the oil is hot, add the onions and cook until they are tender, but not starting to brown, about 5 minutes. 

5. Raise the heat to medium-high and add the rice, stirring constantly until the grains are coated in oil and translucent, about 2 minutes.  Add the wine-garlic puree and cook until the liquid is mostly absorbed.

6. Ladle in about 2-3  ladlefuls of stock, stir and cook until the liquid is mostly absorbed.  Repeat this process, adding in a couple of ladlefuls of stock each time the liquid is mostly absorbed, until the rice is al dente, about 20 minutes.  With about 5 minutes left, add the green beans and red peppers.

7. When the rice is al dente, turn off the heat and stir in the butter and Parmesan cheese.  Season with salt and pepper if necessary.  Serve immediately (with more cheese if you like!)


Saturday, April 25, 2020

Banana Buckwheat Muffins

Banana Buckwheat Muffins

Being home during the pandemic has allowed for a lot more time to bake.  This is evident for many people it seems as it is getting increasingly difficult to find flour and yeast. 

So I decided to try a recipe I have never tried with some other flours I had in the house.  This is a slight adaptation from the original recipe found in Nourishing Meals by Alissa Segersten and Tom Malterre.

Banana muffins are a staple in my house, so I thought this would be a easy recipe to try and especially test out on the kids to see if they would notice a difference.  These muffins are dairy-free, gluten-free, egg-free and refined sugar-free.  They are great for anyone who has allergies to any of these ingredients.

I've never used buckwheat flour before, but I had recently picked up a small bag by Bob's Red Mill to try out.    The muffins smelled amazing - just like any other banana muffin I've made before.  They had a much darker colour, almost like I had mixed cocoa in it.  The muffins were a little denser than I'm used to, but they still had a very texture.  The flavour is distinct; I'm assuming it is the buckwheat flour.  It was not subtle and the kids definitely picked up on the flavour and of course for them it was "not a banana muffin" anymore.  That is not to say that it was still not good.  My husband and I enjoyed the muffins, but it is definitely different from what I was used to.

So without further ado.....here is the recipe:

Ingredients:
Dry:
2-1/4 cups buckwheat flour
1/4 cup tapioca flour
2 tsp baking powder
1/2 tsp baking soda
1/2 tsp salt

Wet:
2 cups mashed bananas (about 5 bananas)
1/2 cup coconut sugar
1/3 cup avocado oil
2 tsp vanilla extract
1 cup non-dairy milk (I used oat milk)

Directions:

1. Preheat oven to 350F.  Line a 12-cup muffin pan with liners.

2. In a large bowl, whisk together the dry ingredients.

3. In another (medium) bowl, whisk together the wet ingredients.  Begin with about 1/2 cup of the milk.  Pour the wet ingredients into the dry and whisk together.  If the batter is too thick, add more milk up to the other 1/2 cup.  The batter should come off the whisk, but not so much that it is thin and runny.

4. Fill each cup all the way.  If you fill 3/4 of the way, you will get about 18 muffins instead.

5. Bake for 20-25 minutes.  Cool completely on a wire rack before storing in an airtight container.


Thursday, April 16, 2020

Quick & Easy Creamy Lemon-Garlic Ravioli

Has anyone else been struggling to find inspiration for 3 meals a day every day during this COVID-19 pandemic?  I've come to realize how often we ate out or even just picked up snacks out.  Now we are basically enjoying all meals inside.

I'm a PC Insiders member and I didn't even realize we had exclusive access to something called the Insiders Project until I received an email saying they were giving free access to everyone during the pandemic! 

Well of course I had to go on and browse what they have on there - and wow! Lots of variety and lots of great looking recipes.  So of course I had to try one of them out.

I've always loved a cream sauce on my pasta, even though my kids are not big fans.  And no matter what I do, I can never really replicate my mom's cream sauce, and any that I've found online are not what I would consider keepers.  Well tonight the pasta was enjoyed by all and my husband actually said "Wow! This is a keeper!" Now that's saying a lot because I'm pretty sure my kids inherited their dislike for cream sauces from him.  He started talking about all the different ways we could use this sauce in other dishes.

This amount was perfect for our family of 4, and it came together very quickly.  Once I popped the frozen ravioli in the boiling water, I got started on the sauce.  It has very little prep involved as well - grate the cheese, mince the garlic and zest the lemon.  The recipe calls for 1 cup of Parmesan cheese, but I never measure and always use till I think it looks good. Of course, you could use any pasta you want, but for some reason I love ravioli in a cream sauce.

Ingredients:

400g bag frozen cheese ravioli
2 tbsp butter
2 garlic cloves, minced
1 cup cream
zest of one lemon
sea salt to taste
1 tsp dried parsley
(1 cup) Parmesan cheese, grated
2 tbsp lemon juice
freshly ground black pepper to taste

Directions:

1. Place frozen ravioli in a salted (large) pot of boiling water. Cook until the ravioli is al dente (approx. 8-10 minutes).  Reserve 1/2 cup of pasta water, and drain the ravioli.

2. While ravioli is cooking, melt butter in a large frying pan over medium heat.  Add garlic and cook until fragrant, about 30 seconds.  Be careful not to brown or burn the garlic.  Stir in cream, lemon zest, dried parsley and salt.  Simmer until the sauce is reduced by half, about 5 minutes, stirring occasionally.

3. Add drained ravioli and 1/2 cup pasta water.  Increase heat to medium-high, then cook, stirring often until the sauce thickens and coats the pasta, approx. 2-3 minutes.  Remove from heat and gradually grate the Parmesan cheese over top, stirring occasionally.  Stir in lemon juice and season with black pepper.  Serve.

Makes 4 servings.


Friday, January 4, 2019

Asparagus & Mushroom Risotto

Rice was a staple in my husband's family growing up, but it's not something I could eat everyday.  Risotto is a great dish that brings together my Italian heritage with his Hispanic heritage.  Growing up there were two risotto dishes that were a staple in my house (made by either my mom or my nonna): mushroom risotto and a meat/tomato "red" risotto.  While I have never attempted to make the red one, mushroom risotto is something I make often enough.  I love playing around with different ingredients to add in a risotto.  Once you are familiar with the method, it is really easy to change up the ingredients.  This time around we happened to have a lot of asparagus sitting in the fridge that needed to be used up, so I added it into the risotto. 

If you've read any of my other risotto recipes, you'll recognize this one.  It is essentially the same with the asparagus added.  Unfortunately, my measurements may be a little off as I tend to eyeball risotto when I make it.  It doesn't hurt to have extra broth simmering away; you can always refrigerate it and use it for something else another time if there's leftovers.

This risotto was so creamy and delicious.  The asparagus is sliced up into tiny pieces so it's kind of hidden away from the kids, but it does give the dish a green hue.  I sometimes buy sliced mushrooms to save time, but I find they are often sliced into huge pieces.  So I give them a quick chop as well.  This will also hide the mushroom away if people in your house are not fans.  My recommendation when it comes to the oil and butter is to always add more if it is looking dry or sticking to the pot.

Make sure all your veggies are chopped and ready to go before you start cooking the rice because once you start, you are pretty at the pot until it is cooked.

Ingredients:
5-6 cups chicken (or vegetable) broth (stock)
2-3 tbsp olive oil
2-3 tbsp butter
1-1/2 cups arborio (risotto) rice
2 celery stalks, thinly sliced
1 bunch asparagus (rough ends trimmed), thinly sliced with tops reserved
1 pkg (225g) mushrooms, thinly sliced
4-6 scallions, thinly sliced; reserve green tops
3 cloves garlic, minced
1 tsp dried oregano
1/2 cup (or more) Parmesan
salt and pepper to taste

Directions:
1. Bring the broth to a boil, reduce and simmer over low heat.

2. Heat the oil and butter in a deep pan over medium-low heat.  Add the rice and cook, stirring constantly for 2-3 minutes until the rice is coated and translucent.  Add more butter or oil if necessary. [If you like, at this point you can add a splash or two of white wine for extra flavour.  The rice will soak it right up almost immediately.]

3.  Add more butter and oil if necessary before adding the celery, scallions and asparagus (not the tips).  Cook, stirring frequently, for 2-3 minutes before adding the garlic then cook for another 2-3 minutes.  Add the mushrooms and cook for 3-4 minutes.  Add the asparagus tips and oregano.  Season slightly with salt and pepper.

4.  Add the broth, one or two ladlefuls at a time.  Stir constantly to prevent sticking and burning.  Add more liquid, 1-2 ladlefuls  at a time, as the liquid absorbs.  Increase the heat to medium so the liquid bubbles, but lower it slightly (or add more broth) if the broth gets absorbed too quickly (almost immediately).  Continue adding broth and stirring until the rice is fully cooked and creamy.  The actual amount of liquid used will vary.  This whole process should take around 20 minutes.    Season with salt and pepper.

5. Remove from heat and stir in one tablespoon of butter and the Parmesan cheese.  Plate the risotto and top with more cheese if desired.

It will be very hot (but delicious).  I often spread the risotto in a thinner layer on the plate so it cools faster, and work my way inwards on the plate.

Enjoy and let me know how it turned out for you!


Monday, October 8, 2018

Garlic Parmesan Chicken Bake

My husband and I have just started week 4 of the Plant Paradox.  Overall we've had pretty good success; with my husband being much more successful than I have.  The first few days were extremely hard for me, but we are starting to get into a rhythm.
Thanksgiving was this weekend and we knew it would be hard to follow the plan during this weekend.
So I tried this chicken bake for one of our family visits, and we were able to stay compliant without going hungry.

Ingredients:
10 bone-in, skin-on chicken thighs
1-1/2 tbsp dried basil
1-1/2 tbsp grated Parmesan (or a bit more if you like!)
1-1/2 tsp dried oregano
2 clove garlic, minced
1/4 tsp salt
1/8 tsp black pepper
olive oil

1-1/2 cups brussel sprouts, cut in half (or quarters if large)
1 scallion, thinly sliced
2 cloves garlic, thinly sliced

1 lemon

avocado oil for frying


1. Preheat the oven to 450F.
2. Mix the basil, Parmesan, oregano, garlic, salt and pepper in a small bowl.  Add a few drops of olive oil to combine.
3. Trim excess fat around each chicken thigh.  Then gently lift the skin to create a small pocket.  Rub the herb mixture onto each thigh,

under the skin, being gentle now to rip the skin.  Generously sprinkle both sides of the chicken thighs with salt.
4. Heat a few teaspoons of avocado oil in a large skillet over medium-high heat.  Depending on the size of your skillet, you may have to fry the chicken in batches.  Place the chicken skin-side down for five minutes.  Flip the chicken over and cook for another 5-7 minutes.
5.  Move the chicken to a large baking tray that has been greased, skin side up.  If you are frying in batches, start on the second batch. Otherwise move on the veggies.
Ready to go in the oven
6. When all the chicken has been fried, add all the vegetables to the frying pan and stir to coat in the oil and juices.  Fry for a few minutes until browned and softened.  Add to the pan with the chicken.
7.  Cut the lemon into thirds.  Take the two end pieces and cut into quarters, placing them around the chicken and brussel sprouts.  Take the middle piece and squeeze the juice over the chicken and brussel sprouts.
8.  Bake in the oven, uncovered for 30-40 minutes, until chicken is cooked through.  If it starts to brown too quickly, cover with foil.  When cooked, quickly flip the chicken to get the tops covered in the juices and flip back.  Cover with foil and let sit for 10 minutes before serving

.
The final product


Saturday, July 28, 2018

Strawberry Cupcakes with Tri-Colour Vanilla Frosting

My eldest's birthday just passed and the theme was unicorns!  This has been a recent obsession in our house so I started looking for unicorn themed ideas for the party.

The unicorn toppers I purchased.
This cookbook is amazing and
never fails me!
I came across these cupcake toppers on Amazon and decided I would bake some cupcakes for the party.  I pulled out my trusty Martha Stewart's Cupcakes book and settled on Strawberry Cupcakes.  Every recipe I have ever tried from this cookbook has turned out amazing and I always get great compliments on them.  The tips and notes she provides in the recipes are always spot on; nothing has every failed.

I loved using this and can't wait
to make more cupcakes just to use this!
I also used her Vanilla Frosting which I divided into 3 bowls and coloured with food colouring.  I used this neat tool from Wilton that lets you pipe 3 differed coloured icing at the same time.  While I was a little wary of it because I've never really piped anything before and this tool had mixed reviews, I gave it a shot and it was really quite awesome.  It does get a little messy, but overall went pretty smoothly.  And they looked positively stunning.  They were a huge hit at the party!  The frosting recipe was not enough to frost all the cupcakes; I needed about 1-1/2 to 1-2/3.  Doubling the recipe will give you plenty to work with.
Strawberry Cupcakes
Makes 34 cupcakes

Ingredients:
2-3/4 cups all-purpose flour
1/2 cup cake flour (not self-rising) **
1 tbsp. baking powder
1 tsp salt
1 cup unsalted butter, at room temperature
2-1/4 cups sugar
1-1/2 tsp pure vanilla extract
3 large whole eggs plus 1 egg white
1 cup milk
2 cups freshly chopped fresh strawberries (about 20)

Directions:
**If you don't have cake flour, measure out 1/2 cup all-purpose flour.  Remove 1 tbsp and replace it with 1 tbsp. cornstarch.  Give it a quick mix

1.  Preheat oven to 350F.  Line standard muffin tins with paper liners.  Sift together both flours, baking powder and salt.

2. With an electric mixer on medium-high speed, cream butter, sugar and vanilla until pale and fluffy. Add whole eggs and the white, one at a time, beating until each is incorporated, scraping down the sides of bowl as needed.  Reduce speed to l ow.  Add flour mixture in two batches, alternating with the milk, and beating until well combined.  Fold in chopped strawberries by hand.

3. Divide batter evenly among lined cups, filling each three-quarters full.  Bake, rotating tins halfway through, until golden and a cake tester inserted in centers comes out clean, 25-30 minutes.  Transfer tins to wire racks to cool 15 minutes; turn out cupcakes onto rack and let cool completely.  Cupcakes can be stored up to 1 day at room temperature in airtight containers.

Fluffy Vanila Frosting
Makes about 4 cups
Here you can see how awesome
it looks with the three colours
piped together!

Ingredients:
1-1/2 cups unsalted butter, at room temperature
4 cups icing sugar, sifted
1/2 tsp pure vanilla extract

Directions:
1. With an electric mixer, beat butter on medium-high speed until pale and creamy, about 2 minutes.

2. Reduce speed to medium.  Add the icing sugar, 1/2 cup at a time, beating well after each addition and scraping down the sides of the bowl as needed; after every two additions, raise speed to high and beat 10 seconds to aerate frosting, then return to medium.  This process should take about 5 minutes.  Frosting will be very pale and fluffy.

3. Add vanilla, and beat until frosting is smooth.  If not using immediately, frosting can be refrigerated up to 10 days in an airtight container.  Before using, bring to room temperature, and beat on low speed until smooth again, about 5 minutes.

4. If tinting with food colouring, add a drop at a time and stir with a flexible spatula until well combined before adding more.


Wednesday, July 11, 2018

Matcha (Green Tea) Ice Cream

I love tea, and matcha tea is one of my favourites.  What's really neat about matcha is that it is ground green tea leaves.  Instead of steeping the leaves as you would with pretty much any other tea, matcha powder is whisked into hot water.  The powder doesn't dissolve; instead it is suspended in the hot water.  This is why if you don't drink the tea right away, the powder will fall to the bottom of your mug and you will need to whisk it again.  Because you are actually ingesting the tea leaves when you drink matcha, you are reaping the health benefits of green tea (like high in antioxidants) in greater amounts.

Matcha will give your ice cream a nice green colour!  There are different grades of matcha powder.  For ice cream you can use a culinary grade, which will not be as expensive as a ceremonial grade for example.

I use an ice cream bowl attachment for my KitchenAid stand mixer.  It needs to be placed in the freezer for at least 15 hours prior to using it.  The ice cream mixture itself also needs to be chilled prior to using it; at least 4-8 hours.  And then once it has been churned, the ice cream needs to be placed in the freezer again for another 4-8 hours to firm up.  So the whole process is very slow, but it is so worth it!


Ingredients:
3 tbsp matcha green tea powder, or more to taste
1 cup milk (I used 2%, but whole milk provides a richer flavour)
2 cups heaving whipping cream
3/4 cup - 1 cup granulated sugar
2 eggs
1 egg yolk

Directions: 

1. Sift matcha powder into 1/2 cup milk and whisk until the powder and milk is combined.  Gradually whisk remaining milk into matcha-milk mixture.

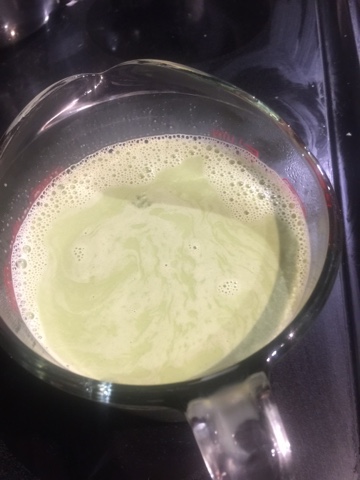
The cooked matcha mixture
cooling to room temperature.
2. Heat whipping cream and matcha-milk mixture in a pot over medium-low heat, whisking occasionally until heated through.  This should take about 5 minutes.

3. In a separate bowl, whisk sugar and eggs together.  Pour about 1/2 cup of the hot matcha mixture into egg mixture to temper the eggs; whisk thoroughly.  Add another 1/2 cup of the hot matcha mixture and repeat.

4. Slowly pour the egg mixture back into the pot, whisking constantly.  Cook, while occasionally whisking, over medium-low heat until heated through, about 5 minutes.

5. Remove from heat and cool to room temperature.  Refrigerate until chilled, at least 4 hours, or overnight.

The churned ice cream mixture ready to firm up in the freezer.
6. Prior to pouring the cooled matcha mixture into an ice cream maker, give it a quick stir.  Then pour it into the ice cream maker and freeze according to the manufacturer's instructions.

The ice cream has a soft texture
even after being left in the freezer
for 24 hours.  It tastes yummy!

Tuesday, April 24, 2018

Chicken Curry with Homemade Naan

I watched an episode of Bake with Anna Olson the other day, where she made naan bread.  She is one of my most favourite pastry chefs and every recipe I've ever tried of hers always turns out amazing.  The recipe looked easy enough and I really wanted to make it, so I went on a search for an easy curry recipe.  I've never made a curry before, so that part was a little daunting.  Everything turned out great.
I made the dough earlier in the afternoon so it had time to rise.  As it got closer to dinnertime, I set the rice to cook in our rice cooker and started on the prep for the curry.  As the curry was left to cook for the last 15-20 minutes, I cooked the naan and everything came together perfectly.


Naan 

Ingredients:
3/4 cup warm water
1/2 cup yogurt
2-1/4 tsp yeast
2-1/2 cups flour
1/2 tsp salt
2 tbsp vegetable oil

Directions:

1. Add the first three ingredients to a large bowl in order.  Next add the flour, reserving 1/4 to 1/2 cup to use when you knead the dough.  Add the salt on top of the flour so it does not come in contact with the yeast.  Lastly add the vegetable oil.
2. Mix the ingredients with a wooden spoon until blended.
3. Turn the dough onto a floured work surface to knead, using the reserved flour, until the dough no longer sticks to your hands.  This should take 3-5 minutes in total.
4. Place dough in bowl and cover with plastic wrap.  Let it rise for 1 hour.
5. Roll out the naan on a floured work surface.  It will deflate as you start handling it.
6. Cut it into 6-8 pieces; no pre-shaping necessary.  Flatten each piece with a rolling pin to about 8-9" across and 1/4" thick.
7. Put in pan, one at a time, on high heat with no butter or oil.  It will take about 90 seconds on each side; the dough will start to bubble and blister.
8.  Baste with melted butter and sprinkle with sea salt to serve.
9.  Roll out the next piece while it cooks, and repeat until all the pieces are done.


Chicken Curry

Ingredients:
6 scallions
3-4 garlic cloves
2 tbsp vegetable oil
200g tomatoes, chopped
2 tbsp curry powder
1 tsp ground ginger
400g boneless, skinless chicken thighs, cut into 1" pieces
100ml Greek yogurt
salt and pepper

cooked rice to serve over

Directions:

1. Thinly slice the scallions, leaving a handful of the green parts for garnish.  Peel and chop the garlic.
2. Heat the oil in a large pan over medium heat and cook the onions and garlic for a few minutes.  Add the tomatoes, curry powder, ginger, and cook for 3-4  minutes.  If the pan gets dry, add some water to ensure the spices don't burn.
3. Add the chicken and cook for 5 minutes.  Make sure all the chicken is coated and is starting to brown.
4. Add 1 cup (250 ml) of water and bring to a boil.  Reduce heat to medium-low and cook for 15-20 minutes, or until the chicken is cooked through with no sign of pink juices in the middle of the pieces. 5. At this point you can prepare the rice (my rice cooker takes a while so I actually start it before I star the curry) and/or cook the naan.
5. When the everything is ready and the chicken is cooked, take the curry off the heat.  Stir in the yogurt and season with salt and pepper. Serve the curry over rice with a drizzle of yogurt and the naan bread.