Thursday, February 25, 2016

Chocolate Berry Muffins

My little one has been asking if we could bake some chocolate berry muffins, so this evening that is exactly what we did.  This recipe is so easy to make and comes together very quickly!  You get very full muffins that bake up perfectly and taste amazing!


Ingredients:
2 cups all-purpose flour
1/2 cup sugar
1 tbsp baking powder
1/4 tsp salt
1 large egg
1 cup buttermilk ***
1/4 cup oil
1 cup berries (I used a mix of frozen blueberries, raspberries and blackberries)
1 cup white/chocolate chips (I used half milk chocolate, half white chocolate)
The yummy looking batter.

Directions:

1. Measure first 4 ingredients (dry ingredients) into a large bowl.  Stir.  Make a well in the centre.

2.  Combine the next 3 ingredients (wet ingredients) in a small bowl.  Add to well.
Muffin  liners filled right to the top
for a full looking muffin with a rounded top.

3.  Add the berries and chocolate chips.  Stir gently until just moistened.

4. Fill 12 paper-lined muffin cups at least 3/4 full.  (I was able to fill the liners almost right to the top.)  Bake in 375F oven for about 24 minutes until toothpick inserted comes out clean.

5. Let stand in pan for 5 minutes before removing to wire rack to cool.

***If you don't have buttermilk, you can use soured milk.  To do this, put 1tbsp of white vinegar or lemon juice in a 1 cup measuring cup.  Add enough milk to make 1 cup.  Stir and let stand at least 1 minute.***


The baked muffins cooling in the muffin pan for 5 minutes.
They cooked up perfectly in 24 minutes!
The final product cooling before we can taste test.
They are quite soft when warm, so patience is oh so important -
even though they smell so delicious!

Saturday, January 23, 2016

Pretzels!


My little one has been asking to make pretzels all week.  I'm not sure where the idea came from, but it's been a persistent request.  So today we spent the afternoon making pretzels.  While the recipe is easy enough, it does take time.  I spent some time trying to find a good recipe, and a lot of them seemed to follow Alton Brown's recipe on www.foodnetwork.com.  So that is the recipe we used!

Ingredients:
Nice and golden on the outside,
so soft on the inside.

1-1/2 cups warm water
1 tbsp sugar
2 tsp kosher salt
2-1/4 tsp active dry yeast
3 to 3-1/2 cups all-purpose flour
1/4 cup unsalted butter, melted
vegetable oil
10 cups water
2/3 cups baking soda
1 large egg beaten with 1 tbsp water
salt
1/4 cup unsalted butter, melted (to brush the baked pretzels)

Directions:

1. Combine water, sugar, and kosher salt in the bowl of a stand mixer and sprinkle the yeast on top.  Allow it to sit for 5 minutes or until the mixture begins to foam.

2. Add the flour (start with about 3 cups and add more if necessary - ie: the dough is still sticky) and butter and mix on low speed using the dough hook attachment until well combined.  Change to medium speed and knead until the dough is smooth and pulls away from the side of the bowl, about 5 minutes. Remove dough from the bowl, oil it well with vegetable oil and return the dough to the bowl.  Cover with plastic wrap and sit in a warm place to allow it to double in size, about 50-55 minutes.

3. Line a large baking sheet with parchment paper that is lightly oiled, set aside.  Preheat oven to 450F.

4. Bring 10 cups of water and the baking soda to a rolling boil in a medium saucepan.

The shaped dough
ready to be boiled.
5.  In the meantime, turn the dough out onto a slightly oiled surface and divide it in half.  Return half to the bowl and divide the other half into 8 equal pieces.  Roll out each piece of dough into a long "rope" (about 24").  Make  U-shape with the rope, holding the ends, cross them over each other and press onto the bottom of the U to make the shape of a pretzel.  Place onto the parchment-lined half sheet pan.  Repeat with the other half of the dough.

6. Place the pretzels into the boiling water, one at a time, for 30 seconds.  Make sure the entire do ugh is immersed in water.  Remove from the water using a flat spatula.  Return to the baking sheet and brush the top with the egg wash.  Sprinkle with salt.

The final product, all golden and delicious!
7. Bake until dark golden brown in colour, approximately 12-14 minutes.  Brush with melted butter and sprinkle again with salt.  Transfer to a cooling rack for at least 5 minutes.

8. Serve warm.  Makes 16 pretzels.

**You can divide the entire dough into 8 equal pieces for larger pretzels.**


While we may need some more practice on our shaping of pretzels, the overall taste was really quite good, especially warm out of the oven.  My husband loved it with nutella on top, cut open with seasoned cherry tomatoes on the inside. I preferred it all on its own, but I've been thinking about what kind of dipping sauce I can make next time.

In fact, next time I think I might add some parmesan, oregano, garlic powder and basil in the dough to give it more of an Italian/pizza flavour and pair it with a marinara sauce.  What do you think?

Saturday, December 26, 2015

Christmas Brunch

I love breakfast! Besides dessert it's my most favourite meal.  Christmas mornings tend to be a little rushed in our house, so an easy but filling breakfast is a must!  I was looking for a great overnight French toast recipe that I could just pop in the oven in the morning while we open gifts.  One of my best friends, who just happens to be an amazing cook, gave me this recipe.

It was my first time making it, but I didn't care so much as it was just for my family.  Then it turned out my little one's godparents were going to join us for breakfast, so I was a little nervous about serving a first time recipe.  But seeing as it was a recipe by Giada De Laurentiis, with some modifications from a very trusted friend, there was no way I could go wrong (I hoped!)

Overnight French Toast

Ingredients:
butter, for greasing
6 eggs
3 cups whole milk
3/4 cup maple syrup (plus extra for serving)
2 tsp ground cinnamon
1/4 tsp salt
1 lemon, zested
1 to 1-1/2 baguettes, cut into 1" cubes
3 apples, cored, peeled and chopped

Topping:
1 tbsp cinnamon
3 tbsp sugar

Directions:

1. Butter a 9x13" baking dish and set aside.

2. In a large bowl, beat the eggs until frothy.  Add the milk, maple syrup, cinnamon, salt and lemon zest.  Add the bread cubes and mix until coated.  Stir in the apple chunks.  Pour the mixture into the prepared baking dish.

3. Cover with saran wrap and refrigerate overnight.

4. Preheat oven to 350F.

5. In a small bowl, mix together the cinnamon and sugar for the topping.  Sprinkle the cinnamon sugar over the egg mixture in an even layer.

6. Bake for 45 - 55 minutes until the top is golden and the filling is set.

7. Spoon onto serving plates and drizzle with maple syrup (and more cinnamon sugar if you like!).


This recipe was a huge success!!  There was no leftovers and everyone went for seconds (and even thirds!).  With the whole rush of Christmas morning, I completely forgot to take a picture, but I will definitely be making this recipe again.

Photo of French Toast from Giada's recipe made with
blueberries and not left overnight.

Holiday Baking Part 2: Sugar Cookies & Shortbread

I love baking sugar cookies and it has only become more fun (and a little more stressful) since my little one likes to help me make them.  It's easy to roll out the dough and cut  out the shapes, but I have to learn to give up some control when I bake with my little one otherwise it becomes very stressful.

Shortbread is another great recipe and really easy to come together because you can just press the dough into the pan instead of letting it rest as you would with the sugar cookies.

Sugar Cookies:
I've played around with different sugar cookie recipes, and this was the one I turned to today: from my Williams Sonoma cookie cookbook.

Ingredients:
1-1/4 cups unsalted butter, at room temperature
3/4 cup granulated sugar
1 large egg yolk
2 tsp vanilla extract
2 cups all purpose flour
1/4 tsp salt

Directions:

1. Using an electric mixer on high speed, cream the butter until fluffy and pale.  Add the sugar, 1/4 cup at a time, beating on low speed for 2 minutes after each addition. Beat the egg yolk and vanilla into the butter mixture until well blended.

The cookies got a little darker than we liked,
but they still tasted good!
2. Sift the flour and salt onto a sheet of waxed paper.  Add the flour mixture to the butter mixture and mix on low speed or stir with a wooden spoon just until blended.

3. Scrape the dough onto a work surface and divide into 4 equal portions.  Shape into disks, wrap into plastic wrap, and refrigerate for at least 2 hours or up to overnight.

4. Preheat the oven to 350F.  Lightly grease 2 baking sheets or line with with parchment paper.

5. Remove the dough disks from the fridge and let stand at room temperature for about 15 minutes.  Working with 1 disk at a time, roll out between 2 sheets of waxed paper to a thickness of about 1/8-1/4".  Using cookie cutters, cut into shapes.  Repeat with remaining dough portions, then gather up the scraps and re-roll.  If the scraps of dough have become sticky, refrigerate for 10 minutes before re-rolling.

6. Transfer the cookies to the prepared pans.  Sprinkle with coloured sugar.  (If you are dusting with icing sugar or drizzling with chocolate, wait till the cookies are baked.  Sprinkle with sugar while still warm.)

Traditional Shortbread
7. Bake the cookies until they are lightly golden on the bottom, 10-12 minutes.  Let the cookies cool briefly on the pans on wire racks before transferring them to the racks to cool completely.

Shortbread:
Today I tried a new shortbread recipe, from Anna Olson's book Back to Baking.

Ingredients:
1 cup unsalted butter, room temperature
1/2 cup icing sugar, sifted
1/4 cup sugar
1 tsp vanilla extract
2-1/4 cups all-purpose flour
1/4 cup brown or white rice flour
1/4 tsp salt

Directions:

1.Preheat oven to 375F and grease an 8" square pan.

2. Beat the butter for 2 minutes to make it fluffy and light.  Add the icing sugar and sugar then beat again for 2 minutes, until fluffy, then beat in the vanilla.

3. Sift the flour, rice flour, and salt, then add to the wet ingredients, stirring until evenly blended.

4. Scrape the dough into the prepared pan and press it flat into the bottom of the pan.  Use a fork to dock the shortbread at 1" intervals.  You can also score the dough to make it easier to cut if you like.

5. Bake the shortbread for about 25 minutes, until the outside edges have browned a little.

6. Let it cool for 10 minutes, then cut into squares.  Allow the cookies to cool completely before lifting them out of the pan to store.  The shortbread will keep in an airtight container for up to 10 days.

You can also drizzle the shortbread with some melted semi-sweet chocolate for an extra flavour boost.
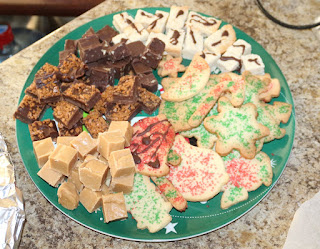
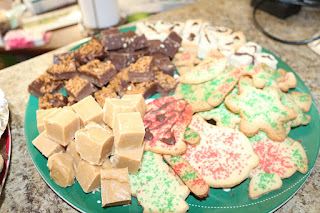
The finished product: cookies, shortbread and fudge
ready for our many holiday visits!

Friday, December 25, 2015

Holiday Baking Part 1: Fudge Four Ways

I've spent the last two days getting my holiday baking together and I'm exhausted.
For this post I am going to share 4 different fudge recipes: two that I've used for years and two new ones I'm trying this year.

I love making fudge because it really comes together pretty easily.  You just have to allow yourself time for it to set in the fridge or freezer.

Super Chocolate Fudge

This one is probably my favourite.  It has such a rich chocolate taste - perfect for the chocolate lover in your life.  I have substituted about half of the semisweet chips for milk chocolate and it still turns out great! For the nuts I have used walnuts, almonds or a mix of both, but I'm sure any nut would be a great addition - try your favourite.

Ingredients:
3 cups semisweet chocolate chips
1 can sweetened condensed milk
2 tsp vanilla
1/2 cup chopped nuts

Directions:

1. Melt chocolate with milk, stirring occasionally.  (For a quicker approach you can microwave for about 3 minutes or until it is melted.  Stir about every 30 seconds.)

2. Remove from heat; stir in vanilla and nuts.

3. Spread evenly in a parchment-paper lined 8" square pan.  Chill for 4 hours in the fridge or until firm.

4. Remove from pan and cut into small squares.

Makes about 64 1" squares.

Brown Sugar Fudge
The popular brown sugar fudge!

This is another great fudge, but a bit on the sweet side so cut them into small squares! This fudge turned out to be the most popular amongst my family.  It was gone so quickly!

Ingredients:
1 can condensed sweetened milk
2 cups well-packed brown sugar
1 cup (227 g) butter

Directions:

1. Place ingredients in a large microwave safe bowl and give it a quick stir.

2. Microwave on HIGH for 10 minutes, stirring every 2 minutes.  Let cool slightly.

3. Beat with electric mixer on low for 5 minutes.

4. Spread mixture into a parchment-paper lined 8" square pan.  Chill to set and cut into squares.

Makes about 64 1" squares.

Chocolate Peanut Butter Fudge

This is a new recipe I tried this year from the Bewitchin' Kitchen.  I really enjoyed this fudge.  The combo of peanut butter and chocolate is so yummy!

Ingredients:
2 cups peanut butter chips
1 cup semisweet chocolate chips
1 can condensed sweetened milk
1/2 cup Skor Toffee Bits

Directions:

1. In a microwave-safe bowl combine the peanut butter chips, chocolate chips and condensed milk.  Give it a quick stir.

2. Microwave for about 3 minutes until the chocolate has melted.  Stir the mixture every 30 seconds.

3. Pour the fudge into a 8" square pan lined with parchment paper.

4. Top with Skor bits and gently press down.

5. Freeze for a few hours until it has hardened.

I've decided to only share these three recipes as the fourth fudge recipe didn't seem to turn out so well for me.  It was a white chocolate & toffee fudge that just didn't seem to set properly.  It is currently sitting in my freezer because if I take it out it will probably thaw into a goo.  Some family suggested using it in a cookie recipe, which I might try.  Until then, I will stick with these three fudge recipes as my go to's!
LEFT: Super Chocolate Fudge
RIGHT: Chocolate Peanut Butter Fudge

Monday, September 28, 2015

Chicken Enchiladas & Apple Crisp

Many, many years ago I was at my friend's apartment and she made this recipe.  I absolutely loved and saved it.  I've made it several times over the years.  Every once in awhile I have a craving for it and tonight was one of those nights.  It's also a bonus that everyone in my house loves it!  There's always leftover for lunch the next day too.

Chicken Enchiladas

Ingredients:
1 medium onion, chopped
2-4 tbsp butter
4-6 chicken breasts, chopped
1 - 1-1/2 cups salsa
1 pkg (125g) cream cheese
2 cups grated cheese (I like a mixture of cheddar, mozzarella and asiago)
6 large flour tortillas

Directions:

1. Chop chicken into cubes and fry on stove in butter until it is no longer pink. Remove from pan and set aside in a bowl.
2. Cook and stir onion in butter over medium heat for 2-3 minus until softened.  Stir in cooked onion, about 2/3 cup salsa, and cream cheese.  Cook until thoroughly heated.
3. Stir in 1 cup grated cheese.
4. Spoon about 1/3 cup of the chicken mixture in the centre of each tortilla.  Roll and place seam side down in large (13x9") baking dish.  Top with remaining salsa and cheddar cheese.
5. Bake in preheated 350F oven for 15 minutes.
Cooking the chicken cubes.
Adding in the salsa and cream cheese.


Snapping a picture just before I chow down!


Saving some leftovers for lunch tomorrow.


And now onto dessert - my favourite part of any meal!

Apple Crisp

The great thing about this recipe, is that you can make a large batch and portion it out to freeze.  If you are expecting a large crowd, put this in a large dish and make one portion.  But if you want to have some on hand to give to family or friends or save for another day, then you can do that as well.

Today I made this into 3-8x8" serving dishes.  One went to our neighbour, the other is being frozen for a work function and the last one is the dessert tonight.  My apple crisp recipes have evolved over the years, but this time the crumble part is true to a Barefoot Contessa recipe.

Ingredients:
10 apples, peeled, cored and sliced (fairly thinly)
1/2 cup sugar
the juice of one lemon
2 tsp cinnamon
1 tsp nutmeg

For the topping:
1-1/2 cups all-purpose flour
3/4 cup sugar
3/4 light brown sugar, packed
1/2 tsp salt
1 cup rolled oats
1 cup cold unsalted butter, diced


Directions:

1. If you are making a large dish, grease a 9x14" dish.  If you are making smaller portions, grease 3 8x8" dishes.

2. Peel, core and cut the apples into slices.  Combine the apples, lemon juice, sugar and spices.  Pour into the dish.  (I actually like to divide the apples into the three dishes and then squeeze the lemon juice over top.  I then mix the rest of the ingredients and evenly sprinkle it over each dish and toss.)

3. For the topping: Combine the flour, sugars, salt, oatmeal, butter in the bowl of stand mixer with the paddle attachment.  Mix on low speed until the mixture is crumbly and the butter is small.  Scatter evenly over the apples.

4. If you are baking immediately, bake in a preheated 350F oven for 45 minutes, until the top is brown and the apples are bubbly.  Serve warm.  (Consider putting a sheet pan underneath for overflow if your dish is really full.)  If you are freezing, cover in foil and write the instructions on top.  Place in the freezer.  If you are baking one large dish, you will probably have to increase the baking time to 60 minutes.

5. Baking from frozen?  Thaw and bake uncovered at 350F for 45 minutes.


Prepping the apples in their foil dishes.

Check out the delicious crumble topping.


The apple crisp all bubbly and brown!

"It's so yummy mommy!"
And of course, we have to add Birthday Cake Oreo Ice Cream on top!

Monday, August 31, 2015

Visiting a Friend with Baby #2

We are off to visit my oldest friend who just had a new baby.  We are so excited to meet her newest member.  Although I can't relate to having two, I can only imagine how exhausting it is to entertain guests when you have two under two running around.  That is why I am bringing lunch and dessert for our visit.

Both recipes that I chose come together pretty easily, but they need time to sit so they have to be made well in advance.  For lunch I made macaroni and cheese (the overnight edition) and for desert this lovely tart that I've been dying to make forever.

Overnight Mac & Cheese

Ingredients: 
4 cups whole milk
2 cups uncooked elbow macaroni
1/8 cup butter, diced into small cubes
1 cup cheddar cheese, grated  (I like to mix the cheese that I use: this time I used medium orange cheddar and an aged white cheddar)
1/4 tsp salt

Directions:

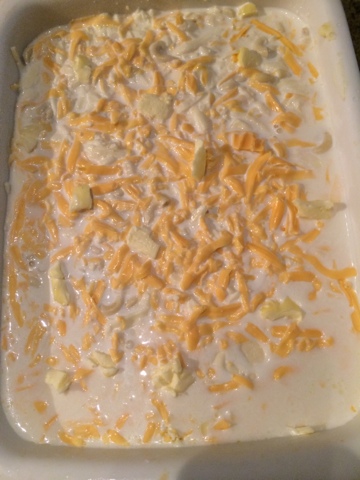
1. Grease a 13x9" baking dish.  Spread half the pasta in the bottom of the dish.  Sprinkle with half of the cheese, dot with half of butter and sprinkle with half the salt.  Repeat the layers with the remaining pasta, remaining cheese, butter and salt.

2. Pour milk evenly over pasta, cover with aluminum foil and refrigerate for about 24 hours.

3. Bake, covered with foil at 350F for 45-60 minutes.  Remove the foil during the final 15 minutes to allow the top to brown and get crispy.  (Sometimes I sprinkle some Parmesan cheese over the top when I remove the foil.)


Caramel-Swirl Double Chocolate Tart
Almond crust, cooling

Ingredients:

Crust:
2-1/4 cups almonds
1/2 cup sugar
1/4 cup flour
1/3 cup butter, melted and cooled

Filling:
6 oz white chocolate, finely chopped
8 oz semisweet chocolate, finely chopped
1 cup 35% whipping cream, divided

Dark chocolate filling
Caramel Sauce:
1/3 cup brown sugar
1/2 cup 35% whipping cream
1/4 tsp vanilla
1/2 tbsp butter

Directions:

1. Preheat oven to 350F.

Crust:
2. In a food processor, process the almonds, sugar and flour until the nuts are finely ground.  Pour in butter; process (or mix) until thoroughly moistened.  Pat nut mixture into the bottom of a 10" pie plate.  Bake for 15-20 minutes or until the crust is lightly coloured.  Cool on rack.
White chocolate filling

Filling:
Caramel sauce simmering
3. Meanwhile place white chocolate in a bowl and dark chocolate in another bowl.  Bring cream to a boil in saucepan over medium heat.  Pour 1/3 cup of hot cream over white chocolate; pour remaining 2/3 cup hot cream over dark chocolate.  Whisk white chocolate mixture until smooth and the chocolate is melted.  Repeat with dark chocolate.  Let each cool for 10 minutes.  (At this point you can start making the caramel sauce in the same saucepan.)
4. Pour dark chocolate over cooled crust, spreading evenly.  Pour white chocolate over dark chocolate, tilting pan to evenly distribute.

Caramel Sauce:
5. In a saucepan combine all ingredients and bring to a boil over medium heat, stirring occasionally.  Reduce heat and simmer for 5 minutes, stirring occasionally.
6. Drizzle caramel sauce over white chocolate in decorative pattern.
7.  Refrigerate for at least 8 hours.  Store in the refrigerator.
Assembled product without
the caramel sauce.
Ready to be refrigerated for 8 hours.