Monday, March 19, 2018

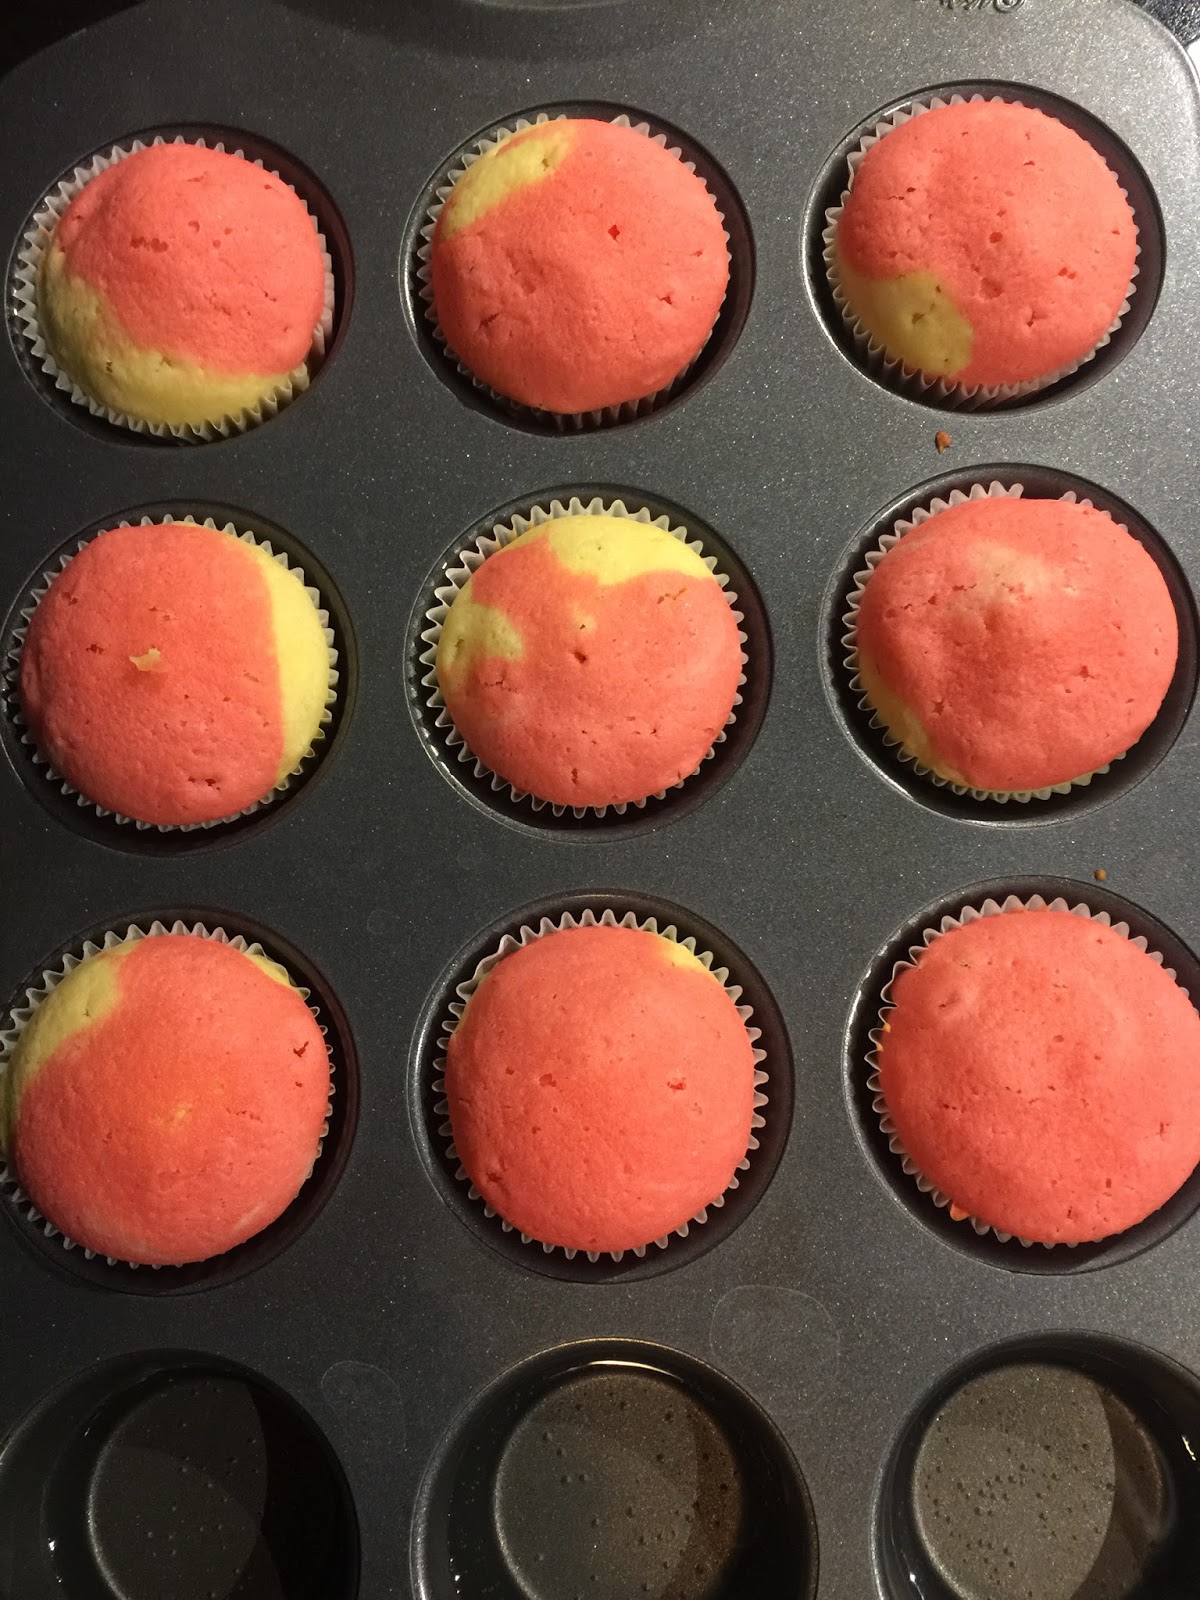
Rainbow Cupcakes


Our children's daycare does an activity called Toddlers in the Kitchen.  The kids get to make something and then bring it home.  It is very popular and the baked goods turn out pretty awesome each time.

This time they made Rainbow Cupcakes, which of course made my eldest a little jealous.  So I promised we would attempt to make the recipe another time.  This happened to occur over the March Break.  And of course right as we were colouring the batter, the daycare called to say the little one was ill and needed to be picked.  Needless to say, this very time consuming recipe took even more time than initially anticipated.  The end result was a beautiful cupcake with a dense texture and not too sweet taste.  We topped the cupcakes with a vanilla frosting from Martha Stewart that is always a hit!

Ingredients

 3 cups all-purpose flour
2-1/2 tsp baking powder
1/2 tsp salt
1 cup unsalted butter, softened
1-3/4 cup sugar
2 large eggs
1-1/2 tsp vanilla extract
1-1/2 cups whole milk
Food colouring (red, orange, yellow, green, blue purple)

Directions

1. Preheat oven to 350F.
2. Sift together flour, baking powder, and salt in a bowl.
3. In a large bowl, cream together the butter and sugar. Add the eggs, one at a time.  Then add the vanilla and mix until combined.
4. Alternately add the flour mixture and milk to butter mixture.
5. Divide the batter into six bowls and dye each with food colouring. (Alternately, transfer each colour to sealable plastic bags and pipe the batter into the cups.
7. Bake the cupcakes for 15-18 minutes, until a toothpick inserted comes out clean.

Fluffy Vanilla Frosting
1 cup unsalted butter, room temperature
1-2/3 cup confectioners' sugar, sifted
1/2 tsp pure vanilla extract

1. With an electric mixer, beat butter on medium-high speed until pale and creamy, about 2 minutes.
2. Reduce speed to medium.  Add the confectioners' sugar, 1/2 cup at a time, beating well after each addition and scraping down the sides of the bowl as needed; after every two additions, raise speed to high and beat 10 seconds to aerate the frosting, then return to medium.  This process should take about 5 minutes.  Frosting will be very pale and fluffy.
3. Add vanilla, and beat until frosting is smooth.  If not using immediately, frosting can be refrigerated up to 10 days in an airtight container.  Before using, bring to room temperature and beat on low speed until smooth again, about 5 minutes.
4. To tint with food colour, add a drop at a time and stir with a flexible spatula until well combined before adding more.


We enjoyed our creations over a warm cup of tea!


Saturday, February 24, 2018

Lemon Pudding Cake

I love just about everything lemon.  It adds such a nice flavour to things.  So when I came across this Lemon Pudding Cake, I had to make it!  I love how it "magically" separates to be a cake on top and a pudding on top.  I made this to bring to a dinner at a friend's house and it was a hit!

Ingredients:
1/2 cup flour
1/2 cup sugar
1/2 tsp salt
3 eggs at room temperature, separated
1 cup fresh lemon juice
1 tbsp lemon zest
1 tsp vanilla extract
1/4 cup butter, melted
1-1/4 cups milk or half-and-half
1/4 cup sugar

Directions:

1. Preheat the oven to 350F.  Butter a 9" square cake pan.
2. Combine the flour, 1/2 cup sugar, and salt.  In another bowl, beat the egg yolks until smooth.  Stir in the lemon juice and zest, vanilla, butter and milk (or half-and-half).  Add the flour mixture to the egg yolks. 
3. Beat the egg whites to form soft peaks.  Gradually beat in the 1/4 cup sugar and continue beating until stiff, moist peaks form.  Fold a small amount of the egg whites into the lemon mixture first, then the remaining amount.
4. Pour into the prepared pan.  Set the pan into a large pan filled with one inch of hot water.  Bake for 40-50 minutes.  Serve warm or at room temperature.


Saturday, June 17, 2017

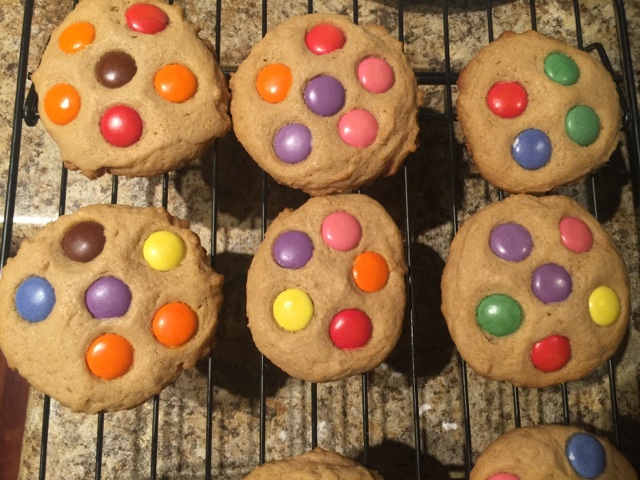
Smarties Cookies

This cookie recipe comes together pretty easily and makes about 2-2.5 dozen cookies (depending on your size).  You can substitute the Smarties for chocolate chips if you like.

Ingredients:
1-1/2 cups Smarties
1 cup butter, softened
1-1/2 cups packed brown sugar
2 tsp vanilla extract
2 eggs
2-1/4 cups all-purpose flour
1/4  tsp salt
1/2 tsp baking powder

Directions:

1. Preheat oven to 375F.  Grease a large baking sheet, or line it with parchment paper.

2. In a large bowl beat butter and brown sugar with electric mixer until creamy.  Beat in vanilla and eggs.  Beat in flour, baking powder, and salt.

3. Drop by rounded tablespoons on to baking sheet, about 2-inches apart.  Flatten cookies slightly and press 4-5 Smarties into the top of each.

4. Bake for 10-12 minutes, or until edges are lightly golden brown but center is still soft.  Cool in pan for 5 minutes before removing them to a rack to cool completely.

5. Cookies can be stored in an airtight bag or container for up to one week.


Monday, May 22, 2017

Strawberry Shortcake

I thought my husband would want an ice cream cake for his birthday, but this year he surprised me when he told my little one he wanted a fresh cake with strawberries and cream.  At first I couldn't tell if he was serious, but I held him to his words and decided to make just that for his birthday cake.

I had never made a cake like that before, so I took to the internet.  After browsing several recipes, I settled on one by Martha Stewart.  I've always trusted her cupcake recipes (I have a cookbook of hers and every cupcake turns out amazing - no matter what!), and it seemed to have pretty good reviews.  So I crossed my fingers and hoped for the best.

The outcome was a dense cake with a lot of flavour and freshness to it.  Below is basically her recipe with some modifications based on the reviews and other things.  You can view the original recipe here.
This recipe is definitely a keeper that we will make again!

Ingredients:
1/2 cup unsalted butter, room temperature (plus more for the pans)
1-1/2 cups all-purpose flour (plus more for the pans)
2 tsp baking powder
1/2 tsp salt
1/2 cup sugar
2 large eggs, plus 2 large egg yolks
1/2 cup milk

for the filling
1 pound strawberries, hulled and thinly sliced (a few more never hurt either!)
1/2 cup sugar
1 tsp  unflavoured gelatin (from a 1/4-oz envelope)
1-1/2 cups heavy cream (or up to 473ml carton)
1 tsp vanilla

Directions:

1. Preheat oven to 350F.  Butter bottom of two (2) 8" round cake pans, and line with parchment paper.  Butter and flour paper and sides.  (Alternately you can bake it in 1 pan, double the cooking time and then slice it in half horizontally using a serrated knife.)

2.  In a medium bowl, whisk together flour, baking powder and salt; set aside.

3. Using an electric mixer on high speed, beat butter and 1/2 cup sugar in a large bowl until light and fluffy.  Add eggs and yolks, one at a time, beating well after each addition and scraping down the sides as necessary.  Beat in vanilla.

4. With mixer on low, alternately add flour mixture in 3 parts and milk in 2 parts, beginning and ending with flour mixture; mix just until combined.  Spread batter in prepared pans (the batter is quite thick).

5.  Bake until a toothpick inserted in center of cake comes out clean, about 15 minutes (or 30-35 minuets if you baked it in one pan).  [The cake will look very light in colour; it doesn't brown much.]  Cool in pan for 10 minutes; invert onto wire racks to cool completely. [At this point slice the cake if you used on pan.  Place the bottom half cut side up, and the top half will be placed cut side down.]

6. To make the filling/topping: In a large bowl, combine strawberries and 1/4 cup sugar; set aside.  Place 2 tbsp cold water in a small bowl and sprinkle with gelatin; let soften 5 minutes.  Microwave gelatin bowl in 10-15 second increments until the gelatin is dissolvevd, stirring as needed.  Let it cool.

7. Using an electric mixter, beat cream, vanilla and remaining 1/4 cup sugar in a large bowl until very soft peaks form.  Add a couple of teaspoons of whipping cream to gelatin mixture to temper it.  Then gradually add the gelatin mixture as you continue to beat the whipping cream until soft peaks form.

8.  Arrange half the strawberries over bottom cake layer; top with half of whipped cream, leaving a 1" border.  Cover with top half of cake (bottom side up).  Top with remaining whipped cream, leaving a 1" border.  Refrigerate cake and remaining strawberries separately, at least 1 hour (or up to 1 day).  Just before serving, spoon strawberries over cake.

Tuesday, February 7, 2017

Maple Glazed Trout

I often buy trout from Costco - it comes as two nice fillets that are pretty easy to prepare.  This recipe will glaze two of those fillets (about 1.5 kg).  It can easily be halved if you are planning on making one fillet and freezing the other for another use. (Original recipe: http://www.epicurious.com/recipes/member/views/steelhead-trout-baked-with-honey-or-maple-glaze-50175385)

This trout pairs nicely with some basmati rice and steamed green beans tossed in salt and olive oil.  You can also sub out the maple for honey with the same results!

Ingredients:
1/4 cup butter
4 cloves garlic, minced
2 tbsp maple syrup (or honey)
2 tbsp brown sugar
2 tbsp apple cider vinegar
2 tbsp dijon mustard
2 tbsp soy sauce
1/3 onion, thinly sliced

Directions:

1. Melt the butter in a glass bowl in the microwave.  Whisk in the remaining ingredients.

2. Place the fish in the centre of a piece of foil.  Pour the glaze over the fish and fold the packet around the fish.

3. Preheat the oven to 400F.  (The fish will marinate while the oven heats up.  This step is not necessary though; you can preheat the oven while you prepare the fish to save time.)

4. Bake for 10 minutes plus 10 minutes for each inch of thickness (ie: a one inch thick fillet would bake for 20 minutes.)  Alternatively, you can subtract 5 minutes from your total cooking time, open up the foil and broil for 5 minutes.


Tahini Cookies

I remember seeing a recipe for Tahini Cookies once.  The writer said that it was a great alternative to peanut butter cookies.  It looked easy enough and the reviews were good, so I went out to buy tahini.  Of course life got in the way and the tahini sat in my cupboard for awhile.

Today was a snow day so I decided to bake cookies with my eldest while the baby napped.  I thought about those tahini cookies, but couldn't remember if I had saved that recipe so I looked for a new one.  This one had a lot a great comments and very few ingredients - all great things when I didn't know how much time I'd have before the baby woke up. (Original recipe: http://sweetpotatosoul.com/2014/12/life-changing-tahini-cookies.html)

These cookies came together really easily - perfect for little hands!  And the batter itself is delicious to eat - and safe since there's no raw egg.  This recipe is nut-free, dairy-free and egg-free, and also vegan!

Ingredients:
1 cup tahini
1/4 cup maple syrup
1/4 cup  honey
2 tsp cinnamon
1.5 cups rolled oats
1.5 tsp vanilla
1 tsp salt

Directions:

1. Mix the tahini, maple syrup, honey, cinnamon, vanilla and salt until well combined.

2. Add rolled oats and stir to combine.

3. Scoop out some dough into your hands and roll into a ball.  Place onto a parchment lined baking sheet and flatten slightly.  Repeat with remaining batter.

4. Bake in a preheated 350Ff oven for 10 minutes.

5. Allow to cool for 10 minutes before serving.

Makes approximately 16 cookies.

Try adding chopped walnuts or chocolate chips for added flavour!

Monday, December 26, 2016

Crackers & Dip - a great appetizer for a holiday get-together!

Around the holidays, it is inevitable that I will make my spinach dip at least once.  Several years ago I made these cheesy crackers and they were hit.  They do take some time and as it happened, I hadn't made them since.  Feeling ambitious this year I decided to make them again and once again they were a huge hit.


Cheesy Spinach Dip

Ingredients:
2 250g cream cheese bricks, cubed
1/2 cup milk
1/4 cup Parmesan cheese
1/4 cup Asiago cheese
1/3 onion, finely chopped
1/2 tsp garlic powder
1 tsp paprika
1 tsp thyme
2 300g package chopped frozen spinach, thawed and drained
salt to taste

Directions:

1. Spray a medium-sized saucepan with cooking spray.  Combine cream cheese and milk over medium heat, stirring frequently to melt the cream cheese (adjust heat as necessary).

2. When the cream cheese is almost melted, add the onion, garlic powder, paprika and thyme; stir to combine. When the cream cheese is completely melted, add spinach, Parmesan and Asiago cheeses.  Stir to combine.  As the mixture starts to bubble, lower the heat.  Continue to heat through, about 20-30 minutes, stirring occasionally so it doesn't stick to the bottom.

3. At this point you can transfer it to a serving dish and serve it warm with various crackers.  If you are making it ahead, transfer it to an oven-proof dish (like corning ware) with a lid.  Let it cool before refrigerating until you need it.  To reheat, place in oven with lid at 350F for 20-30 minutes, or until heated through.  Stir and serve.
This yummy and cheesy spinach dip can easily be halved for smaller crowds!


Tex-Mex Cheese Crisps

Ingredients:
1-3/4 cups flour
1 tsp chilli powder
1 tsp garlic powder
1/2 tsp ground paprika
1/2 tsp salt
1 cup (chilled) butter, chopped
1 egg, lightly beaten
200 g cheddar cheese, grated (about 1.5 cups - but weight to be precise!)

Directions:

1. Preheat oven to 415F. Line two baking trays with parchment paper and spray with cooking spray.

2. Sift the flour, chilli powder, garlic powder, paprika and salt into a large bowl.  Rub the butter into the flour with your fingertips until the mixture resembles fine bread crumbs.

3. Add the egg and cheese and stir until the mixture comes together.  Turn onto a lightly floured surface and gather together into a ball.  Cover the dough with plastic wrap and refrigerate for 20 minutes.

3. Roll the dough on a lightly floured surface to 3 mm (1/8") thickness.  Cut into shapes with a 6 cm cookie cutter (for Christmas I used candy canes and Christmas trees!).

4. Place on the trays, allowing room for spreading.  Bake for 12 minutes, or until crisp and golden brown.  Leave on the trays for 2 minutes before transferring to a wire rack to cool.

Source: Ultimate Kitchen Companion

I call these crackers because they are crunchy, but they are also biscuit-like in that they are so flaky.  These were a huge hit again this year - people couldn't get enough (with and without the spinach dip!)