Saturday, December 26, 2015

Christmas Brunch

I love breakfast! Besides dessert it's my most favourite meal.  Christmas mornings tend to be a little rushed in our house, so an easy but filling breakfast is a must!  I was looking for a great overnight French toast recipe that I could just pop in the oven in the morning while we open gifts.  One of my best friends, who just happens to be an amazing cook, gave me this recipe.

It was my first time making it, but I didn't care so much as it was just for my family.  Then it turned out my little one's godparents were going to join us for breakfast, so I was a little nervous about serving a first time recipe.  But seeing as it was a recipe by Giada De Laurentiis, with some modifications from a very trusted friend, there was no way I could go wrong (I hoped!)

Overnight French Toast

Ingredients:
butter, for greasing
6 eggs
3 cups whole milk
3/4 cup maple syrup (plus extra for serving)
2 tsp ground cinnamon
1/4 tsp salt
1 lemon, zested
1 to 1-1/2 baguettes, cut into 1" cubes
3 apples, cored, peeled and chopped

Topping:
1 tbsp cinnamon
3 tbsp sugar

Directions:

1. Butter a 9x13" baking dish and set aside.

2. In a large bowl, beat the eggs until frothy.  Add the milk, maple syrup, cinnamon, salt and lemon zest.  Add the bread cubes and mix until coated.  Stir in the apple chunks.  Pour the mixture into the prepared baking dish.

3. Cover with saran wrap and refrigerate overnight.

4. Preheat oven to 350F.

5. In a small bowl, mix together the cinnamon and sugar for the topping.  Sprinkle the cinnamon sugar over the egg mixture in an even layer.

6. Bake for 45 - 55 minutes until the top is golden and the filling is set.

7. Spoon onto serving plates and drizzle with maple syrup (and more cinnamon sugar if you like!).


This recipe was a huge success!!  There was no leftovers and everyone went for seconds (and even thirds!).  With the whole rush of Christmas morning, I completely forgot to take a picture, but I will definitely be making this recipe again.

Photo of French Toast from Giada's recipe made with
blueberries and not left overnight.

Holiday Baking Part 2: Sugar Cookies & Shortbread

I love baking sugar cookies and it has only become more fun (and a little more stressful) since my little one likes to help me make them.  It's easy to roll out the dough and cut  out the shapes, but I have to learn to give up some control when I bake with my little one otherwise it becomes very stressful.

Shortbread is another great recipe and really easy to come together because you can just press the dough into the pan instead of letting it rest as you would with the sugar cookies.

Sugar Cookies:
I've played around with different sugar cookie recipes, and this was the one I turned to today: from my Williams Sonoma cookie cookbook.

Ingredients:
1-1/4 cups unsalted butter, at room temperature
3/4 cup granulated sugar
1 large egg yolk
2 tsp vanilla extract
2 cups all purpose flour
1/4 tsp salt

Directions:

1. Using an electric mixer on high speed, cream the butter until fluffy and pale.  Add the sugar, 1/4 cup at a time, beating on low speed for 2 minutes after each addition. Beat the egg yolk and vanilla into the butter mixture until well blended.

The cookies got a little darker than we liked,
but they still tasted good!
2. Sift the flour and salt onto a sheet of waxed paper.  Add the flour mixture to the butter mixture and mix on low speed or stir with a wooden spoon just until blended.

3. Scrape the dough onto a work surface and divide into 4 equal portions.  Shape into disks, wrap into plastic wrap, and refrigerate for at least 2 hours or up to overnight.

4. Preheat the oven to 350F.  Lightly grease 2 baking sheets or line with with parchment paper.

5. Remove the dough disks from the fridge and let stand at room temperature for about 15 minutes.  Working with 1 disk at a time, roll out between 2 sheets of waxed paper to a thickness of about 1/8-1/4".  Using cookie cutters, cut into shapes.  Repeat with remaining dough portions, then gather up the scraps and re-roll.  If the scraps of dough have become sticky, refrigerate for 10 minutes before re-rolling.

6. Transfer the cookies to the prepared pans.  Sprinkle with coloured sugar.  (If you are dusting with icing sugar or drizzling with chocolate, wait till the cookies are baked.  Sprinkle with sugar while still warm.)

Traditional Shortbread
7. Bake the cookies until they are lightly golden on the bottom, 10-12 minutes.  Let the cookies cool briefly on the pans on wire racks before transferring them to the racks to cool completely.

Shortbread:
Today I tried a new shortbread recipe, from Anna Olson's book Back to Baking.

Ingredients:
1 cup unsalted butter, room temperature
1/2 cup icing sugar, sifted
1/4 cup sugar
1 tsp vanilla extract
2-1/4 cups all-purpose flour
1/4 cup brown or white rice flour
1/4 tsp salt

Directions:

1.Preheat oven to 375F and grease an 8" square pan.

2. Beat the butter for 2 minutes to make it fluffy and light.  Add the icing sugar and sugar then beat again for 2 minutes, until fluffy, then beat in the vanilla.

3. Sift the flour, rice flour, and salt, then add to the wet ingredients, stirring until evenly blended.

4. Scrape the dough into the prepared pan and press it flat into the bottom of the pan.  Use a fork to dock the shortbread at 1" intervals.  You can also score the dough to make it easier to cut if you like.

5. Bake the shortbread for about 25 minutes, until the outside edges have browned a little.

6. Let it cool for 10 minutes, then cut into squares.  Allow the cookies to cool completely before lifting them out of the pan to store.  The shortbread will keep in an airtight container for up to 10 days.

You can also drizzle the shortbread with some melted semi-sweet chocolate for an extra flavour boost.

The finished product: cookies, shortbread and fudge
ready for our many holiday visits!

Friday, December 25, 2015

Holiday Baking Part 1: Fudge Four Ways

I've spent the last two days getting my holiday baking together and I'm exhausted.
For this post I am going to share 4 different fudge recipes: two that I've used for years and two new ones I'm trying this year.

I love making fudge because it really comes together pretty easily.  You just have to allow yourself time for it to set in the fridge or freezer.

Super Chocolate Fudge

This one is probably my favourite.  It has such a rich chocolate taste - perfect for the chocolate lover in your life.  I have substituted about half of the semisweet chips for milk chocolate and it still turns out great! For the nuts I have used walnuts, almonds or a mix of both, but I'm sure any nut would be a great addition - try your favourite.

Ingredients:
3 cups semisweet chocolate chips
1 can sweetened condensed milk
2 tsp vanilla
1/2 cup chopped nuts

Directions:

1. Melt chocolate with milk, stirring occasionally.  (For a quicker approach you can microwave for about 3 minutes or until it is melted.  Stir about every 30 seconds.)

2. Remove from heat; stir in vanilla and nuts.

3. Spread evenly in a parchment-paper lined 8" square pan.  Chill for 4 hours in the fridge or until firm.

4. Remove from pan and cut into small squares.

Makes about 64 1" squares.

Brown Sugar Fudge
The popular brown sugar fudge!

This is another great fudge, but a bit on the sweet side so cut them into small squares! This fudge turned out to be the most popular amongst my family.  It was gone so quickly!

Ingredients:
1 can condensed sweetened milk
2 cups well-packed brown sugar
1 cup (227 g) butter

Directions:

1. Place ingredients in a large microwave safe bowl and give it a quick stir.

2. Microwave on HIGH for 10 minutes, stirring every 2 minutes.  Let cool slightly.

3. Beat with electric mixer on low for 5 minutes.

4. Spread mixture into a parchment-paper lined 8" square pan.  Chill to set and cut into squares.

Makes about 64 1" squares.

Chocolate Peanut Butter Fudge

This is a new recipe I tried this year from the Bewitchin' Kitchen.  I really enjoyed this fudge.  The combo of peanut butter and chocolate is so yummy!

Ingredients:
2 cups peanut butter chips
1 cup semisweet chocolate chips
1 can condensed sweetened milk
1/2 cup Skor Toffee Bits

Directions:

1. In a microwave-safe bowl combine the peanut butter chips, chocolate chips and condensed milk.  Give it a quick stir.

2. Microwave for about 3 minutes until the chocolate has melted.  Stir the mixture every 30 seconds.

3. Pour the fudge into a 8" square pan lined with parchment paper.

4. Top with Skor bits and gently press down.

5. Freeze for a few hours until it has hardened.

I've decided to only share these three recipes as the fourth fudge recipe didn't seem to turn out so well for me.  It was a white chocolate & toffee fudge that just didn't seem to set properly.  It is currently sitting in my freezer because if I take it out it will probably thaw into a goo.  Some family suggested using it in a cookie recipe, which I might try.  Until then, I will stick with these three fudge recipes as my go to's!
LEFT: Super Chocolate Fudge
RIGHT: Chocolate Peanut Butter Fudge

Monday, September 28, 2015

Chicken Enchiladas & Apple Crisp

Many, many years ago I was at my friend's apartment and she made this recipe.  I absolutely loved and saved it.  I've made it several times over the years.  Every once in awhile I have a craving for it and tonight was one of those nights.  It's also a bonus that everyone in my house loves it!  There's always leftover for lunch the next day too.

Chicken Enchiladas

Ingredients:
1 medium onion, chopped
2-4 tbsp butter
4-6 chicken breasts, chopped
1 - 1-1/2 cups salsa
1 pkg (125g) cream cheese
2 cups grated cheese (I like a mixture of cheddar, mozzarella and asiago)
6 large flour tortillas

Directions:

1. Chop chicken into cubes and fry on stove in butter until it is no longer pink. Remove from pan and set aside in a bowl.
2. Cook and stir onion in butter over medium heat for 2-3 minus until softened.  Stir in cooked onion, about 2/3 cup salsa, and cream cheese.  Cook until thoroughly heated.
3. Stir in 1 cup grated cheese.
4. Spoon about 1/3 cup of the chicken mixture in the centre of each tortilla.  Roll and place seam side down in large (13x9") baking dish.  Top with remaining salsa and cheddar cheese.
5. Bake in preheated 350F oven for 15 minutes.
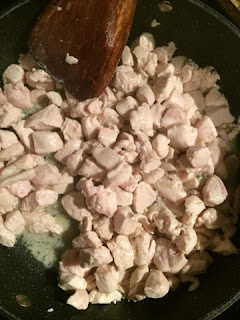
Cooking the chicken cubes.
Adding in the salsa and cream cheese.


Snapping a picture just before I chow down!


Saving some leftovers for lunch tomorrow.


And now onto dessert - my favourite part of any meal!

Apple Crisp

The great thing about this recipe, is that you can make a large batch and portion it out to freeze.  If you are expecting a large crowd, put this in a large dish and make one portion.  But if you want to have some on hand to give to family or friends or save for another day, then you can do that as well.

Today I made this into 3-8x8" serving dishes.  One went to our neighbour, the other is being frozen for a work function and the last one is the dessert tonight.  My apple crisp recipes have evolved over the years, but this time the crumble part is true to a Barefoot Contessa recipe.

Ingredients:
10 apples, peeled, cored and sliced (fairly thinly)
1/2 cup sugar
the juice of one lemon
2 tsp cinnamon
1 tsp nutmeg

For the topping:
1-1/2 cups all-purpose flour
3/4 cup sugar
3/4 light brown sugar, packed
1/2 tsp salt
1 cup rolled oats
1 cup cold unsalted butter, diced


Directions:

1. If you are making a large dish, grease a 9x14" dish.  If you are making smaller portions, grease 3 8x8" dishes.

2. Peel, core and cut the apples into slices.  Combine the apples, lemon juice, sugar and spices.  Pour into the dish.  (I actually like to divide the apples into the three dishes and then squeeze the lemon juice over top.  I then mix the rest of the ingredients and evenly sprinkle it over each dish and toss.)

3. For the topping: Combine the flour, sugars, salt, oatmeal, butter in the bowl of stand mixer with the paddle attachment.  Mix on low speed until the mixture is crumbly and the butter is small.  Scatter evenly over the apples.

4. If you are baking immediately, bake in a preheated 350F oven for 45 minutes, until the top is brown and the apples are bubbly.  Serve warm.  (Consider putting a sheet pan underneath for overflow if your dish is really full.)  If you are freezing, cover in foil and write the instructions on top.  Place in the freezer.  If you are baking one large dish, you will probably have to increase the baking time to 60 minutes.

5. Baking from frozen?  Thaw and bake uncovered at 350F for 45 minutes.


Prepping the apples in their foil dishes.

Check out the delicious crumble topping.


The apple crisp all bubbly and brown!

"It's so yummy mommy!"
And of course, we have to add Birthday Cake Oreo Ice Cream on top!

Monday, August 31, 2015

Visiting a Friend with Baby #2

We are off to visit my oldest friend who just had a new baby.  We are so excited to meet her newest member.  Although I can't relate to having two, I can only imagine how exhausting it is to entertain guests when you have two under two running around.  That is why I am bringing lunch and dessert for our visit.

Both recipes that I chose come together pretty easily, but they need time to sit so they have to be made well in advance.  For lunch I made macaroni and cheese (the overnight edition) and for desert this lovely tart that I've been dying to make forever.

Overnight Mac & Cheese

Ingredients: 
4 cups whole milk
2 cups uncooked elbow macaroni
1/8 cup butter, diced into small cubes
1 cup cheddar cheese, grated  (I like to mix the cheese that I use: this time I used medium orange cheddar and an aged white cheddar)
1/4 tsp salt

Directions:

1. Grease a 13x9" baking dish.  Spread half the pasta in the bottom of the dish.  Sprinkle with half of the cheese, dot with half of butter and sprinkle with half the salt.  Repeat the layers with the remaining pasta, remaining cheese, butter and salt.

2. Pour milk evenly over pasta, cover with aluminum foil and refrigerate for about 24 hours.

3. Bake, covered with foil at 350F for 45-60 minutes.  Remove the foil during the final 15 minutes to allow the top to brown and get crispy.  (Sometimes I sprinkle some Parmesan cheese over the top when I remove the foil.)


Caramel-Swirl Double Chocolate Tart
Almond crust, cooling

Ingredients:

Crust:
2-1/4 cups almonds
1/2 cup sugar
1/4 cup flour
1/3 cup butter, melted and cooled

Filling:
6 oz white chocolate, finely chopped
8 oz semisweet chocolate, finely chopped
1 cup 35% whipping cream, divided

Dark chocolate filling
Caramel Sauce:
1/3 cup brown sugar
1/2 cup 35% whipping cream
1/4 tsp vanilla
1/2 tbsp butter

Directions:

1. Preheat oven to 350F.

Crust:
2. In a food processor, process the almonds, sugar and flour until the nuts are finely ground.  Pour in butter; process (or mix) until thoroughly moistened.  Pat nut mixture into the bottom of a 10" pie plate.  Bake for 15-20 minutes or until the crust is lightly coloured.  Cool on rack.
White chocolate filling

Filling:
Caramel sauce simmering
3. Meanwhile place white chocolate in a bowl and dark chocolate in another bowl.  Bring cream to a boil in saucepan over medium heat.  Pour 1/3 cup of hot cream over white chocolate; pour remaining 2/3 cup hot cream over dark chocolate.  Whisk white chocolate mixture until smooth and the chocolate is melted.  Repeat with dark chocolate.  Let each cool for 10 minutes.  (At this point you can start making the caramel sauce in the same saucepan.)
4. Pour dark chocolate over cooled crust, spreading evenly.  Pour white chocolate over dark chocolate, tilting pan to evenly distribute.

Caramel Sauce:
5. In a saucepan combine all ingredients and bring to a boil over medium heat, stirring occasionally.  Reduce heat and simmer for 5 minutes, stirring occasionally.
6. Drizzle caramel sauce over white chocolate in decorative pattern.
7.  Refrigerate for at least 8 hours.  Store in the refrigerator.
Assembled product without
the caramel sauce.
Ready to be refrigerated for 8 hours.


Saturday, August 29, 2015

Classic Belgian Waffles #2 - Gluten Free & Dairy Free

Waffles - one of my most favourite "breakfasts that doubles as dessert" of all time.  You can top them with nutella and bananas, nutella and strawberries, whipped cream, maple syrup, icing sugar; the list is really endless.

I have a recipe that I've used for years to make them from scratch and they turn out delicious!  My husband promised my little one that I would make them this morning for her, only for me to realize that we were completely out of flour and pancake mix.  I didn't know what I could do until I remembered I had some gluten free flour left from my gluten-free stint a few months back.  I have adapted my recipe to be dairy free, so why not substitute the flour and make gluten free ones as well.

The result was a much thicker and fluffier waffle.  As I was making it I wasn't sure if it would turn out because the batter was so thick, but they really turned out so good.

You can find my original recipe here or read it again below.  At the end of the post I have provided my gluten free and dairy free substitutions.

Ingredients:
2 cups flour
2 tsp baking powder
1/2 tsp salt
4 large eggs, separated
2 tbsp sugar
1/2 tsp vanilla extract
1/4 cup unsalted butter, melted
2 cups milk

Directions:

1.  Preheat the waffle iron according to its instructions.
2. In a medium bowl, sift together flour, baking powder and salt.  Set aside.
3. In a second bowl use the wooden  to beat together the egg yolks and sugar until sugar is completely dissolved and eggs have turned a pale yellow.  Add vanilla extract, melted butter and milk to the eggs and whisk to combine.
4. Combine liquid mixture with flour mixture and whisk just until blended; do not over mix.
5.  In a third bowl, beat the egg whites with an electric mixer until soft peaks form, about 1-2 minutes.  Using a rubber spatula, gently fold the egg whites into the waffle batter.  Do not overmix!
6.  Coat iron with non-stick cooking spray and pour enough batter in iron to just cover the waffle grid.  (I have a Cuisinart iron with 4 squares.  I always put about 1/3-1/2 cup into each square.  This normally prevents it from oozing out the sides.)  Close and cook per its instructions, about 2-3 minutes.
7.  Top with your favourite ingredients and serve immediately.

Makes about 8-10 waffles.

Gluten Free Option: I substituted the flour for a gluten-free all-purpose flour.  I really like the PC Brand.

Dairy Free Option: Substitute 1/4 cup vegetable or coconut oil for the butter.  Substitute almond milk for the regular milk.  I love using the unsweetened vanilla almond milk.  When I'm short on almond milk, I often do 1 cup almond milk and 1 cup water - it still turns out delicious!


Gluten and Dairy Free Belgian Waffles

Wednesday, August 26, 2015

AABCD (Applesauce-Almond-Brown Sugar Cookie Drops)

The cooler temperature and drizzling rain made today a great day to bake with my little one.

We decided on cookies so I looked for an easy recipe that didn't require any chilling time.  The result is my "AABCD" (Applesauce, Almond Brown Sugar Cookie Drops).  Cheesy I know, but maybe it'll stick in your mind.....

This recipe makes about 2 dozen cookies and can easily be doubled.  The result is a really light cookie that really tastes delicious.

Ingredients:

1 cup packed brown sugar
1/2 cup butter, softened
1/2 cup applesauce
1 egg
1-3/4 cup all-purpose flour
1/2 tsp baking soda
1/4 tsp salt
1-1/2 tsp cinnamon
1 cup almonds, finely chopped (optional)

Directions:

1. Preheat oven to 400F.

2. Beat brown sugar, butter, applesauce and egg in the stand mixer on medium speed.

3. Meanwhile in a small bowl combine flour, baking soda, salt and cinnamon.  Add it to the wet ingredients and stir with a spatula.

4.  Add in the almonds (I ground them up in my food chopper) and stir again.

5. Drop dough by the tablespoonful about 2" apart on a parchment paper lined cookie sheet.  Bake 9-11 minutes or until almost no indentation is left when touched in the centre.  Cool for a couple of minutes then remove to a cookie sheet to continue cooling.

Wednesday, August 12, 2015

A Vegetarian Dinner

Tonight was a meat free dinner with some delicious vegetarian options: eggplant pizza and baked broccoli.  Both recipes required the use of the oven, so I started with the eggplant and while it was cooking I prepped the broccoli.  When the eggplant was ready to be taken out of the oven, I put the broccoli in and topped the eggplant slices.  I then turned the oven to broil on high and put the eggplant back in beside the broccoli for about 5 minutes.  When it was ready, I left the broccoli to cook again at 425 for whatever time was left.

Baked Broccoli
This makes a great side dish to any meal and it's really easy to put together.

Ingredients:
1 head of broccoli, washed and cut into pieces
2-4 tbsp olive oil
4 garlic cloves, minced
salt and pepper to season
1/4 cup bread crumbs
2 tbsp cheese (Parmesan or Asiago are my favourites), shredded or grated
1/3 cup grated Parmesan cheese
1 lemon, zest and juice

Directions:

1. Preheat the oven to 425F. Spray a 8x8" baking dish with cooking spray.

2. In a large bowl, combine the broccoli, olive oil, garlic, salt and pepper until the broccoli is coated.  Add the bread crumbs and 2 tbsp cheese; stir again.  Transfer to the baking dish.  Make sure you add all the crumbs in the bowl to the top of the broccoli.  (Easy clean-up option: Combine all the ingredients in a large ziploc bag and give it a shake to coat!)

3. Roast in the oven for 20-25 minutes until everything is browned.  Stir the broccoli about half way through cooking if you like.

4. Zest the lemon over the broccoli.  Cut the lemon in half and squeeze the lemon juice over the broccoli as well.  Sprinkle with the remaining Parmesan cheese.


Eggplant Pizza
I've been wanting to make this for a long time.  With the ingredients required to make it, you really can't go wrong!  And this portion of our vegetarian dinner is gluten free as well!

Ingredients:
1 large eggplant, sliced into 1" thick slices
1 jar/can (213mL) tomato sauce or pizza sauce
1/2 cup mozzarella, grated (this amount varies depending on how cheesy you like our pizza)
15-20 fresh cherry tomatoes, halved (enough so that there's 2-3 halves per slice)
4-5 fresh basil leaves, thinly sliced
1 tsp sea salt
Asiago or Parmesan cheese (optional)

Directions:
Sprinkle the eggplant slices with salt.
This will help dry them out as they cook.

1. Preheat oven to 425F.  Arrange the sliced eggplant in rows on a baking sheet (or two if you need it).  Sprinkle with salt and bake for 20 minutes.

2. Remove the eggplant from the oven and turn the broiler on.  Spread 1 tbsp sauce over each eggplant, followed by the mozzarella.  Arrange the basil and cherry tomatoes over the cheese.  Grate some Asiago cheese over each slice.

3. Broil for 3-5 minutes.  Keep a close eye to make sure it does not burn.  Serve hot.

Instead of mozzarella, you can use Provolone cheese.  If you buy it already sliced, it makes for an even quicker prep and less clean up.
The cooked eggplant topped and ready to be broiled!

The final product - so delicious!

Tuesday, August 11, 2015

Yummy Pancakes!

There's nothing worse than promising your daughter pancakes on a rushed morning to discover you are out of pancake mix.  That's what happened this morning, so I had to whip up an easy "from scratch" pancake recipe.  This recipe came together quickly and was really quite light and fluffy.  It just soaked up the maple syrup and was absolutely delicious!

For a dairy-free alternative, use unsweetened (vanilla) almond milk and oil (vegetable, canola or melted coconut) instead of milk and butter.

Ingredients:

1-1/2 cups all-purpose flour
3-1/2 tsp baking powder
1 tsp salt
1 tbsp white sugar
1-1/4 cups milk
1 egg
3 tbsp butter, melted
1 tsp vanilla


Directions:

1. In a large bowl, sift together the flour, baking powder, salt and sugar.  Make a well in the centre and pour in the milk, egg and butter; mix until smooth.

2. Heat a lightly oiled griddle or frying pan over medium-high heat.  Scoop the batter onto the griddle (approximately 1/4 cup each pancake).  Brown on both sides and serve while it's ot.

Feel free to add in your favourite mix-ins: chocolate chips, cinnamon, berries, etc.

Makes approximately 10-12 pancakes.

Sunday, August 2, 2015

Zucchini Bread

My grandparents have given me a lot of zucchini from their garden.  I've made the muffins, fried zucchini, the zucchini flowers so I had to make zucchini bread.

This makes two loaves which is plenty: one for you and one for a friend!

Ingredients:
3 eggs
2 cups sugar
2 cups vegetable oil
2 tsp vanilla
2 cups grated zucchini
3 cups flour
1 tsp baking soda
1 tsp salt
1/2 tsp baking powder
3 tsp cinnamon
nuts and/or raisins

Directions:

1. Peel the skin off the zucchini.  Using a grater or a food processor, grate zucchini into thin slivers.

2. Lightly beat the eggs; then add the sugar.    Add the remaining ingredients one at a time (the order doesn't really matter), saving the nuts and/or raisins until the end.  When everything is mixed well, add in the chopped nuts and/or raisins.  (I used about 1-2 handfuls of walnuts that I roughly chopped.)

3. Pour into two greased and floured bread pans.  Bake about 60-70 minutes in a 350F preheated oven.  Toothpick inserted will come out clean when it's ready.

4.  Cool slightly in pan then remove to cooling rack to cool completely.

To store it, wrap it in foil.  It can also be frozen.  This makes such a moist loaf and the walnuts add the perfect crunch.

Wednesday, July 29, 2015

Stuffed Zucchini Flowers (Fiori di Zucca)

I love zucchini flowers.  My Nonna used to make them when my Nonno picked them from the garden.  She would make a batter, dip them, fry them and sprinkle them with sugar.  When I recently asked her why she doesn't make them anymore her response was, "They don't turn out so good...."  So I asked her if they had any in the garden because I wanted to try making them. Nonno went out and came back with three large zucchini.  "She wants the flowers!!" Nonna shouts in Italian.  He's not sure if there is any, but he went out to look anyways.  And he came back with about a dozen.  I have seen a lot of recipes for stuffed zucchini flowers so that's what I wanted to try!

When preparing the flowers, make sure you take out the yellow stamen inside and cut off the stem (if necessary).  You don't need to wash them, but it doesn't hurt to wipe them with a damp paper towel if they look a little dirty.  Be gentle when you open them as you need them to stay in tact in order to be stuffed.  Some of the smaller ones or ones I couldn't stuff, I simply dipped in the same batter, fried them and sprinkled them with sugar like my Nonna does!

Ingredients:
12 zucchini blossoms, ready to be stuffed
1 cup ricotta cheese
1 large egg
1/3 cup Parmesan cheese, grated
1.5 tsp garlic powder (or 1-2 cloves minced garlic)
2 tsp basil, or about 4 fresh basil leaves finely chopped
1 tsp salt
2/3 cup & 1/8 cup all-purpose flour
1 cup cold water
1 tbsp lemon juice
oil for frying (vegetable, canola or coconut - I used a combo of vegetable and coconut)

1. Mix together the ricotta, Parmesan, egg, basil, garlic and salt.  Continue mixing until it has a smooth consistency.  Using a freezer bag, place the mixture into it and cut off the corner to make a piping bag.  Do this just before you are ready to stuff the flowers.

2. Add the lemon juice to the water and give it a quick stir.  In a separate bowl whisk together the flour and lemon water.

3.  Meanwhile heat the oil over medium heat.  You will need a large pan with a couple of inches of oil so the whole flower can fry.

4. Gently pipe about 1-2 tbsp (depending on the flower size) of the ricotta filling into the flowers.  The large flowers will swell up as they are filled.  Twist the top of the petals together to close and seal the flowers.

5.  Test the oil by dropping in some batter.  If it's hot enough it will sizzle and rise to the top.  Dip each flower into the batter one at a time.  Hold the flower by the top where you twisted the petals.  Make sure it is totally covered in batter and let the excess batter drip off.

6. Gently lower the flower into the hot oil.   Cook until the flowers are crispy, about 2-3 minutes.  If the whole flower isn't covered in the oil, turn it over part way through.  Fry the flowers in small batches depending on the size of your pan.

7.  Remove the flowers with a slotted spoon and place on a baking sheet with a paper towels.  Keep the stuffed flowers warm in a low oven while the others are being fried.  They taste best when they're fresh, but can easily be warmed up again in the oven at a later time.


Tuesday, July 28, 2015

Pink Lemonade Popsicles

My little one has been asking to make popsicles for such a long time, so tonight was the night.  Off to bed we would go afterwards and they'd be ready for a delicious snack the next day.  And with the temperatures they're calling for, we are going to need a frozen treat like this to cool off.

Please do not mind my photo of the popsicles.  I couldn't find my moulds for the life of me, so we had to improvise.  What you see is a result of placing the mixture in a parchment lined loaf pan, putting in a popsicle stick through when they were pretty solid and then cutting them into 8 pieces afterwards.

Ingredients:
1 tsp freshly grated lemon zest (I always use a bit more!)
1/2 cup freshly squeezed lemon juice (from about 4 lemons)
1/2 cup and 2 tbsp sugar
1-3/4 cup water
handful of frozen or fresh raspberries
pinch of salt

Directions:

1. In a blender or food processor, combine the lemon zest, juice and sugar.  Pour in water.  Add the raspberries and salt and blend until the mixture is smooth and pink.

2.  Pour into your popsicle moulds, dividing evenly among the moulds.  Cover and freeze until solid, at least 5 hours.    If you are using sticks, insert them into the moulds when they are partially frozen and will stand on their own, about 2 hours.  Continue to freeze them until solid.

If you're liking me and you can't find (or don't have) moulds, there are several workarounds.  As I mentioned above, you can line a loaf pan with parchment paper that overhangs on all sides and pour the mixture in.  The directions above didn't work too well for me as the mixture was still pretty liquidy 4 hours after it was placed in the freezer.  So what I did was at that time I placed the popsicle sticks in, went to bed and woke up in the morning.  Of course I couldn't pull out the block, so I cut it into 8-10 squares in the pan.  Then I was easily able to remove it from the pan and put them back in the freezer as individual pops.  If yours freezes up faster, then slice them individually  after 3-4 hours.

You can also use paper cups or individual glasses and follow the steps above for inserting the popsicle sticks.  When ready to eat, you may have to let them sit at room temperature for up to 5 minutes so they can be easily removed.

Alternate flavour: Instead of raspberries, add 2-3 strawberries (fresh or frozen) that have been hulled.

These had quite a tangy flavour, but they are really quite good and refreshing on such a hot day!

Saturday, July 25, 2015

Chocolate Zucchini Muffins


I had a lot of zucchini lying around and I was debating between making a bread or muffins.  Since muffins are a staple in my house, it was an easy decision.  And since everything has to have chocolate (my little one's request), we decided to bake chocolate zucchini muffins.  An early wake-up call meant going downstairs, dressing up in our matching aprons and having a fun morning.

Ingredients:

3 cups all-purpose flour
1-1/3 cup sugar
1 cup unsweetened cocoa powder
2 tsp baking soda
1/2 tsp salt
1 tsp cinnamon
2 eggs, lightly beaten
1 cup unsweetened applesauce
1/2 cup vegetable oil
2/3 cup milk
1 tsp vanilla extract
2 cups grated zucchini
1-1/3 cup semi-sweet chocolate chips

Directions:

1. Preheat oven to 350F.  Line muffin tins with liners or spray them.
2. In a large bowl, stir together flour, sugar, cocoa powder, baking soda, salt and cinnamon.  Set aside.
3. In a separate bowl, whisk together the eggs, applesauce, oil, milk and vanilla extract.  Pour the wet ingredients into the dry ingredients and mix until just combined.  Fold in the zucchini and chocolate chips.
4. Divide the batter amongst each cavity; each should be pretty full.  Bake for 25 minutes or until a toothpick inserted comes out clean.  Cool 5-10 minutes in pan and then move to a cooling rack until completely cool.

Makes 24 muffins.


These taste especially good while warm as the chips are still gooey, but they still taste delicious when cooled.  They have a nice texture and are really quite moist.  You can't even tell that there's zucchini in them.  We will definitely be making them again - and sharing with our friends!

Friday, July 3, 2015

Coconut Curry Chicken Stiry-Fry

There's nothing like planning to make a stir-fry and then realizing that your husband finished the soy sauce and didn't add it to the "need to buy" list!

I had already prepped everything and was really stumped.  So I took to my good friend Google and found some stir-fries that use coconut milk (which surprisingly I did have in my cupboard).  Working with ingredients I did have on hand, I was able to tweak a recipe and come up with this.  It turned out pretty good, but I wouldn't put it up there as one of my favourites.  Good thing is that it is gluten free (if you need that sort of thing).  I don't know much about paleo, but I think the stir-fry itself could be paleo, if you changed some of the veggies and didn't use the noodles I did.

Ingredients:
Coconut oil for frying (or some other cooking fat)
4-5 boneless, skinless chicken thighs, cut into stir-fry size
1 large onion, chopped
2 cloves garlic, finely chopped
4 handfuls of frozen, shelled edamame
1 carrot, thinly sliced
1 can (398mL) coconut milk
1-1/2 tsp curry powder
3/4 tsp ground ginger
salt to taste

Directions:

1. Prepare the sauce by whisking together the coconut milk, curry powder and grated ginger over medium heat.  Bring to a gentle simmer, stirring occasionally.  Lower the heat and continue to stir on occasion.

2. Stir-fry the chicken in a hot wok with about 1 tbsp coconut oil.  Cook until meat is no longer pink and cooked through.  Remove the chicken and set aside.

3. Reheat the wok and add the onion with some more coconut oil.  Cook the onion for a few minutes until it is translucent and tender.  Add the garlic, frozen edamame and carrot.  Stir-fry until the veggies are tender.  Return the chicken to the wok and add the sauce.  Cook until everything is hot once again.

At this point you can eat the curry on its own, or you can serve it over rice or noodles.  I chose to use bean thread noodles.  To prepare them, simply boil water.  Place 4 sets (50g each) in a bowl and cover with the boiling water.  Let them soak for 15 minutes to soften up.  Drain the water and toss them in with your curry.  Mix everything together to coat.

Serves 6.

Monday, June 29, 2015

Strawberry Blueberry muffins

I know my summer vacation has officially started when I spend my day cleaning, organizing and baking.

We went strawberry picking on the weekend at Strawberry Creek Farms. Much to our surprise (and slight disappointment) they did not have a good year and the basket of strawberries that we picked was free. Part of me thought I should go back and pick some more since it was free, but the other part of me realized that there really wasn't much to pick and it took quite awhile to fill the little basket we had.

Thanks to my husband we were able to enjoy some delicious strawberry-banana shakes and I had just enough left over to make muffins this morning. The recipes I've tried in the past never really made much of an impression. I needed something better for my little one who started in a new room at daycare today (and was not very happy about it). I wanted a delicious treat waiting for us when we got home. 

I took to my trusty friend Google and found a recipe by Ina Garten I knew would be amazing (as her recipes tend to be). I didn't have enough strawberries, so I added some blueberries. These muffins turned out so amazing. They had a nice crust on the top but were so moist in the center. My husband must have polished off 4 within the first 30 minutes. My little one could have had two or three as well. They are just that delicious. I'd say we finished off half the muffins just this afternoon. 

So here is the recipe (made with real Canadian fruit!)

Ingredients:
3 cups all-purpose flour
1 tbsp baking powder
1/2 tsp baking soda
1/2 tsp salt
1-1/2 tbsp cinnamon
1-1/4 cups milk
2 eggs, lightly beaten
1 cup butter, melted
1 tsp vanilla
2 cups diced fresh berries
(I used 1-1/2 cups strawberries and 1/2 cup frozen blueberries, rinsed)
1-1/2 cups sugar

Directions:

1. Preheat oven to 375F. Line muffin tins with paper liners.

2. Sift the flour, baking powder and soda, salt and cinnamon together in a large bowl. Stir with your hand to be sure the ingredients are well-combined.

3. In a large mixing glass (2 cup) combine the milk, eggs, vanilla and melted butter. Make a well in the middle of the dry mixture, pour the wet mixture into the well, and stir until just combined. There will be some lumps, but don't overmix the batter. Add the berries and sugar and stir gently to combine (fold them in gently).

4. Spoon the batter into the muffin tins with a tablespoon.  Fill the liners.  Bake for 20-25 minutes, until a toothpick inserted comes out clean and the tops are nicely browned.

Makes 24 delicious muffins.

Thursday, April 9, 2015

Double Chocolate Banana Muffins

I love baking banana bread or muffins. It's pretty fast and easy to come together, makes a great snack, and I almost always have a couple of bananas that I have left too long and don't care to eat anymore.

All these reasons gave way to my decision bake them for work. To be honest, I had almost forgotten I signed up for this week's snacks and was kind of scrambling (I also needed to do groceries but it was hubby's soccer night so I wasn't going anywhere!).
I pulled up my go to recipe to make sure I had everything (you can find it here: Banana muffins ) and got on my way. As it turned out, I didn't have enough yogurt but I did have a little bit of sour cream so I used both in place of the yogurt; I think it was a bit more than I normally use (of course I didn't measure!). I also was craving chocolate so I added 3-4 tbsp of cocoa (which I also didn't measure but went till it looked chocolate-y enough for me). 

The result: really moist and delicious banana muffins. They seemed more moist than I remembered (now this could be because they really were OR because I hadn't had a gluten muffin in so long that I truly forgot how amazing and moist baked goods can be!) and the cocoa was a great addition. They were a ht at work and with my hubby and child!

I literally just tweaked a couple of things from my original post (Banana Muffins), but here is the recipe in its entirety. 

Ingredients:

1/2 cup oil
1 cup sugar
1 egg
1 tsp vanilla
3/4 cup plain (Greek) yogurt
3/4 cup sour cream
1-1/2 cups flour
1/2 tsp salt
1 tsp baking soda
1 tsp baking powder
3-4 tbsp cocoa (Dutch, unprocessed)
3 bananas, mashed
1 cup chocolate chips (semi-sweet)

Directions:

1. Mix oil, sugar, egg, vanilla, yogurt and sour cream in a large bowl.  Set aside.

2. In a separate bowl whisk together flour, salt, baking powder and soda, and cocoa.  Add the dry ingredients to the wet ingredients and mix well. (At this point, if it doesn't look chocolate-y enough, add another tablespoon of cocoa.)

3.  Add the mashed bananas and fold in.  Add the chocolate chips.

4.  Place the batter in lined (or greased) muffin tins, about 3/4 full. Bake in a preheated 365F oven for 20 minutes.

Makes 24 muffins.


Saturday, April 4, 2015

Italian Easter Bread - Pane do Pasqua

I've always wanted to make a traditional Easter bread so this year I actually did it. I had a lot of fun decorating the eggs with my little one and we had a blast making the dough as well. While I didn't taste my own bread (still trying gluten free) it smelled amazing as I baked it and I got positive feedback at Easter lunch!

Ingredients:
1/2 cup unsalted butter, room temp. 
1/2 cup milk
2-1/2 tsp yeast
1/2 cup warm water
3 eggs, room temp. 
2/3 cup sugar
1 tsp vanilla
Zest of one lemon
4-1/2 - 5 cups all purpose flour
1 tsp ground anise seed
1 tsp salt
6 hard boiled eggs (optional, don't have to be hard boiled)

Directions:
1. In a small saucepan, heat the milk and butter just until the butter melts. Set aside to cool. 

2. Add 1 tbsp sugar to the warm water and stir to mix. Sprinkle the yeast over the top and set aside for 5 minutes. 

3. In a stand mixer, whisk together the eggs and sugar until combined. Add the butter/milk mixture, yeast mixture, vanilla, zest and anise. Mix together until all the wet ingredients are combined. 

4. Switch to the dough hook and add in 4-1/2 cups flour and salt; mix until a soft dough forms. Gradually add more flour to make a smooth and slightly sticky dough. 

5. Turn onto a lightly floured surface and knead for a few more minutes until very smooth. Shape into a ball. 

6. Grease the bowl with oil and return the dough, turning to cover in oil. Cover with plastic wrap and let rise for 1-1/2 hours until it has doubled in volume. 

7. Line a very large baking sheet (or 2 sheets) with parchment paper and lightly grease. 

8. When the dough is ready, punch it down on a lightly floured surface and divide into 4 equal pieces. 

9. Roll each piece into a rope about 22" long. Lay two ropes side by side and loosely braid them together. 

10.  Lift the braid onto the baking sheet and pinch the ends to seal into a circle. Place 3 eggs in each circle lengthwise, tucking them between the ropes. (I used hardboiled eggs, but you can put them in uncooked and they will cook as the bread does.)

11. Repeat this process with the other two braids. 

12. Cover with plastic wrap and let rise for another 45 minutes until doubled. 

13. Brush the tops with egg wash (and sprinkle with sprinkles if you desire). Bake them for 30 minutes in a 350F oven until golden and cooked through. (The bread should sound hollow when tapped.)

14. Let cool then slice and serve. 


This picture is deceiving.  These are not small individual buns, but two large breads.

Sunday, March 22, 2015

Gluten Free Apple Cake

Having a sweet tooth and a bag of apples normally meant lots of baking: apple crumble, apple pie, apple crumble pie, and so on.    Now this baking doesn't come so easily if I want to enjoy it.  I went on the search for a gluten free apple cake, thinking this would probably be easier than trying to make a gluten-free crust for a pie.  Most of the recipes I found called for xantham gum, which I didn't have in my kitchen (and probably won't ever have because of its cost and "synthetic" nature).

I found a recipe that I was able to tweak, and the end result was really quite good - and baked much faster than the recipe called for.  While I didn't try it, I believe this could easily be made dairy free as well if you substituted almond milk (or your go to milk) in place of the milk and your own butter substitute (or coconut oil).

The cake is really moist and tasted delicious warm.  It was a little crumbly - I'm not sure if that is because of the ingredients or the fact that we ate it warm. It doesn't rise very much, so next time I might consider baking it in a square pan and longer if necessary.  I may also add in some more apples to increase the flavour.  Overall though, it has a nice taste and definitely satisfied my cake craving.  I wouldn't guess it was gluten-free if I hadn't baked it myself.


Ingredients:
3/4 cup rice flour
1/2 cup potato starch
1/4 cup tapioca flour
1 tsp baking soda
1.5 tsp baking powder
1 tsp cinnamon
1/2 tsp nutmeg
3/4 tsp chia seeds (or flax seeds or half of each)
1.5 tsp boiling water
1/2 cup butter, softened
3/4 cup white sugar
3 tbsp brown sugar
2 eggs
3 tbsp milk
2 tsp vanilla
1.5 cups apples, peeled, cored and shredded (I used 3 small empire apples)

Directions:

1. Preheat oven to 350F.  Grease a 9" round springform pan with butter or coconut oil and dust with rice flour.

2. In a medium bowl, whisk together the rice flour, potato starch, tapioca flour, baking soda, baking powder, cinnamon and nutmeg; set aside.

3. In a small bowl combine chia seeds and boiling water to create a gel; set aside.

4. Cream the butter with your mixer until it is softened and pale yellow. (I used about 1 tbsp less butter and added that amount in coconut oil.)  Add both the white and brown sugar and beat until well combined.

5. Add the eggs, one at a time, beating well after each one.  Blend in the milk (I used regular milk, but you could use almond or any substitute), vanilla and the chia seed gel, beating well after each one.

6. On low speed, add the dry ingredients in two batches, beating well after each addition until it is well absorbed.

7.  Gently fold in the shredded apples.

8. Spoon the batter into the prepared pan and bake 30-35 minutes (the original recipe called for 40-45 mins but my cake was already browning in 30) or until the cake pulls away from the edge of the pan and a toothpick inserted comes out clean.

9.  Serve warm or cooled.  If serving warm, cool in the pan at least 10 minutes before removing.

10.  Dust lightly with icing sugar if you like.


Monday, March 9, 2015

Pork Chops & Mashed Potatoes with Mushroom Gravy

This recipe can be made as follows, or turned into a gluten free recipe by substituting the flour for your regular flour substitute (or cornstarch to thicken the gravy).

Ingredients:
5 boneless pork chops (I used the centre cut that are quite thick)
salt and pepper 
2 tbsp all-purpose flour (or your gluten free substitute)
2 tbsp olive oil and coconut oil (I used half and half)
butter
2.5 portobello mushroom caps, chopped
1-2 onions, chopped (I used 1 large, 1 small)
2 (large) cloves garlic, thinly sliced
1/4 cup red wine
1-2 cups chicken broth
2 tbsp sour cream

Directions:

Sautéing the onions
1. Season pork chops with salt and pepper and coat all sides with flour.  Heat oil in a large non-stick skillet over medium-high heat.  Add the chops (working in batches if you need to) and cook until golden, about 3-4  minutes per side.  Transfer to a plate and keep warm.

2. Add some butter and add the onions.  Sauté for a couple of minutes and add the garlic; sauté another minute. Season with salt and add some more butter and mushrooms, stirring occasionally, for about 5 minutes.  

Returning the pork chops to the
pan with the onions and mushrooms.
3.  Turn up the heat and add the red wine, scraping up the brown bits at the bottom.  Stir constantly until it starts to thicken.  Add 1 tbsp flour (or a gluten free substitute like cornstarch) and cook, stirring for another 3 minutes.  

4. Return the pork chops to the pan, placing them on top of the onion-mushroom mixture.  Pour enough chicken broth to just barely reach the top of the pork chops.  Bring to a simmer, then lower the heat and cover.  Cook for another 20-25 minutes.

5.  Remove pork and add 2 tbsp of flour (or substitute) and stir for a minute to thicken sauce.  Make sure the flour does not clump up.  Add the sour cream and stir to thicken the sauce.  Place the pork chops back in the pot, covering with the sauce and to heat through (if necessary).

6.  Serve with mashed potatoes, covering both in the mushroom gravy.

Quick shot of the chops and mashed
potatoes covered in gravy.
The final product - in all it's gravy!


Mashed Potatoes

Pair your favourite mashed potatoes with the dish for the perfect combo.

I boil my potatoes over medium heat for at least an hour until they are soft.  I drain off the water and return the potatoes to the pot.  I mash them with my masher, periodically adding butter and milk to smooth out the potatoes to the consistency I like (not clumpy, quite smooth).  I also season with a generous amount of salt and pepper.  If I have it on hand, I add 1 tbsp cream cheese and 1 tbsp sour cream towards the end and stir in for that extra creaminess.


Friday, March 6, 2015

Spinach & Artichoke Spaghetti Squash

We take turns at work bringing in munchies on Fridays.  This week was my turn and I wanted something that was meatless (as it would be a Friday in Lent) and gluten free, as well as easy to make as my Thursday night was turning out to be quite busy.

I found the perfect recipe that had all things I love in it, and it tasted so good that everyone was interested in the recipe - there were no leftovers!

Ingredients:
1 spaghetti squash, seeded (about 2 lbs)
3 tsp olive oil
1 onion, chopped
salt and pepper
3 cloves garlic, minced
1/2 cup (light) sour cream
1/2 pkg (250g) cream cheese
1 cup grated Parmesan cheese, divided
3 cups packed baby spinach (about 3 large handfuls)
1 can artichoke hearts, drained and chopped
3/4 - 1 cup marble cheese, grated

Directions:

1. Place the spaghetti squash in a microwave safe dish, cut side up.  Fill up the dish halfway with water, cover with plastic wrap and microwave about 10 minutes, until soft.  Remove and cool slightly.  (Alternately, you can roast the squash in a 350F oven cut side down for about 40 minutes.  Brush the cut sides with olive oil or butter before roasting).

2. Meanwhile, heat olive oil over medium heat in a pan.  Add the onion and cook until tender, about 5-8 minutes.  Season with salt and pepper, then add the garlic and cook until fragrant, about another minute.  Add in sour cream, cream cheese and 1/2 cup Parmesan.  Stir until the cream cheese has melted and the mixture is smooth. Stir in the spinach and artichoke hearts and cook until the spinach has wilted.

3. Scrape up the strings of the squash with a fork and add it to the pan.  Stir together to combine.

4. Pour into a rectangular dish.  Top with the grated cheese and remaining Parmesan cheese.  

5. Place under the broiler for 2-3 minutes, or until the cheese is melted and bubbly.


I let it cool slightly and covered my dish, brought it to work the next day and people microwaved it as they needed.  It turned out so yummy!  And it was really quite filling.

The final product just before broiling the cheese.

Tuesday, February 24, 2015

Tomato & Beef Polenta Casserole

My husband went and bought ground beef in bulk, so I went on the search for a new recipe to use some of it. I came across a southern style recipe that used cornmeal to create a polenta crust - gluten free!  I was very excited to make it and it turned out really well! And it tastes even better warmed up the next day for lunch!

Ingredients:
1 tsp salt
1 cup plain yellow cornmeal
1 tsp Montreal steak spice
2 cups cheddar cheese, grated
1 lb ground beef
1 cup chopped onion
1-1/2 portobello mushroom caps, chopped  **these veggies are optional and can be changed up 
1 medium zucchini, sliced                                 with whatever you have in the fridge.**
1 red pepper, chopped
1 tbsp olive oil
1 can (28 oz) diced tomatoes, strained
1 can (6 oz) tomato paste

Directions:

1. Preheat oven to 350F.  Bring 3 cups water and 1 tsp salt to a boil in a (2 qt) saucepan over medium-high heat.  Whisk in cornmeal; reduce heat to low, and simmer, whisking constantly, 5 minutes or until thickened.  Remove from heat, and stir in steak seasoning and 1/2 cup cheddar cheese.  Spread the cornmeal mixture into a lightly greased large baking dish.

2. Brown ground beef in a large non-stick skillet over medium-high heat, stirring often, 10 minutes or until meat crumbles and is no longer pink; drain and transfer to a bowl.

3. Sauté onion for a few minutes in hot oil over medium heat until softened.  Add the other vegetables and sauté for another 5 minutes.  Stir in beef, tomatoes and tomato paste; simmer, stirring often for about 10 minutes.  Pour beef mixture over cornmeal crust.  Cover with remaining cheese.

4. Bake at 350F for 30 minutes or until bubbly.


Polenta crust
Sautéed beef with veggies 

The final product